Forum Replies Created
-
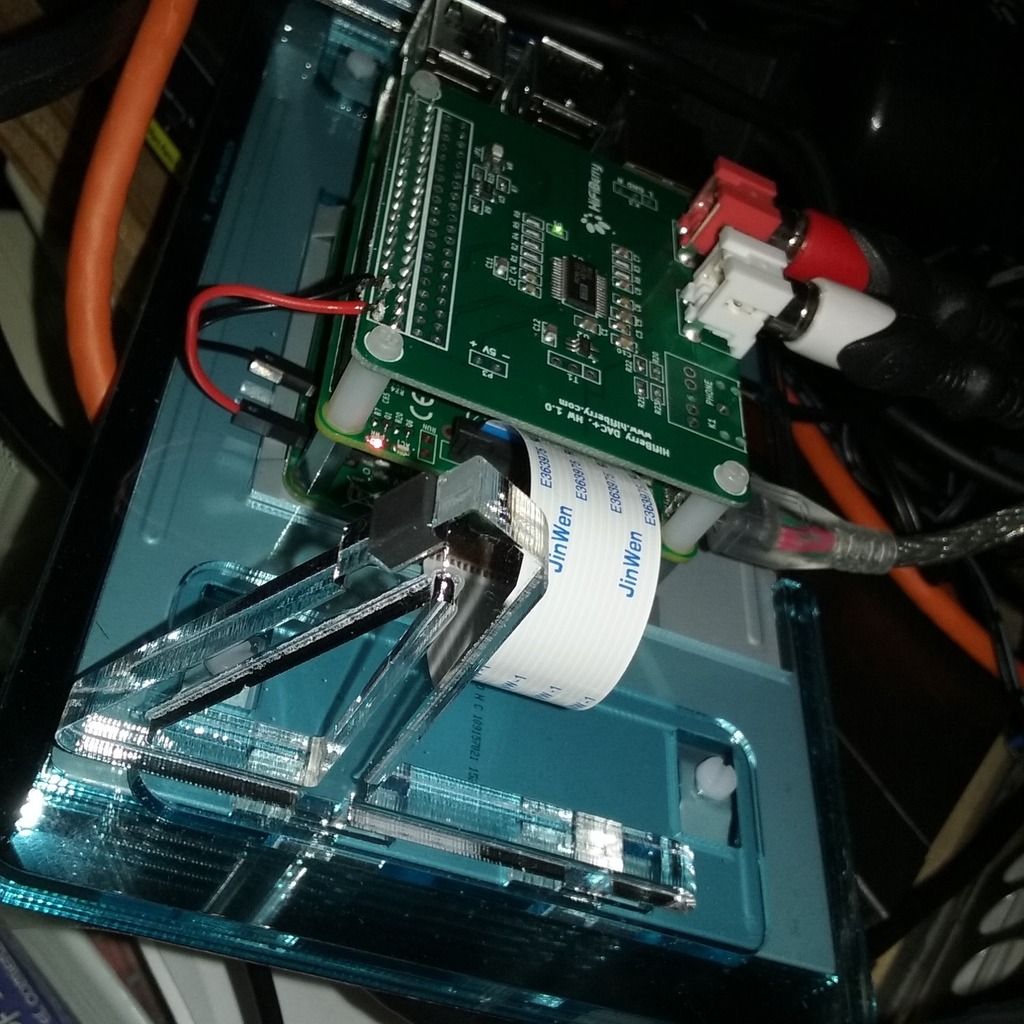
8. Oktober 2015 at 19:46 #16238
Got this photo of it.
Still trying to see if can get it to be like a squeezebox touch. Still have not found out with the WiFiBerry on it too.
8. Oktober 2015 at 19:01 #16233Installed the AudioPlayer. But looks like can only pick the music I copied to it’s SD card.
Have to see if can pick it from my server running Logitech Media Server.
Can go to that server and pick the Max2play. I named it Max2play-berry but looks like it only sees the songs I copied to it’s SD card.
Still seeing what I can do with it. But I do like this HiFiBerry card. For sure it sounds better.
8. Oktober 2015 at 18:22 #16230Are you using WiFi? Try Ethernet and see if that helps. I have no problems and just use Ethernet.
1. Oktober 2015 at 11:54 #15911Got a USB Flash drive on mine. I log in and did this:
mkdir /media/64G_USB_Flash
apt-get install exfat-fuse exfat-utils
mount /dev/sda1 /media/64G_USB_Flash/Added this to /ect/samba/samba.conf can add it by typing:
nano /etc/samba/smb.conf
[64G_USB_Flash]
comment = 64G_USB_Flash
read only = no
path = /media/64G_USB_Flash
guest ok = yes
public = yes
writable = yes
available = yes
create mask = 0664
force directory mode = 2775At the end of it.
I all so under the ####### Authentication ####### I change the security = to share so like this:
security = share
Then don’t need a password to go to it’s folder and save files to it.
All so added my workgroup = rday Use what ever workgroup name on your LAN you have. I just do my 1ST initial and last name.
Can save it by CTRL O and quit out of the edit with CTRL X. It shows it at the bottom the ^ means Press CTRL.
Then restarted samba with:
/etc/init.d/samba restart
Then can easy save it by going to the Max2Play „FILESYSTEM MOUNT“ It will show up there.
Mine looks like this:
UUID=4E4F-2C00 then /media/64G_USB_Flash then exfat then defaults
Said save it and now on reboots it mounts it.
Sort of hard to know that info just to put it in the web page of it.
blkid
will show it’s UUID and Type. So can type it in the web page of Max2play. I guess after you make a folder can then use the webpage to mount it. I don’t think you can do it all from the Max2play web page.
Can’t type all the same as I used. Use your own. Common sense. Like were I mounted mine and the UUID will not be the same.
-
This reply was modified 9 years, 9 months ago by
Raymond Day.
-
This reply was modified 9 years, 9 months ago by
-
This reply was modified 9 years, 9 months ago by
-
This reply was modified 9 years, 9 months ago by
1. Oktober 2015 at 11:28 #15910I was testing this out with other USB cable’s till I got it right. Power it down and up a lot.
I had the GPIO pins plug in wrong! So plug them in right and then did not need the USB out to in. That one don’t have good amps any way to power the Raspberry Pi because the same USB cable can power it right.
Used a Y cable to a 2.1 and I guess 1 amp USB and that still did not power it on right. It should be 3.1 amp then.
Using my power brick that I solder on a USB female end on it. It has 5 volts at 5 amps. It works good. Just have one USB cable going to my Raspberry Pi now.
Order a $10 USB at 2.5 amps. The best I could find on line. Have to wait to get it.
What power supply are others using that works with a Raspberry Pi and 7″ touch screen?
1. Oktober 2015 at 10:25 #15909Yes to run it you have to do this:
chmod 777 install_max2play.sh
./install_max2play.shIn the install it say run it like this:
./install_max2play.sh 2>&1 | tee install_max2play.log
You get a install_max2play.log file then.
The script has a error it don’t show the „./“ before the command you have to do what you did back up a folder and run it or use this ./ command. If you back up a folder it will do a little error at the end saying it can’t find the install_max2play.sh to delete it.
All so a better way to install it just do a wget like this:
wget https://raw.githubusercontent.com/max2play/webinterface/master/install_max2play.sh
29. September 2015 at 16:59 #15884The big thing missing is when you turn it off can’t tell it to use a clock. I hope they update this soon.
All so I just seen when it’s off and goes to sleep mode pressing the touch screen just a arrow pointer will show up and it will not come out of sleep have to go to it’s web page to start it.
28. September 2015 at 17:33 #15874Just did that using the 2 ports on the USB to put power to each the Pi and the 7″ touch screen. This time it don’t have the color cube in the top right.
Just shows that the board that comes with this 7″ touch screen the use power out on the side can not power up the Pi good.
Thank you. I did not think this was the problem. It’s fixed now. 🙂
28. September 2015 at 17:24 #15873Thanks. I just put the best USB cable and best 5 volt power I have on it. A 5 volt brick I solder a female USB end on it. It’s 5 volts at 5 amps.
The 4 color cube in the top right can go off some and then on still.
I guess because I have the power going in the LCD board then out from there to the Pi. I got to test 2 power to each I guess and see if that fixes it. I guess the LCD board can’t do out the right power from it’s USB out to the Pi.
28. September 2015 at 13:48 #15851One thing I see there is all way a 4 color square in the top right corner. Even when it’s off. I guess it could burn in the LCD 7″ touch screen with time. Any way to fix this?
All else seems to be working real good with it now.
27. September 2015 at 11:33 #15848I got that before all so with the head phone out. Just pick the other default audio out. They look about the same. Then restart the player and it will start.
27. September 2015 at 11:31 #15847Just found out why the touch did not work. I was using a 2.1 amp USB power to power them both. It has 2 ports a 2.1 and a 1 amp USB Used a USB Y cable so it gets them from both so 3.1 amp and that works. Now I can use the touch screen.
All seems to work good.
Be nice if could set a clock up when it’s not playing music.
26. September 2015 at 11:18 #15844I got that 7 inch official Raspberry Pi touch display.
Could not get a image to boot up on it to the login. Could not even get a desktop on it.
When I got up today I installed Max2Play fresh. Expand the file system rebooted and put my e-mail in and installed the:
Raspberry Pi Touch Display: Easy Install & Setup of three different Touch Displays (2.4”, 2.8″ and 7″) – including the official Raspberry Pi Touchdisplay
Then I could pick the 7″ and install it. It did not show up before. Then rebooted and the text came up on the 7″ so it worked. This time got to the login too 🙂
Then installed the JiveLite and that takes a little time. Looks like it makes it. Rebooted and started it.
It works on the 7″ touch screen. It ask for language and then the skin and it had 640 x 480 but the last was Juggler Skin. I picked that on the display.
But picked it out with a USB mouse. The touch is not working. Not sure if I plug the ribbon cable in right or if it’s a setting.
But seems like it’s working good just have to fix the touch yet.
Still in the „Install further jivelite Skins (important for small touchscreens)“ I can only pick the „Port for 2.8″ 320×240 Adafruit LCD…“ now. But I don’t need to pick it any more. But something it don’t show up any more there. It did and it was the only one 7″ when I installed from the start.
-
This reply was modified 9 years, 9 months ago by
-
This reply was modified 9 years, 9 months ago by
25. September 2015 at 14:32 #15824Seen in the /boot/config.txt this one line for the display I have.
# --- added by adafruit-pitft-helper Wed Sep  9 21:44:12 UTC 2015 ---
[pi1]
device_tree=bcm2708-rpi-b-plus.dtb
Put my other SD card in were I was trying to set up Max2Play with this display and never got it working.
Put that line in the /boot/config.txt file and rebooted. At lest this time the display did not stay wight it turn black but nothing on it.
So I looked up that line and came to adafruit web page.
Just had to type in 4 commands they showed like this:
curl -SLs https://apt.adafruit.com/add-pin | sudo bash
apt-get install raspberrypi-bootloader
apt-get install adafruit-pitft-helper
adafruit-pitft-helper -t 28r
Rebooted and now it works with this adafruit PiTFT 320×240 2.8″ Resistive touch screen. http://adafru.it/2298 that’s the display I have. I thought it was the same they 2.8 one they had here. But I was wrong.
-
This reply was modified 9 years, 9 months ago by
24. September 2015 at 13:05 #15803I got a 2.8″ display that did not work with Max2Play. So I installed the OS that works with it. Then looked on the web if there is some how to install Max2Play on a OS all ready loaded. I found a neat script. It worked.
Just setting from there but don’t install the „Raspberry Pi Touch Display: Easy Install & Setup of Touch Displays 2,8″ and 3.2″“ because that made 2.8 touch screen not display again. I had to start over.
Guess the same would work for your 7″ touch display. Just install the OS that works with it then the this script. I will past it in here. It’s named „install_max2play.sh“ chmod it with I guess 555 should make it run.
Guess I can’t save it with that script in here.
Will look for the link again…..
Looked for „script max2play“ found it fast here:
https://github.com/max2play/webinterface/blob/master/install_max2play.sh
24. September 2015 at 12:49 #15800Not sure but it could be that the CPU is to slow to handle it.
Odroid has a faster CPU. If that’s what is wrong.
-
This reply was modified 9 years, 9 months ago by
23. September 2015 at 15:59 #15795This just must be something missing from it and have to do a update I guess.
Because I tested it with the Squeezebox Radio and all the moves you do, do a little sound. You go to settings and screen saver and pick when stopped and can pick time and date how it shows. But on the Max2Play all it shows is Now playing, Image viewer, Blank screen, or none. But on the Squeezebox Radio it has a lot more. This is what it don’t have:
Analog clock
Digital clock
Digital clock (black)
Digital clock (Transparent)
Dot Matrix clockNot sure I guess Max2Play has to add that code yet?
23. September 2015 at 13:32 #15789I guess I got a 2.8 PiTFT 320×240 touch screen that would not work with Max2Play. http://adafru.it/2298 Found a image to put on a SD card at there web page and installed it and that’s the first I seen the screen work.
So then just wanted to know if could install Max2Play on about any Ubuntu load. Using Google I found a script and installed it and with a lot of other things got it working good.
Posted about it as I did it a 2ND time in this forum. So I guess you could do the same. Install the OS that works with your 5″ USB touchscreen and run that script and do some settings.
The post link is here:
https://www.max2play.com/forums/topic/cant-get-the-2-8-touchscreen-to-work/
That my help you do it for your screen.
23. September 2015 at 11:40 #15788Not sure if can turn it off because on my Squeezebox Radio it stays on with the time and date showing.
So is there a way to get the time and Date to show on the Max2Play screen when it’s off?
23. September 2015 at 9:55 #15782One other thing can’t start Squeezelite have to „Edit Advanced Options“ It’s on:
„default – bcm2835 ALSA, bcm2835 ALSA – Default Audio Device, CARD=ALSA“
Change it to:
„Sysdefault – bcm2835 ALSA, bcm2835 ALSA – Default Audio Device, CARD=ALSA“
Not sure why they look the same. But now Squeezelite will start when you pick the „Sysdefault“
Can get full screen too! Under the „jivelite“ tab click the box to „Autohide Panel (taskbar) and set Jivelite to Fullscreen:“ stop and start Jivelite and now have full screen!
-
This reply was modified 9 years, 9 months ago by
23. September 2015 at 9:17 #15778Downloaded the image from here. https://learn.adafruit.com/adafruit-pitft-28-inch-resistive-touchscreen-display-raspberry-pi/easy-install
There is a big green icon that says „Download PiTFT 2.4″ and 2.8″ Resistive Image for Pi 1 and Pi 2 (September 9, 2015)“
Unzip it and I used Rufus to put it on a SD card.
Then go to get a „install_max2play.sh“ script I clicked Raw and copy and paste it. So log in with putty with user pi and password raspberry and type „nano“ and enter and paste it in there. It takes a little time but the hole text will show up. I chmod it 777 so „chmod 777 install_max2play.sh“ then backup a folder with „..“ and typed /root/install_max2play.sh
Go to http://max2play and it will have a update. I expanded the file system 1ST.
Reboot and update Max2play from 1.0 to 2.21 as of today.
Reboot it.
Put in your e-mail and location. Then go the the plug in and install Jivelite. That takes a little time. Set it to Autostart and save. Got to start it too the 1st time.
Then it can see it on the little screen. It lets you pick a size but all are in HD. I have not found a 320×240 yet for it. I guess there is some way to set that.
Don’t download the „Raspberry Pi Touch Display: Easy Install & Setup of Touch Displays 2,8″ and 3.2″ I did and it will make the screen just be wight with no image again.
Then in the Jivelite tab click „Install Choosen Skin“ there is only one the „Port for 2.8″ 320×240 Adafruit LCD (QVGATouchSkin by bogdandumitru)“
Then on the screen can see it. The top of the desktop is still there. But it works. I guess that’s the best can do with this PiTFT Touch screen.
-
This reply was modified 9 years, 9 months ago by
-
This reply was modified 9 years, 9 months ago by
-
This reply was modified 9 years, 9 months ago by
23. September 2015 at 1:01 #15777The Touchscreen I have is at this link.
Can it work with Max2play? If so how?
23. September 2015 at 0:48 #15776I got it to work by downloading 2015-05-05-raspbian-wheezy-pitft28r.img put it on a SD card and it booted and showed the text on the small 2.8 Touchscreen.
But just can’t get it to work with Max2Play.
Is there any thing that says how or a step-by-step say?
22. September 2015 at 21:55 #15775Just been working on this a lot. I guess the 2.8″ Touchscreen is bad. Nothing I do gets it to display.
Just order the kit from here. So should be all set. Love to have like a squeezebox touch that cost a lot more then this and looks like they don’t make them any more.
21. September 2015 at 16:22 #15758Tested sync for both players to play my Squeezebox Radio and the max2play-XU4. As soon as I clicked „Synchronize“ it stop playing but the play list is on both now playing. They just both stopped.
Got a Intel Compute Stick as a server running the Logitech Media Server. The 32GB one installed Ubuntu on it. Any way it did not „Synchronization“ when I click to do that.
Don’t have the “Multisqueeze” on it. I will see if I can install it and test again.
Just looked it says this:
„Multisqueeze – run multiple Squeezelite Player simultanous on one device (Raspberry / Odroid). Needs an audiodevice for each player.“ I don’t need it to run 2 on one system. So did not install it.
I see to run it both on the HDMI sound and the USB sound. I have no did that. But I guess that would be the way. Thank you.
My try it later some time. I put my Odroid-XU4 out of the way now and take some time and work to move it to play it in the HDMI again.
-
This reply was modified 9 years, 10 months ago by
-
This reply was modified 9 years, 10 months ago by
-
This reply was modified 9 years, 10 months ago by
21. September 2015 at 3:53 #15746If you have eMMC and a SD card and try to re-size the file system it will not work. You have to unplug one of them.
I thought the switch on the side would say what one I wanted to use. But have to unplug one and then can re-size the file system then.
I got the Odroid-XU4 and it works real good on mine. No problems. I am very impressed with this max2play.
-
This reply was modified 9 years, 10 months ago by
18. September 2015 at 23:59 #15741Wow I got it working!
In the tab „AUDIPLAYER“ under the „Status: Squeezelite is running with processID ####“ Can press „Edit Advanced Options“ and I picked from the long list „hw – Generic USB Audio Device, USB Audio – Direct hardware device without any conversions, CARD=Device,DEV=0“
I guess no way to have it go out both the HDMI and this?
But this is the nice way I can turn off the screen and still have it hear it now.
-
This reply was modified 9 years, 10 months ago by
18. September 2015 at 22:00 #15737sudo su –
su rootUse them 2 commands to get a root log in with a password you set up.
This will replace the root max2play log in.
-
This reply was modified 9 years, 10 months ago by
-
This reply was modified 9 years, 9 months ago by
-


