Now that the setup of the living room is ready, we are dedicating our attention to equipping the kitchen with a Raspberry Pi and an amplifier sound card. In this article, you will learn how to build such a Max2Play bundle and connect it to your audio devices. I’ll also show you how to set up our Squeezebox Server and use network storage and Bluetooth devices as media sources.
Kitchen
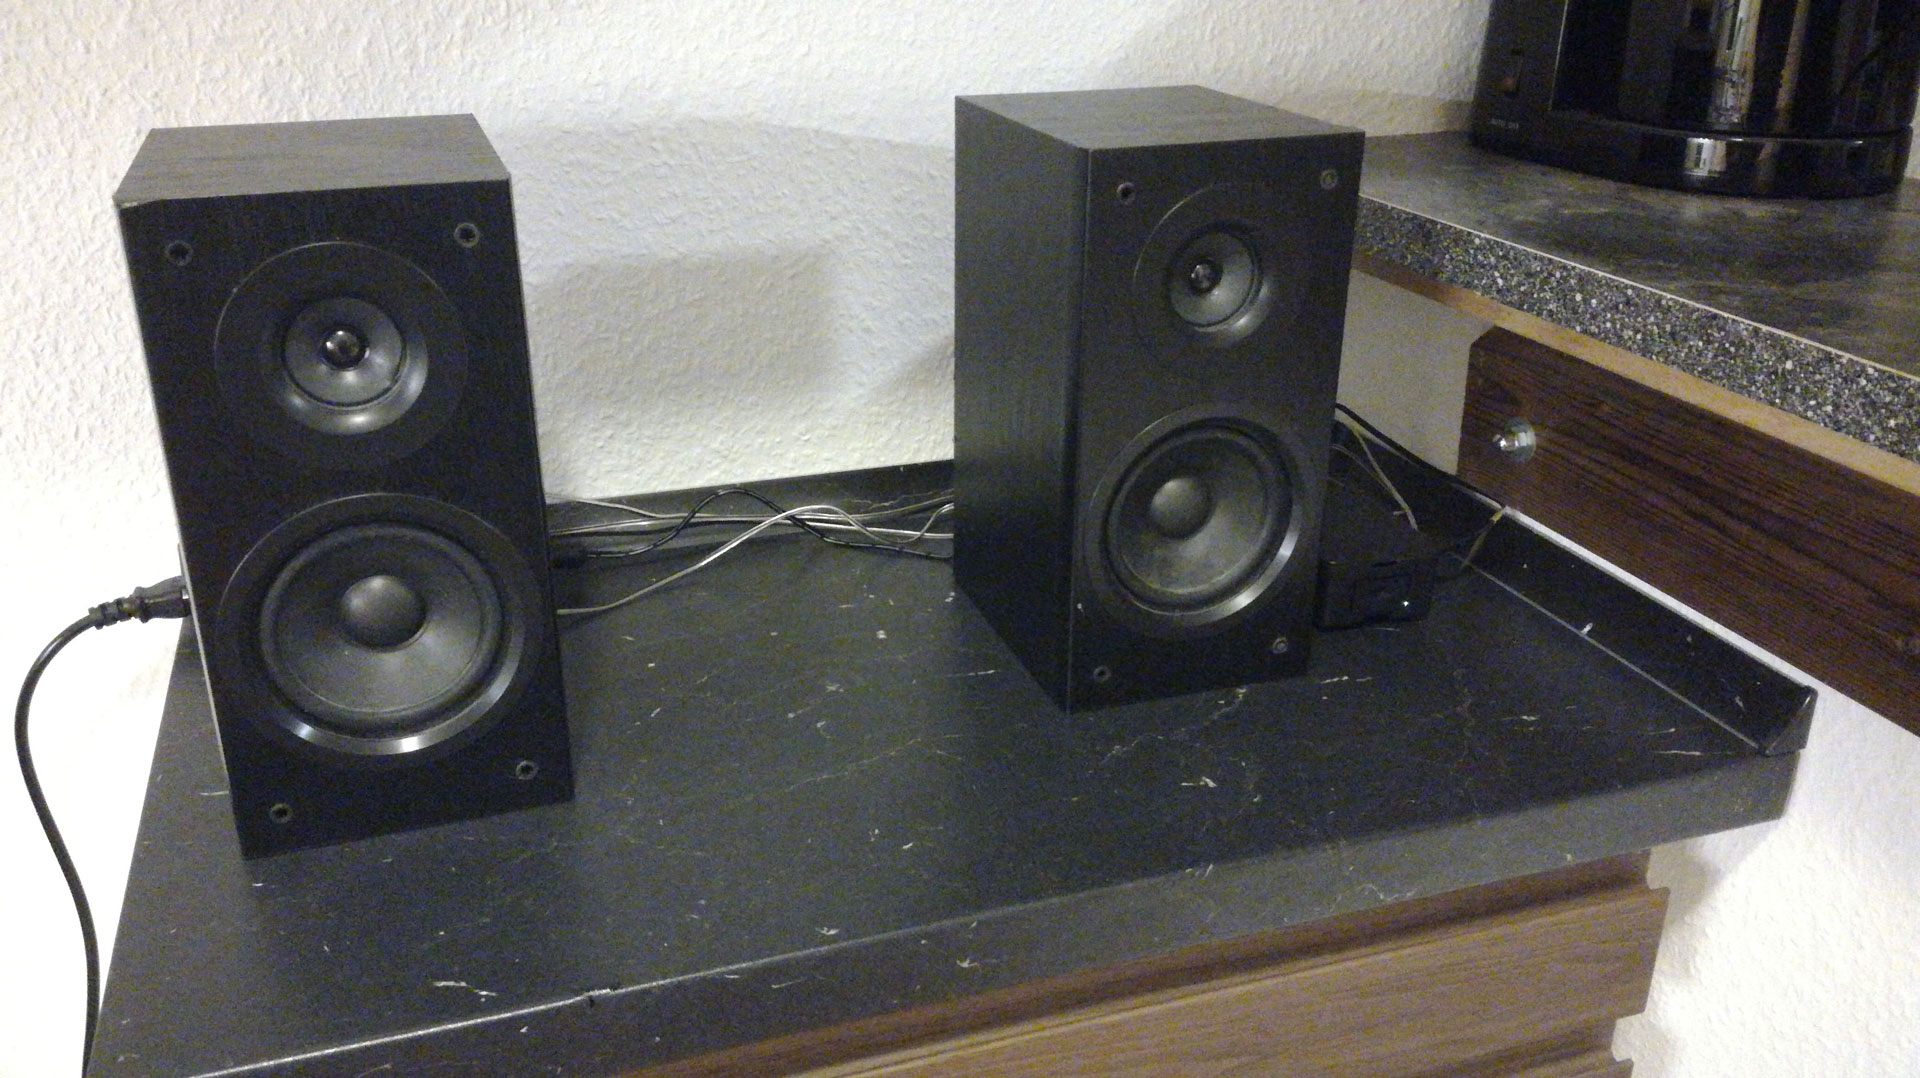
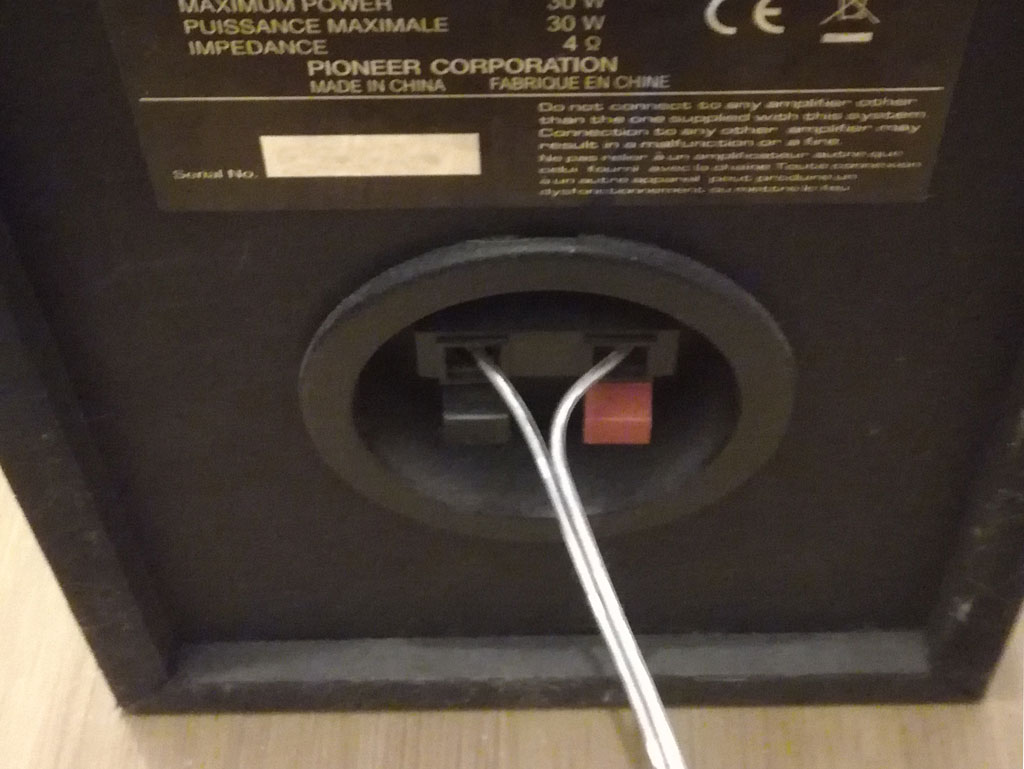
The choice for the kitchen fell on an amplifier sound card for the operation of passive loudspeakers. However, the use of a DAC (digital-to-analog converter) sound card would also be conceivable here. Similarly, an amplifier sound card is also suitable for other rooms – depending on existing hardware and application ideas. In contrast to active speakers (which already have an amplifier built in), passive speakers receive both the audio signal and the power from an external amplifier. They are connected via two cable wires (positive and negative pole), which you have to clamp in the provided connection sockets.
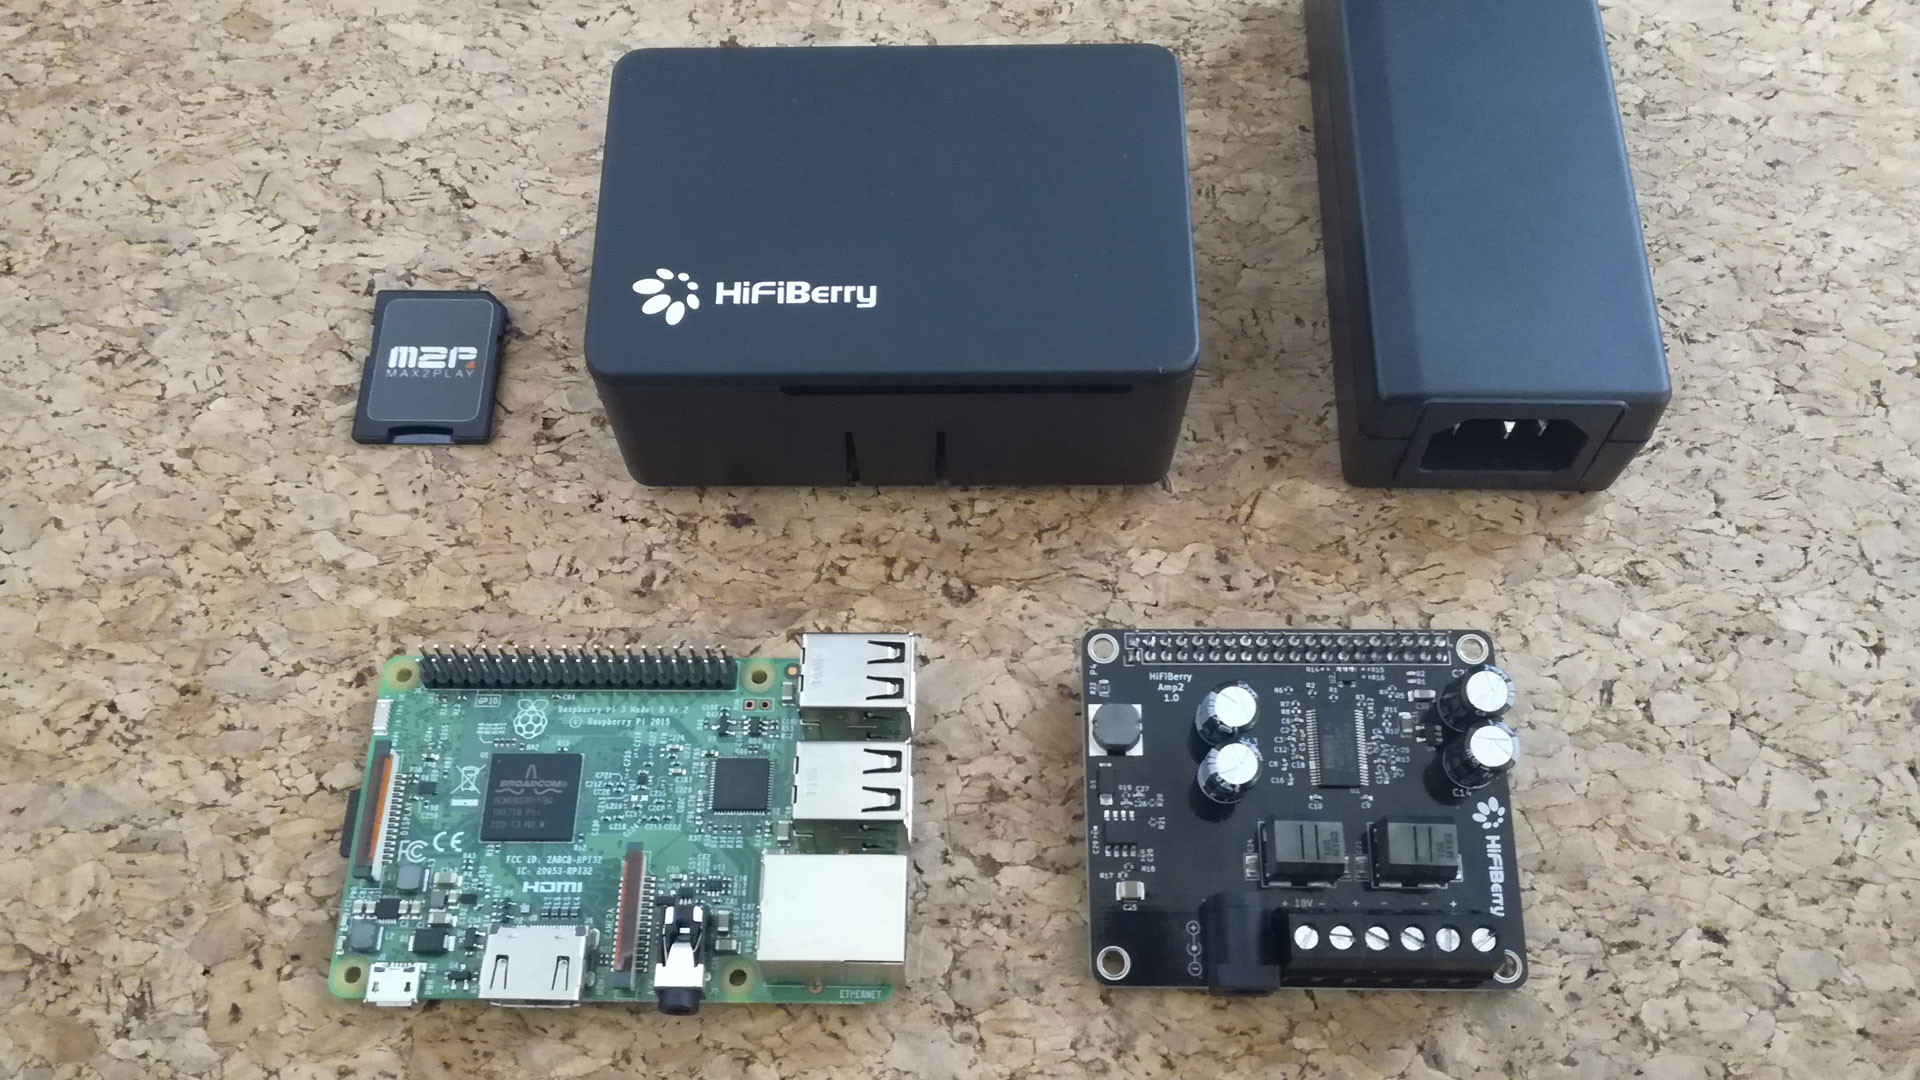
I chose the HiFiBerry AMP2 sound card specifically because it delivers up to 60 watts of output at a good price. The bundle with sound card and Raspberry Pi is available at the Max2Play Shop from 139.99€.
To find out which sound card suits your setup best, you may consult the Max2Play Multiroom Audio Configurator or the Sound Card Comparison Charts for further information.

How to Assemble the Bundle
1. UnpackingThe bundle contains the following parts:
|
|

|
|
2. Let’s Get Started!First you have to guide the 4 plastic spacers through the 4 holes on each side of the AMP2 and fix them with the nuts from the other side, as seen in this pictured. |
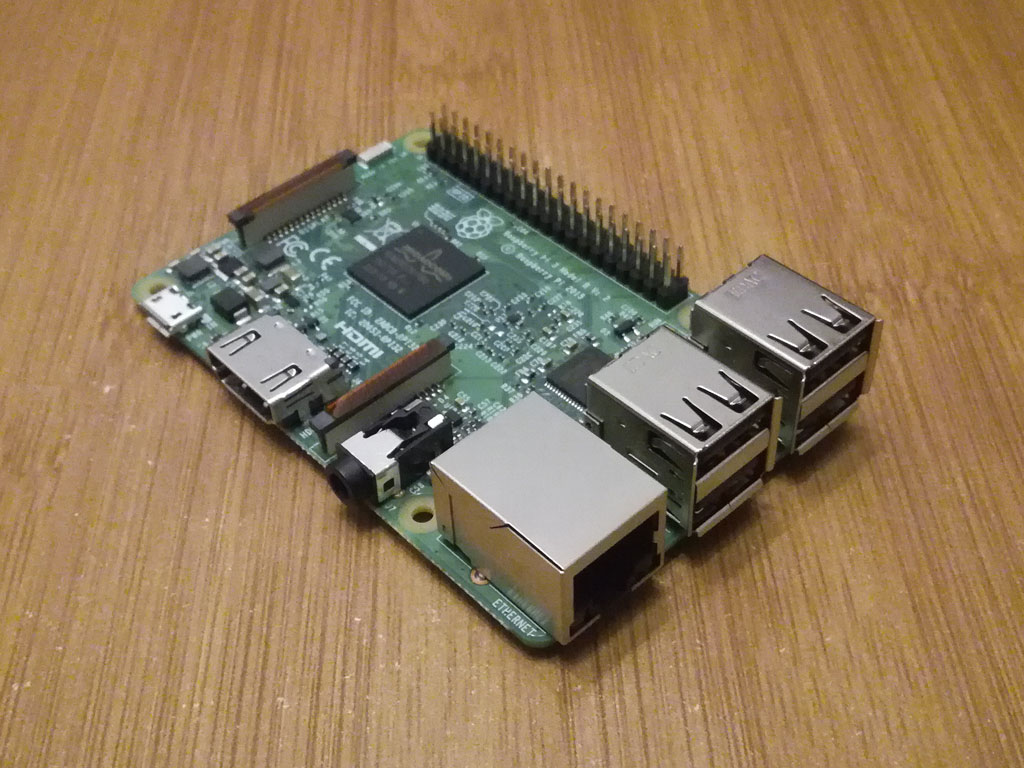
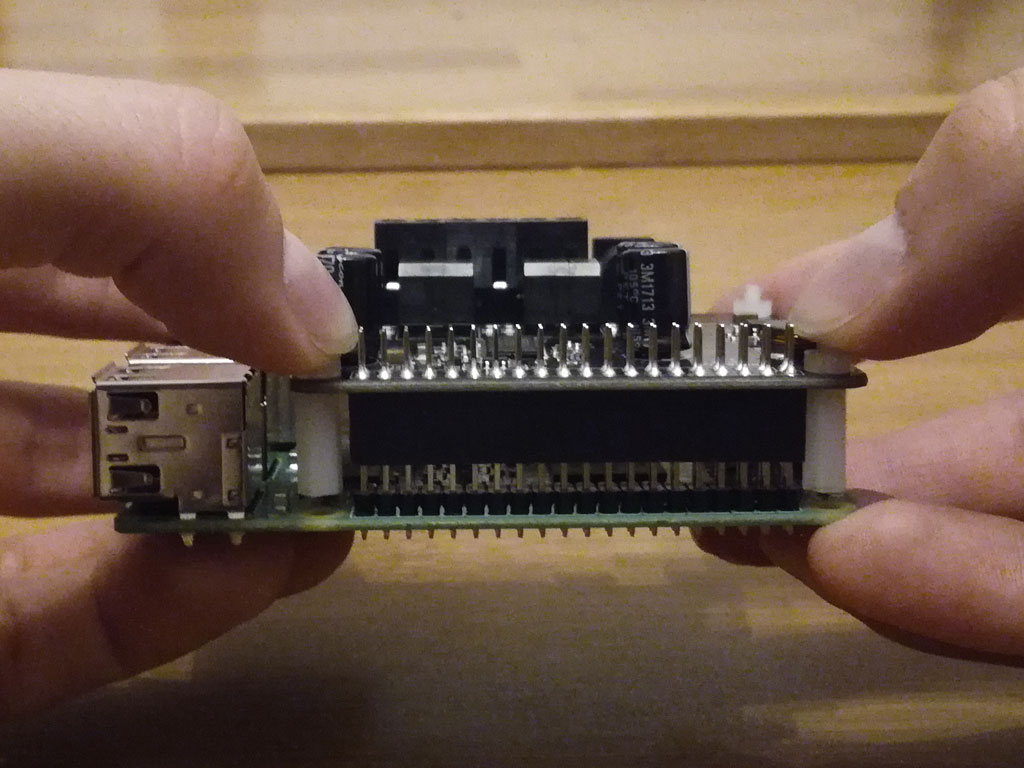
3. Putting the Boards TogetherNow you can put the sound card ontop of the Raspberry Pi. That’s what the so-called GPIO pins are intended for. These are 20 small pin pairs that provide for the transfer of data between sound card and Pi. You have to hold Pi and sound card as I pictured here and gently push the card down until the spacers sit firmly on the Pi. After that, the remaining screws have to be screwed from below through the holes of the Pi into the spacers. Now insert the Max2Play SD card into the corresponding slot. If you have not purchased an SD card with a pre-installed Max2Play image, you can read in our Wiki how to burn the image yourself to an SD card. |
|
|
|
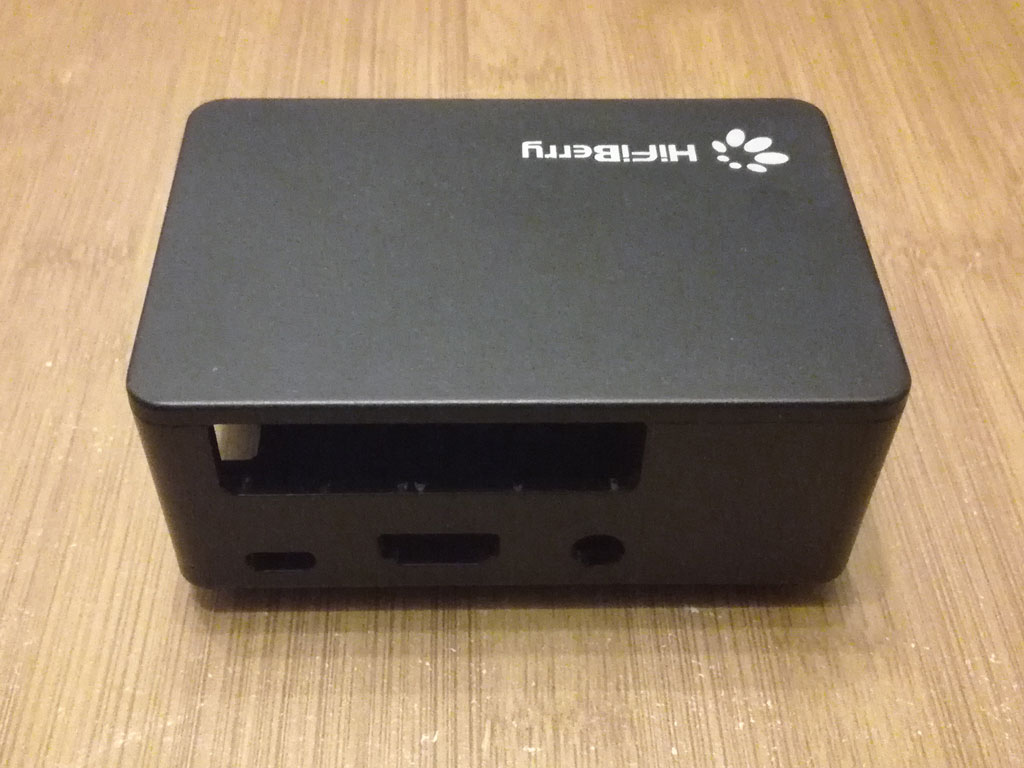
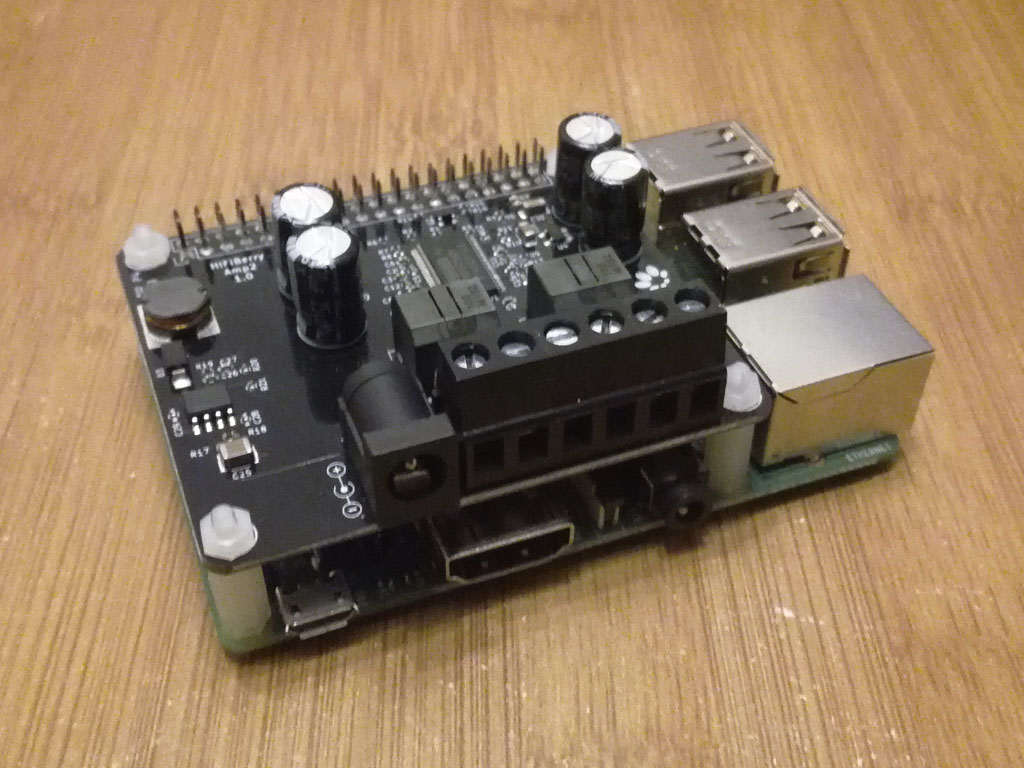
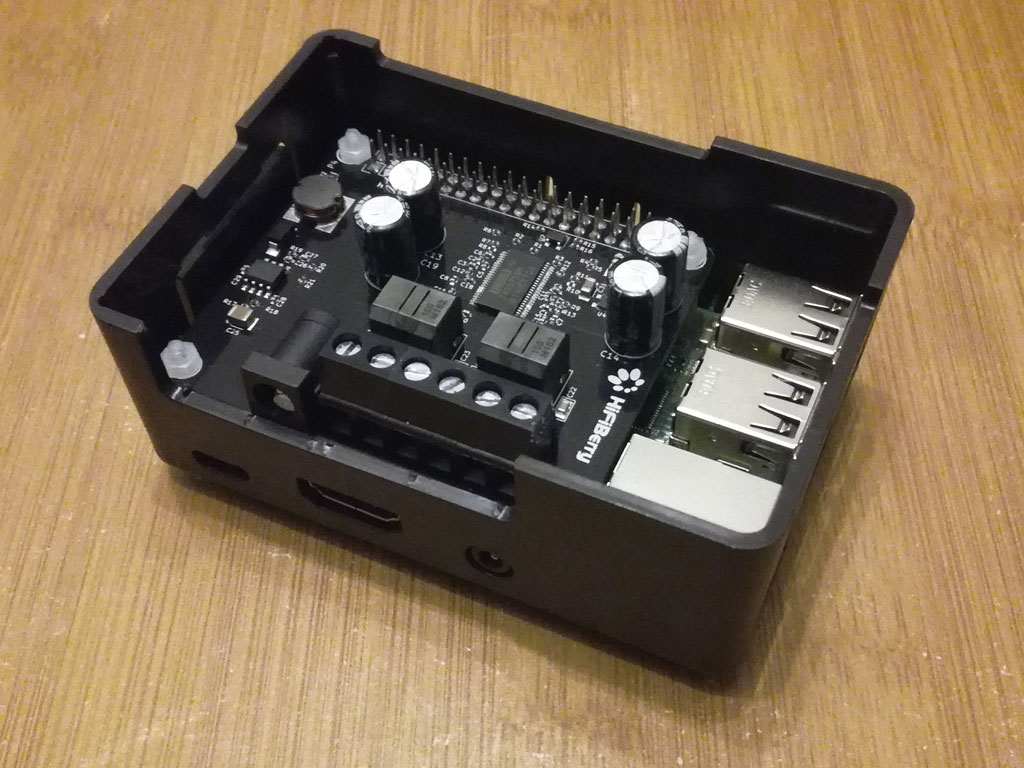
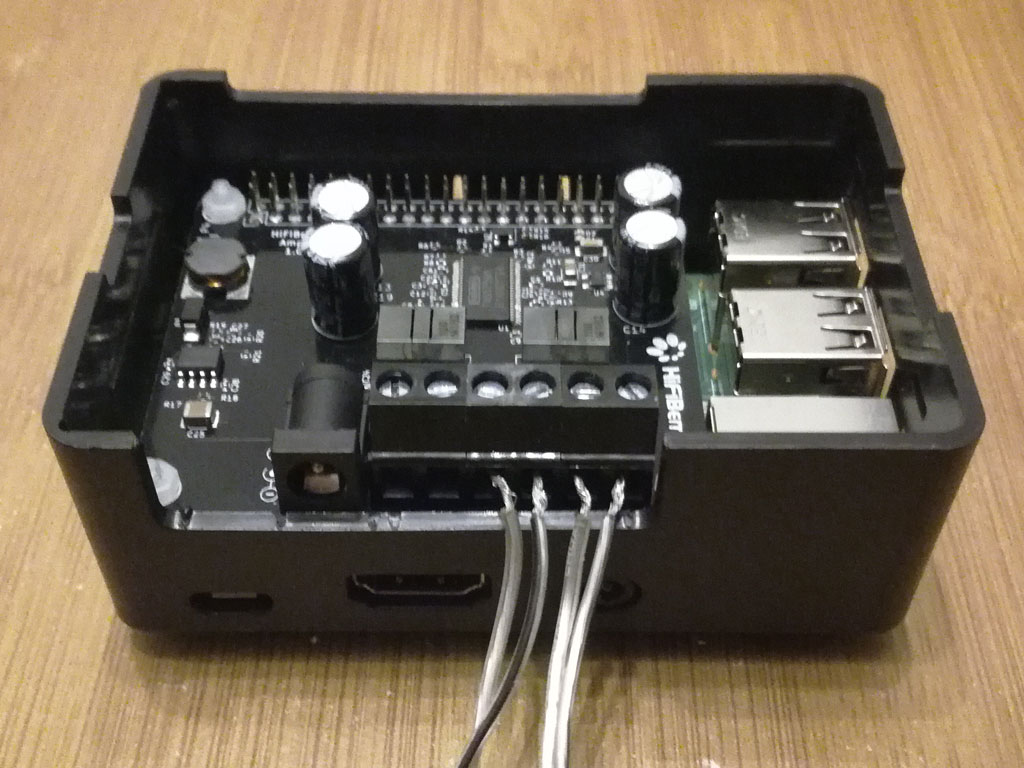
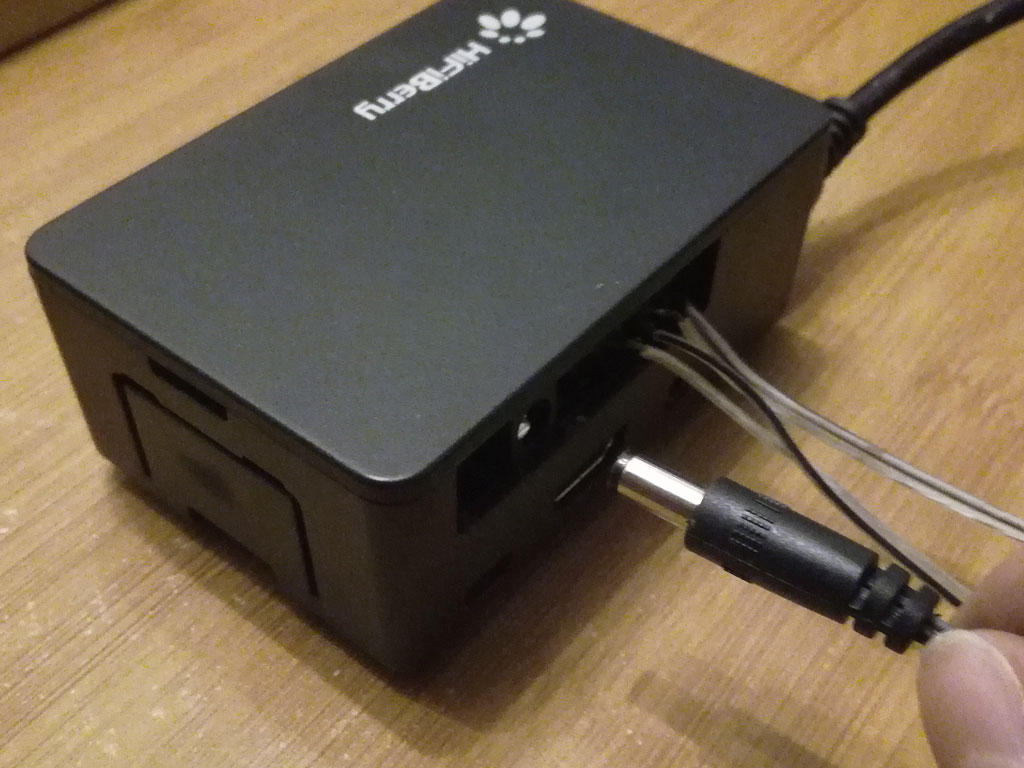
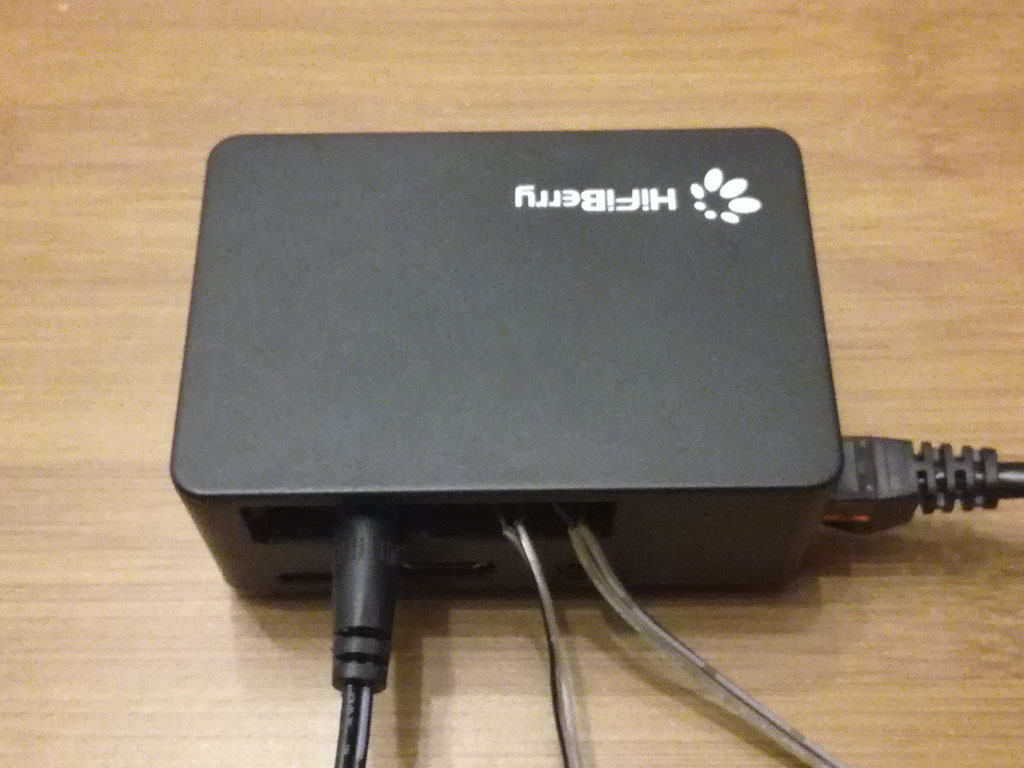
4. The CaseFirst glue the rubber feet on the 4 predefined recesses on the underside of the case. Then click both plastic pieces out of the recess for the connections of the amp. Now take the Raspberry Pi and sound card and firstly put the side of the Pi in the case, on which the HDMI-Port is located. The recesses of the case should fit exactly to the connections of the Pi. After that, you can push down the other side, whereupon it should snap into place. Look for the inscription (Insert and Snap) of the case. Now you can start connecting the speaker cables. To do this, screw the cable clamps on the amp with a flat-head screwdriver and insert the cable ends as shown in the picture. Then tighten the clamps again to establish the contact. Now you can put on the case cover. |

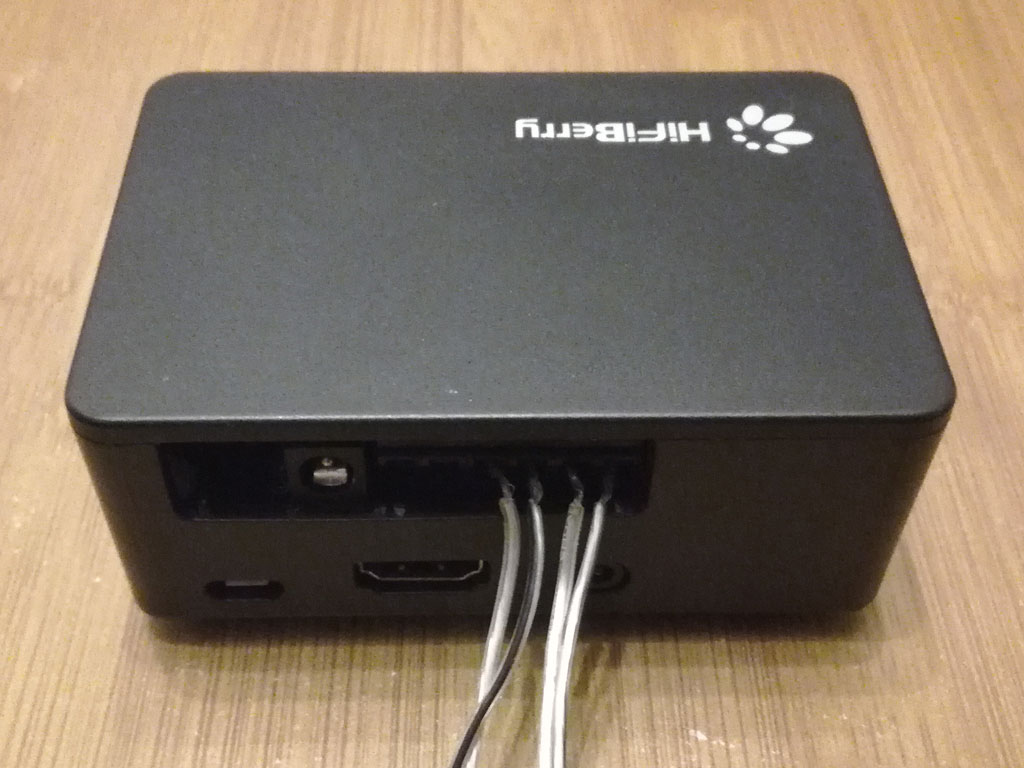
5. ConnectionsYour Max2Play device is ready! Before you connect the power supply and start the system up, you need to connect the Pi to the internet. It is best to use a LAN cable for that. But you can also integrate it into the home network via WiFi. Use the WPS function of your router or the Raspberry Pi’s automatic access point feature for that. After booting up and an unsuccessful WPS search, the Pi automatically switches to Access-Point-mode thanks to Max2Play, so you can easily find your device in the Wi-Fi search on your smartphone (or other WiFi device). The password is „mypasscode“ by default. If the connection is successful, you can make the necessary settings in the web interface to connect your device to the internet. |
|

![]() Now I’ll show you how to set up the Squeezebox Server and how to control and synchronize your players.
Now I’ll show you how to set up the Squeezebox Server and how to control and synchronize your players.
Squeezebox Server and Multiroom Audio
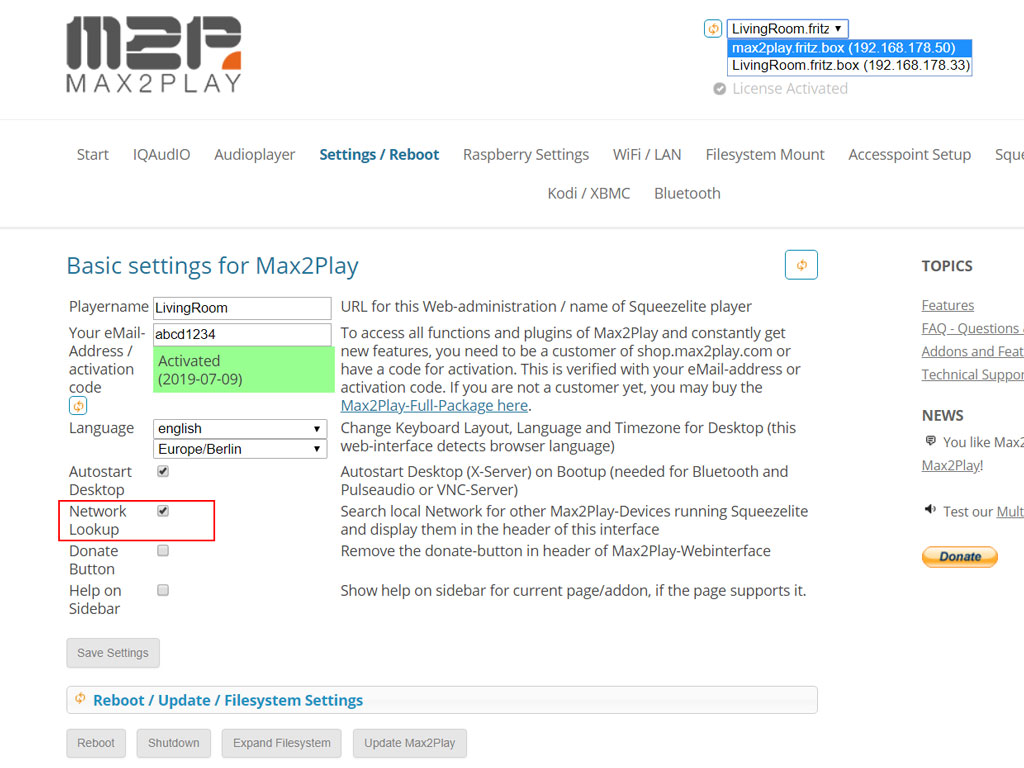
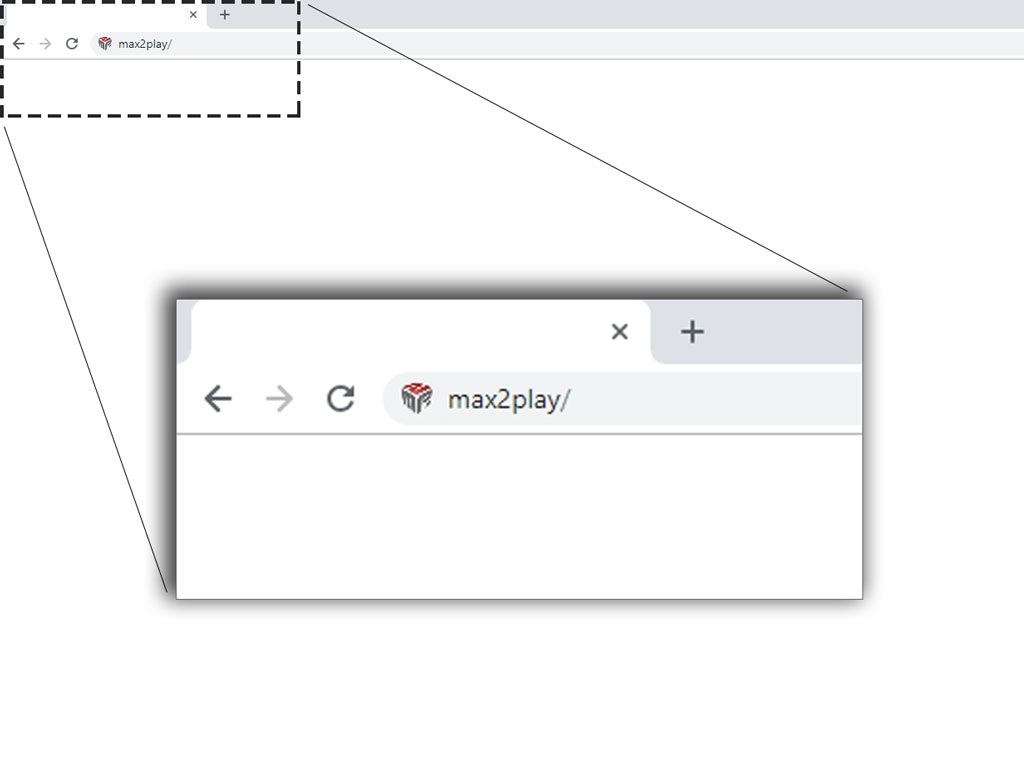
1. The Ground WorkThe web interface can be reached by running „max2play/“ in the address bar of your browser or by activating the network search under Settings/Reboot in the web interface of the already connected Max2Play device. Perform the initial setup like in the living room. This time, we choose „HiFiBerry“ as the manufacturer and the AMP2 as the sound card, enable the „Advanced“ preset again and rename our player in the Settings/Reboot tab (for example „Kitchen“). To be able to use the Squeezebox Server for Multiroom Audio, it must be running on one of the devices in the network. In our case, we have already installed it on the Raspberry Pi in the living room. If you start with this bundle, you can read in the previous article how to install the server. |
|
|
|
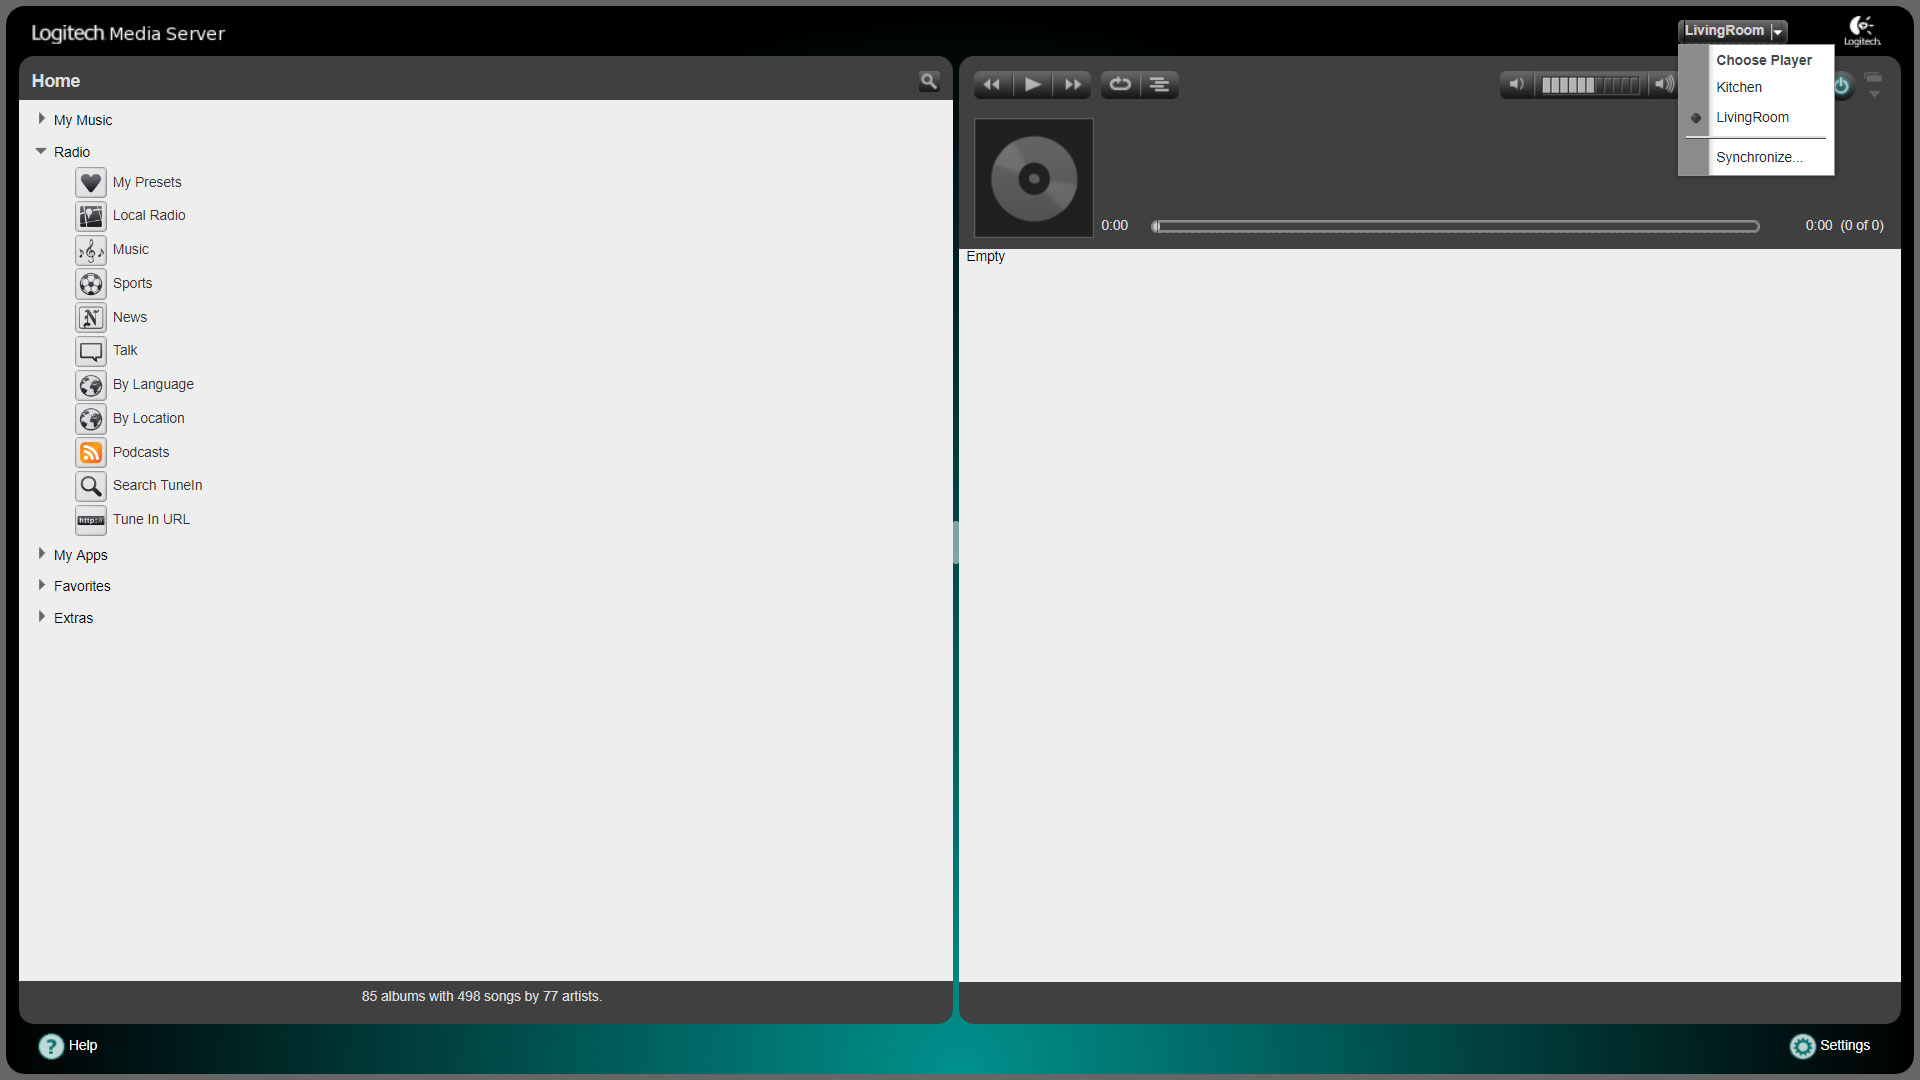
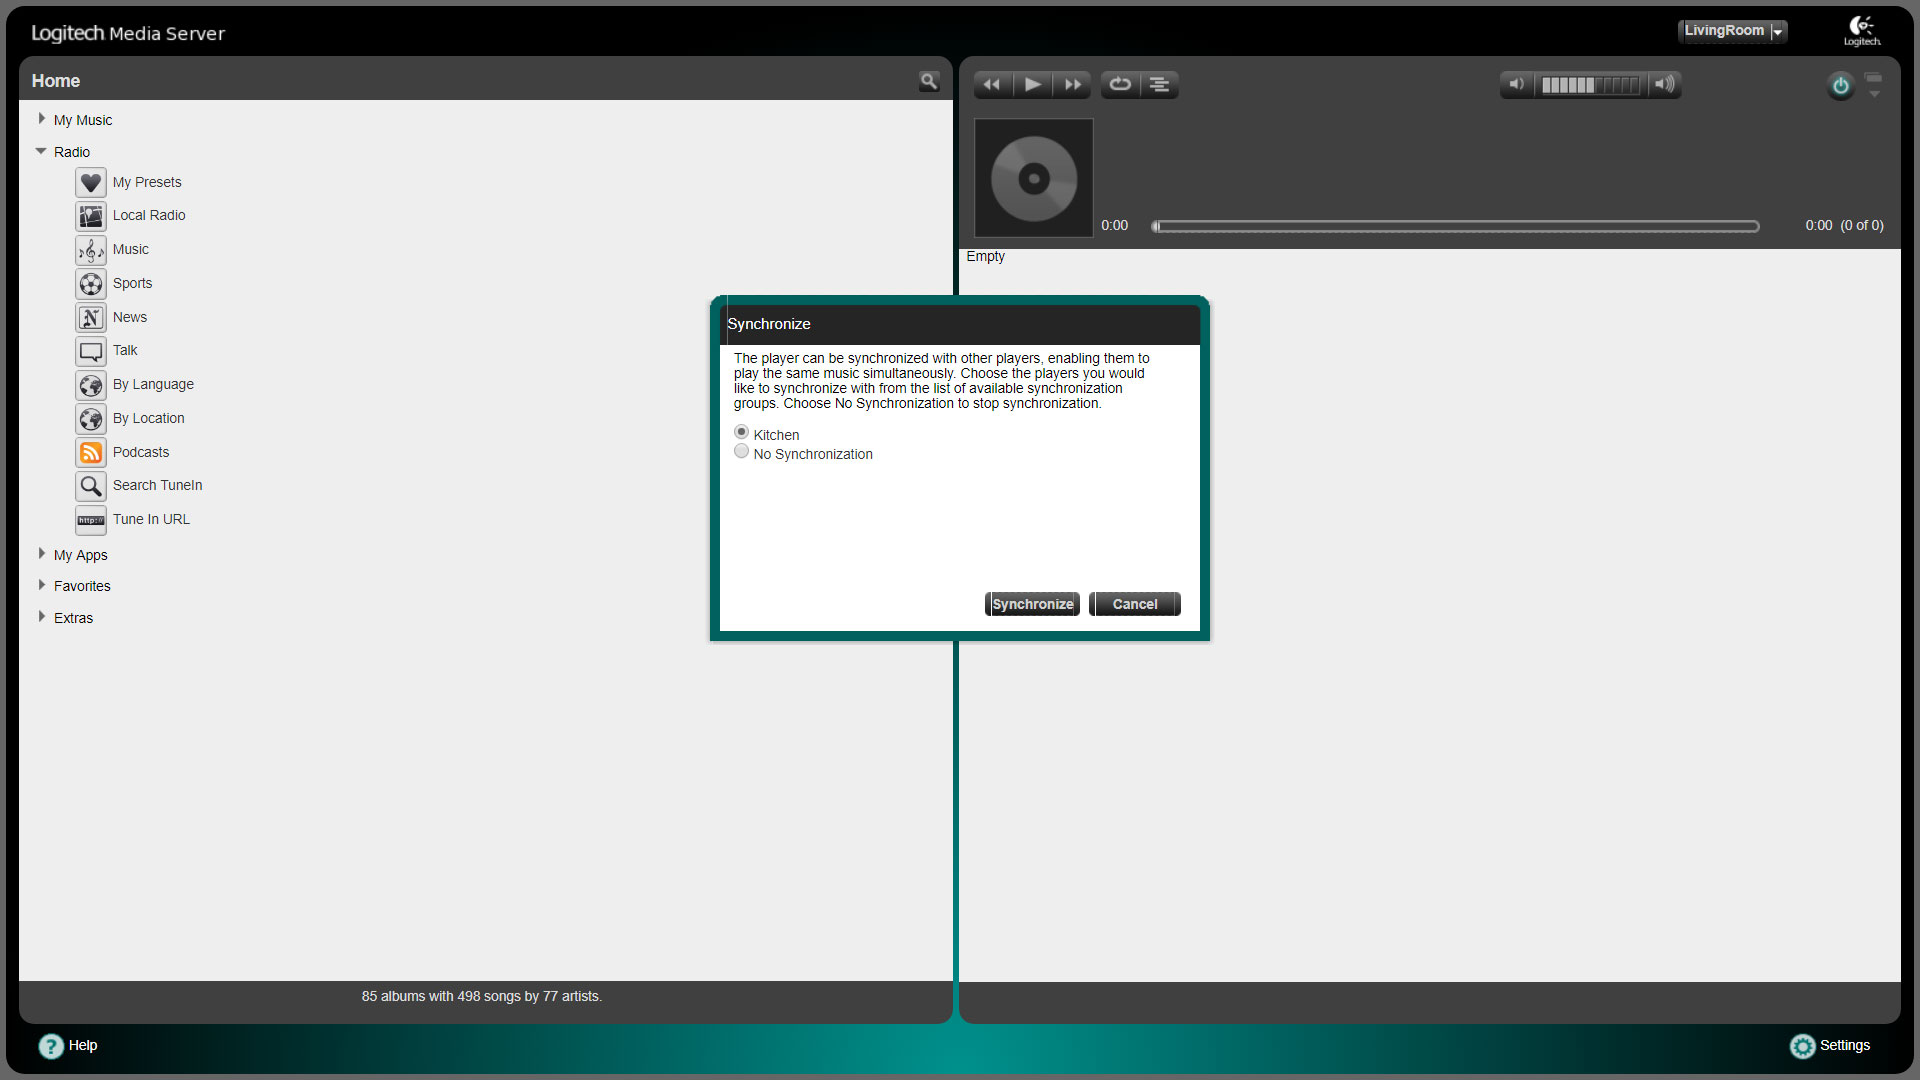
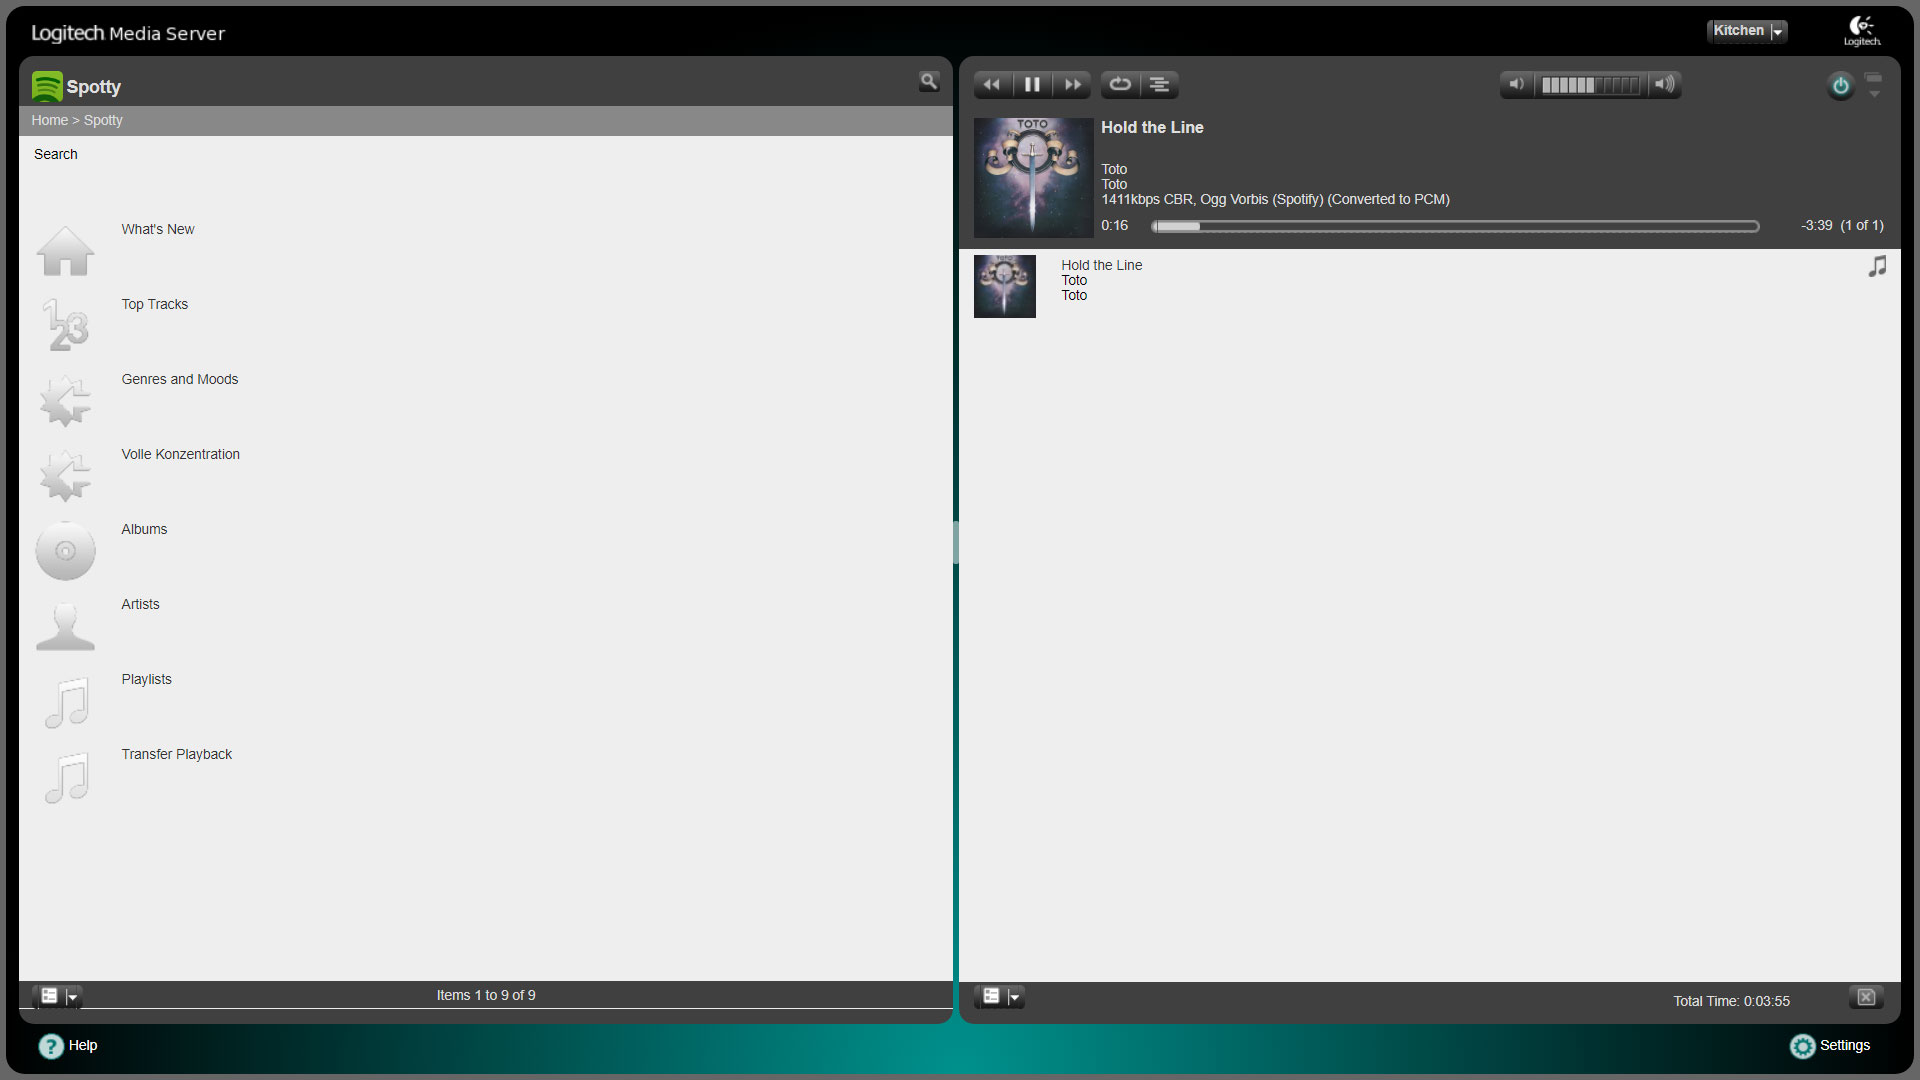
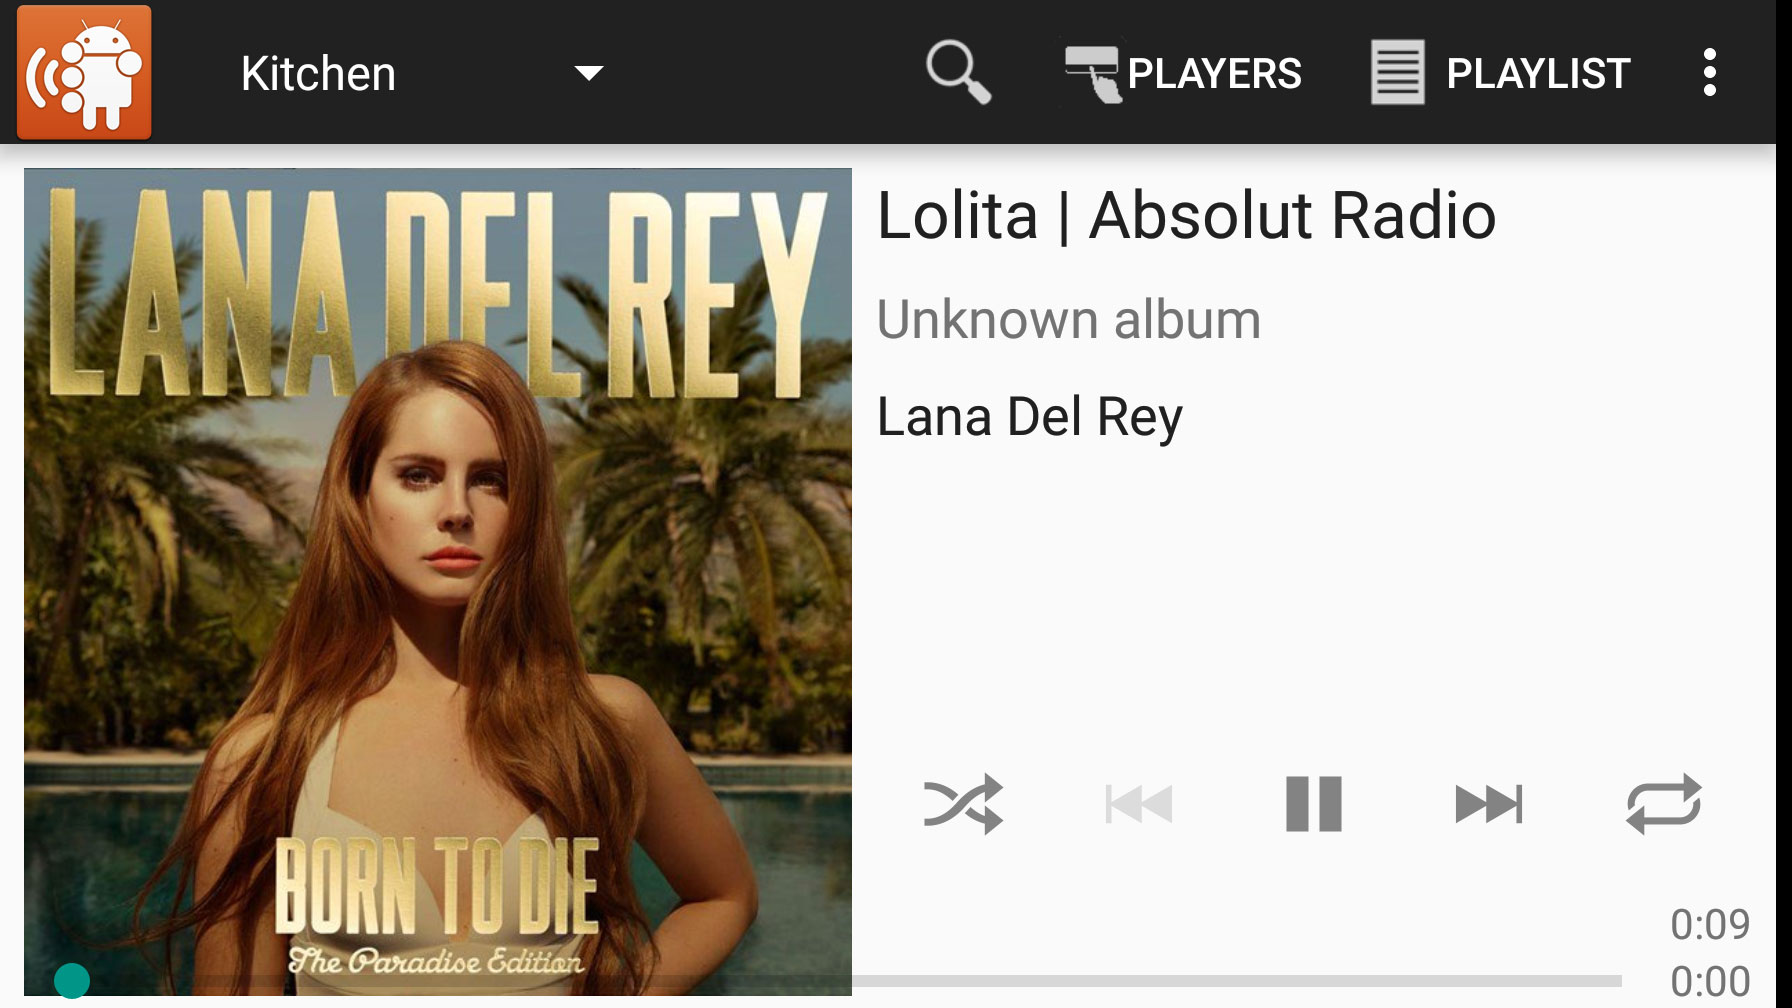
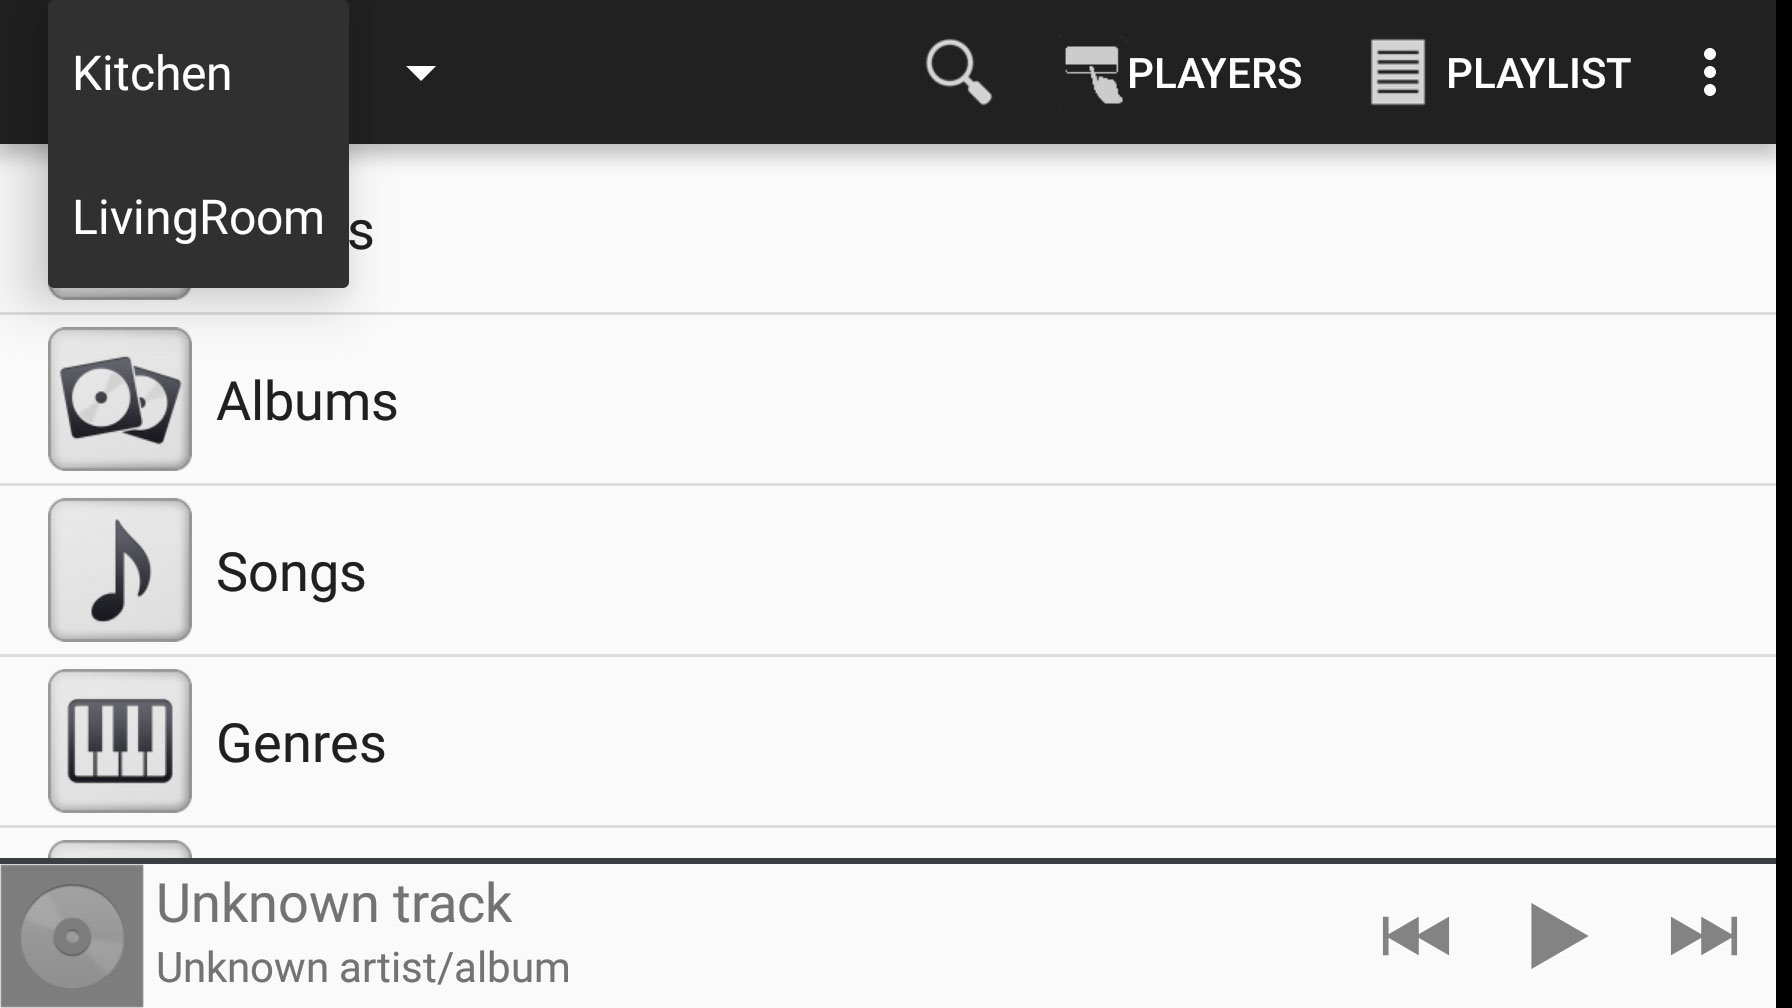
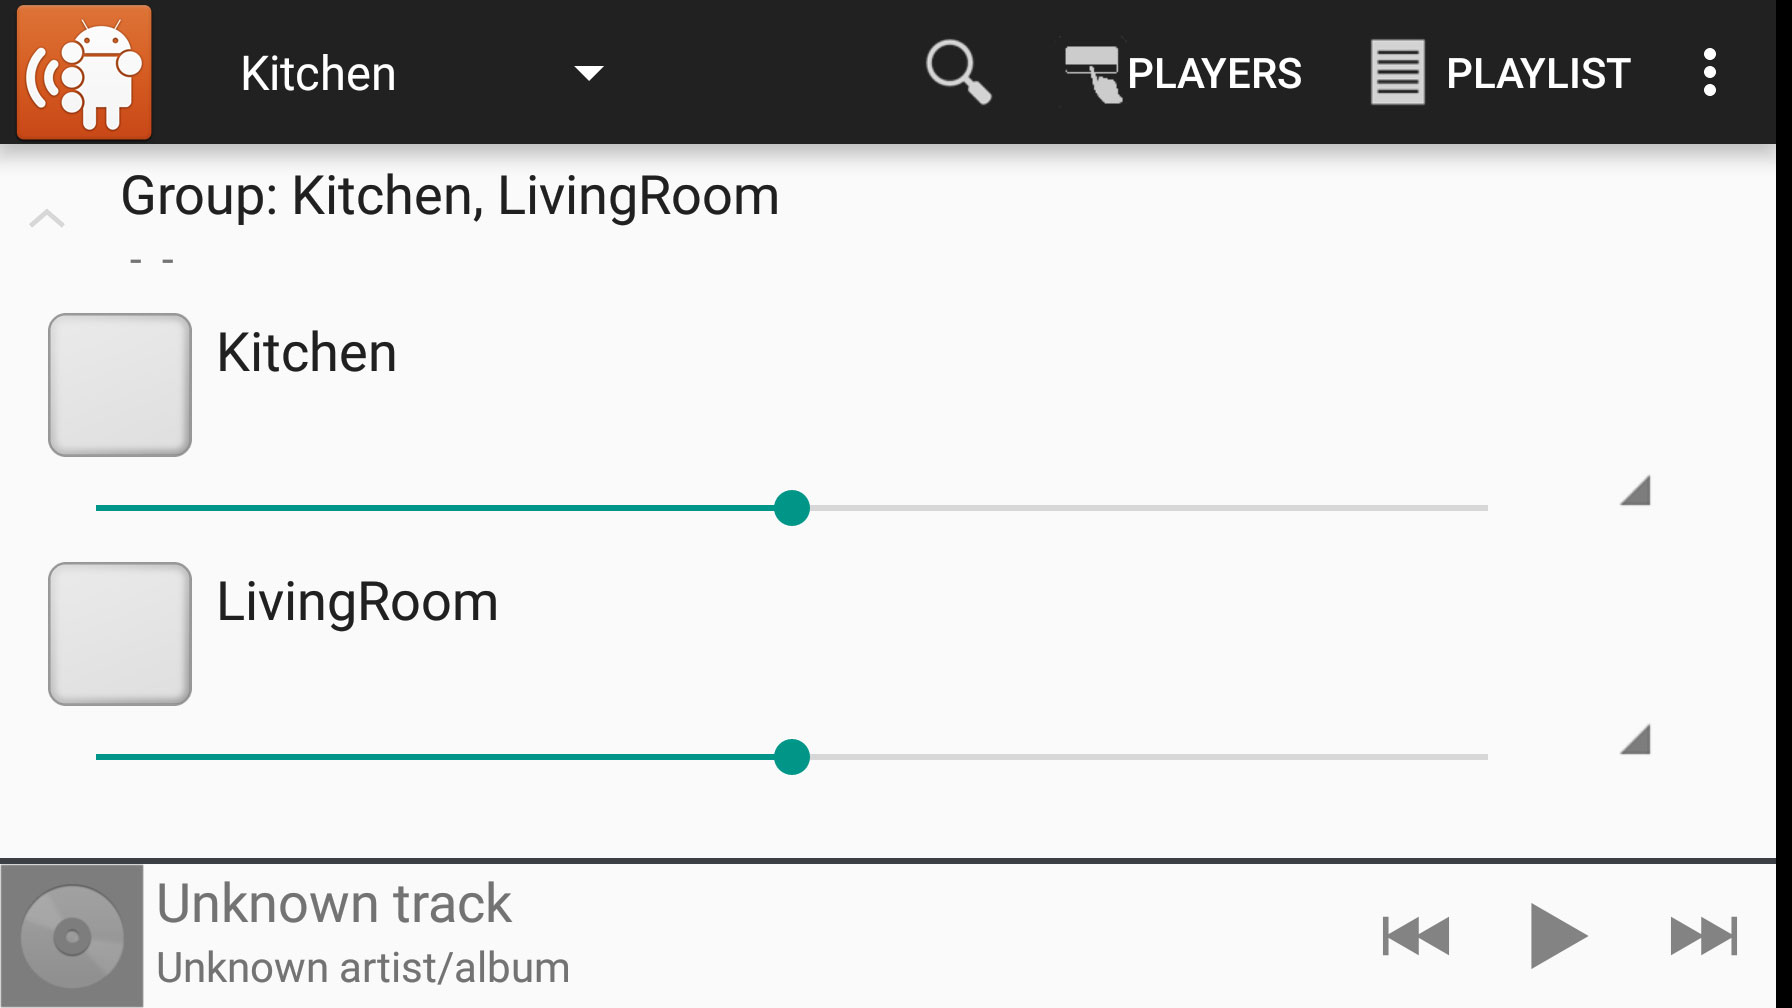
2. Set Up Squeezebox ServerOpen the Squeezebox web interface on the device where the server is installed. If you are launching the web interface for the first time, you will be asked to login to mysqueezebox.com. Such an account is needed for Squeezebox integration of services like TIDAL and Deezer. If you do not have an account and do not want to create one, you can click „Skip“. Now you can select the sources of your music files to add to your Squeezebox Server’s library. If you do not want to use local files, you can skip this step and the next one (selecting playlist files). Now you see the Squeezebox web interface. At the top right you can choose which player is controlled. In our case the two squeezelite players „living room“ and „kitchen“ should be listed there. By clicking on „Synchronize“ you can now run the same playback over both players at the same time. On the left side of the web interface you can choose among other things, whether you want to hear radio or local music tracks. You can also add other services to this selection, such as Spotify. |
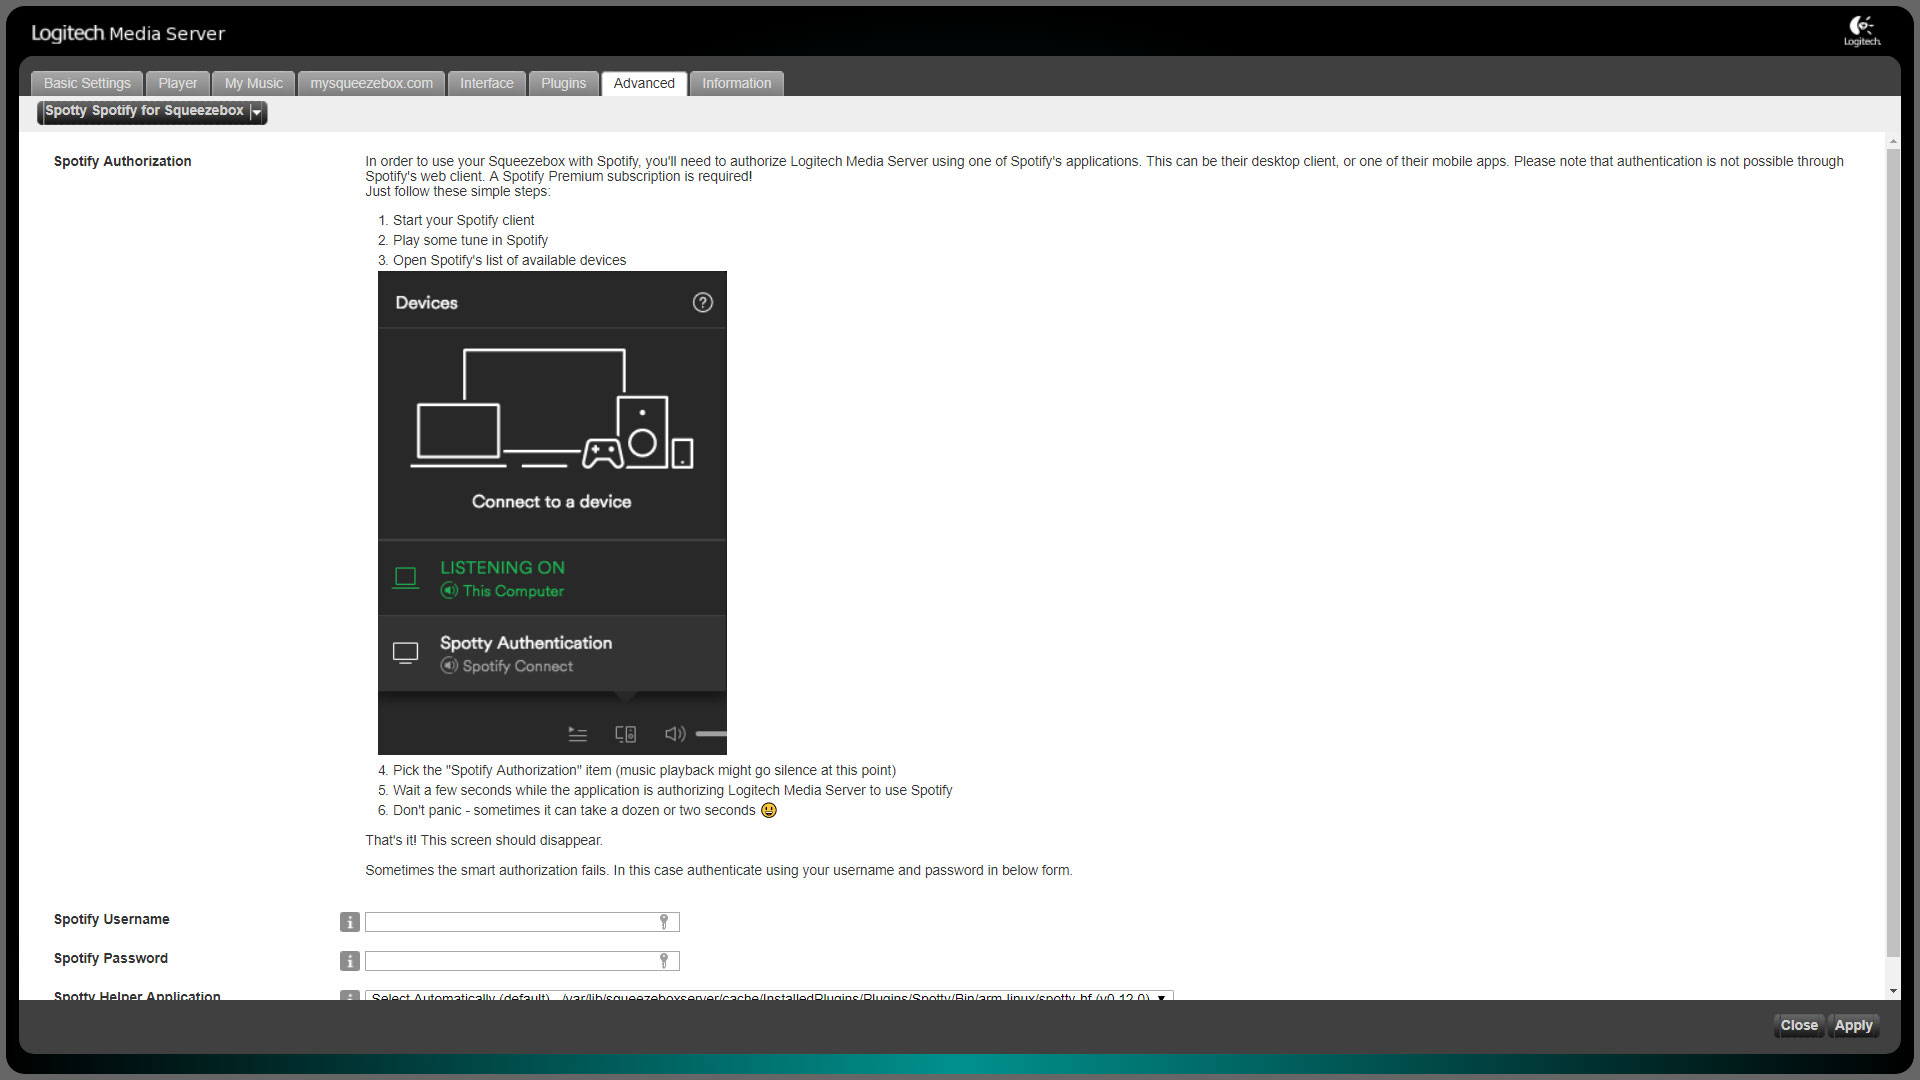
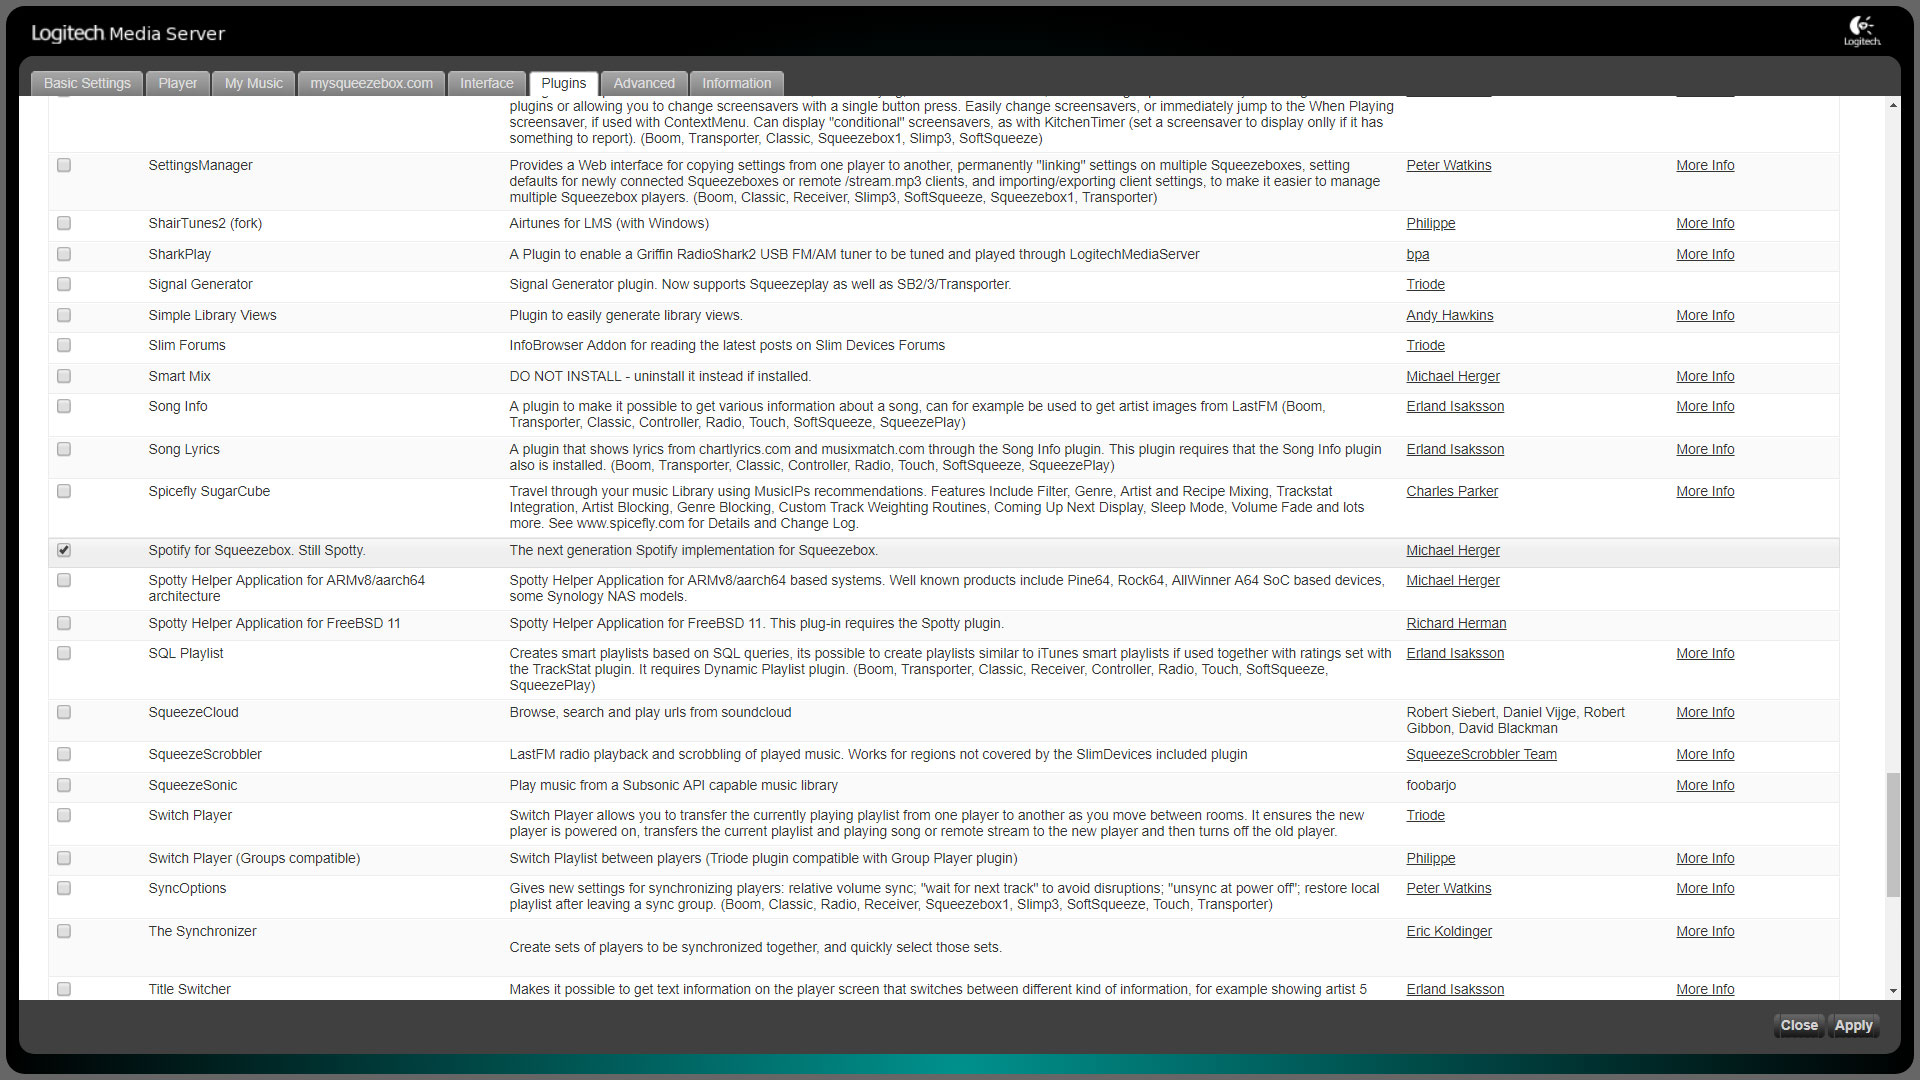
3. Add and Set Up PluginsNow I show you how you can expand your Squeezebox Server with plugins such as Spotify. Go to „Settings“ in the Squeezebox web interface (bottom right) and click on „Plugins“ in the tab that opens. There you will find a list of already active, inactive and third party plugins. Look for the third-party plugin „Spotify for Squeezebox. Still Spotty“ by Michael Herger. Set the checkmark on the left side and click „Apply“ on the bottom right. The plugin will now be activated. After a quick restart of the Squeezebox Server, you can now edit the settings for „Spotty“ in the „Advanced“ tab on the upper left or in the plugin list next to „Michael Herger“. You can sign up with either the one-click authentication with the Spotify app or manually by entering your user data. After logging in, you’ll be able to set the output quality or enable Spotify Connect for the players of your choice. In addition, you will now find the menu item „Spotify“ in the main menu of the Squeezebox web interface. Other interesting plugins for the Squeezebox server are e.g. „Group Players“ and the Bridge plugins which greatly facilitates the Squeezebox integration of smart devices. |
|
|
4. Control with an AppThe Google Play Store, the Apple App Store and even the Windows Store offer a variety of apps that make controlling the Squeezebox Server easier. There are also iPeng (iOS) or OrangeSqueeze (Android), which are not free but have an improved interface and more control options. The apps usually connect automatically to the server in the network. If not, it can be easily added by specifying the IP address and the corresponding port (usually port 9000). In this regard, especially in the kitchen, the control through an app on a tablet makes sense. Several vendors, including iPeng and SqueezePad have already optimized their apps for tablet control. So if you have a tablet lying around, you can use it for ideal control of this setup, and, for example, install it firmly in the kitchen with a suitable holder. If your budget is bigger than mine, Max2Play also offers complete solutions that include a touch screen for the Raspberry Pi. To stream music from your phone directly to the Squeezebox Server, there are Squeezebox plugins like „Shairtunes2“, with which you make the server compatible to Apple Airplay-enabled devices and „UPnP/DLNA Media Interface“ for transmission with UPnP or DLNA. You can follow the same first step from the Spotify plugin to activate those as well. |
![]() In this last section, you’ll learn how to add network storage as a media source and how to set up Bluetooth for Max2Play.
In this last section, you’ll learn how to add network storage as a media source and how to set up Bluetooth for Max2Play.
Music Sources and Bluetooth
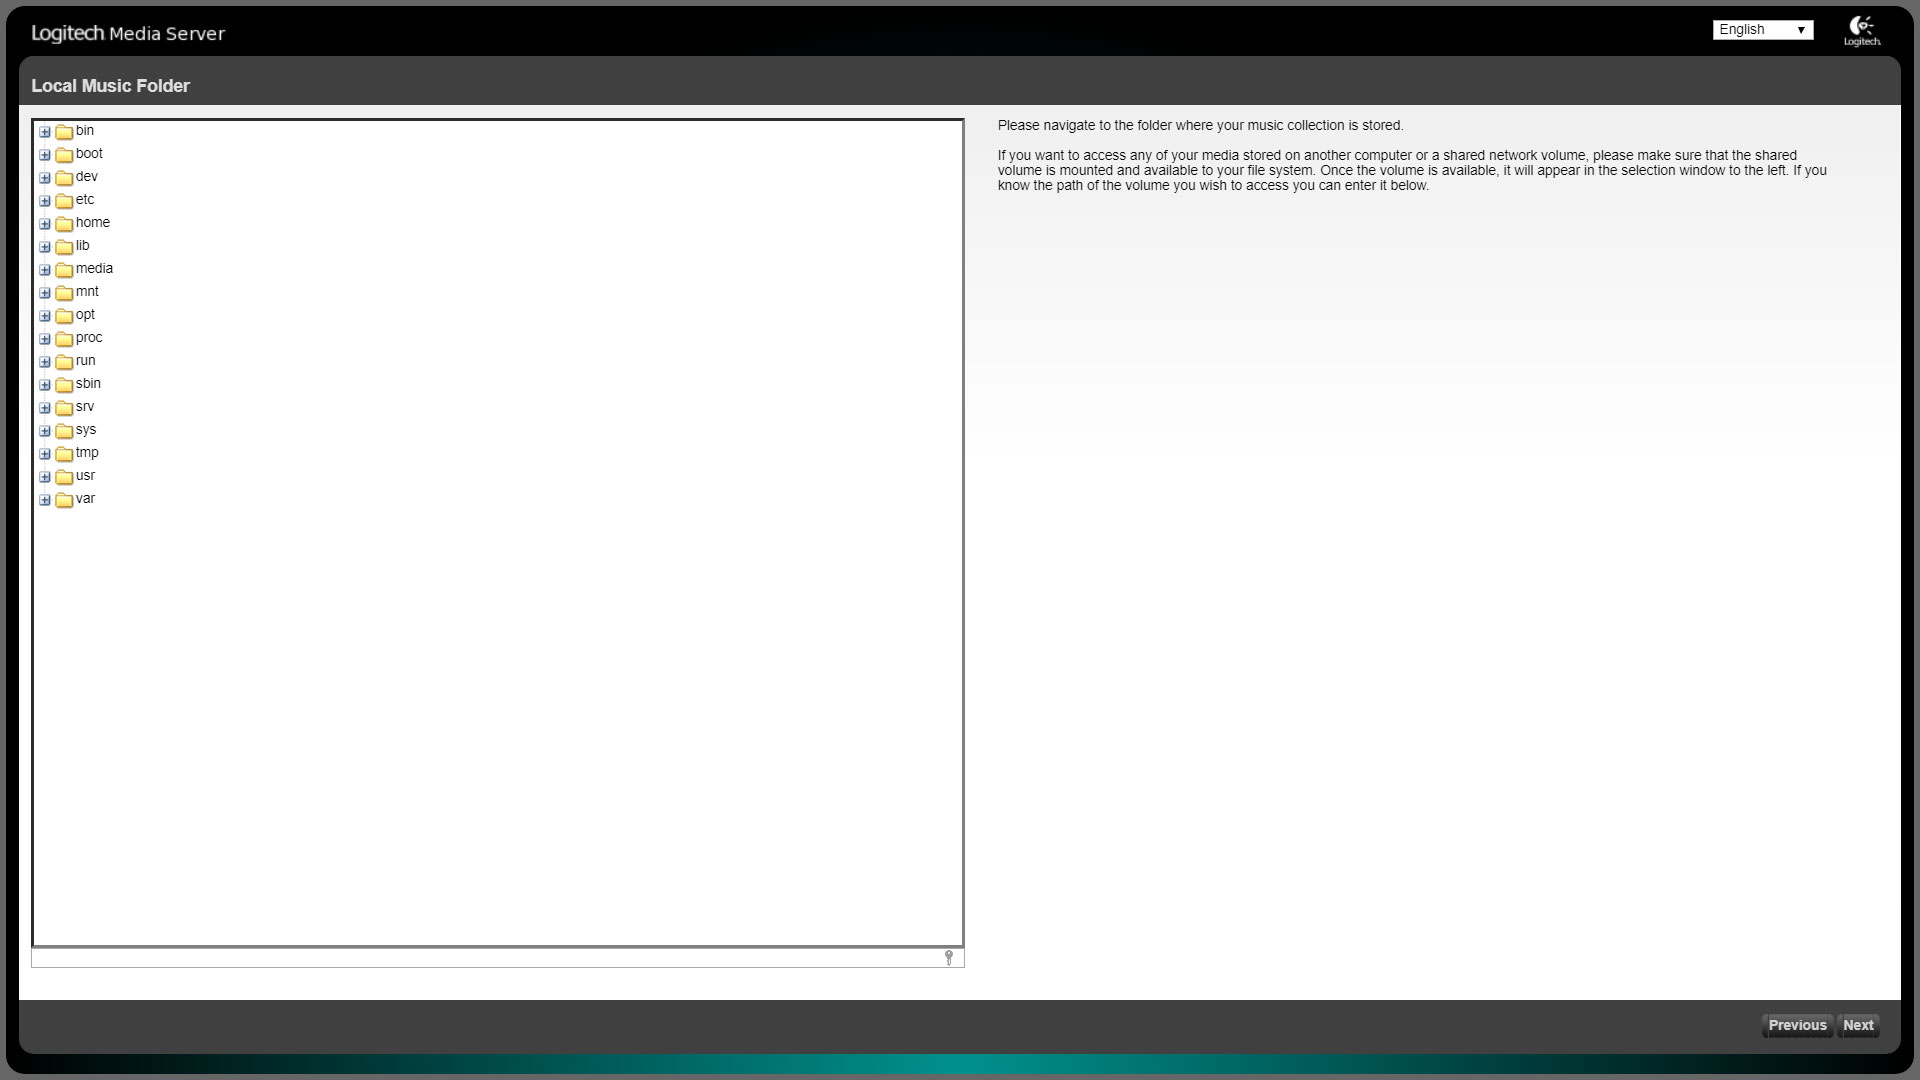
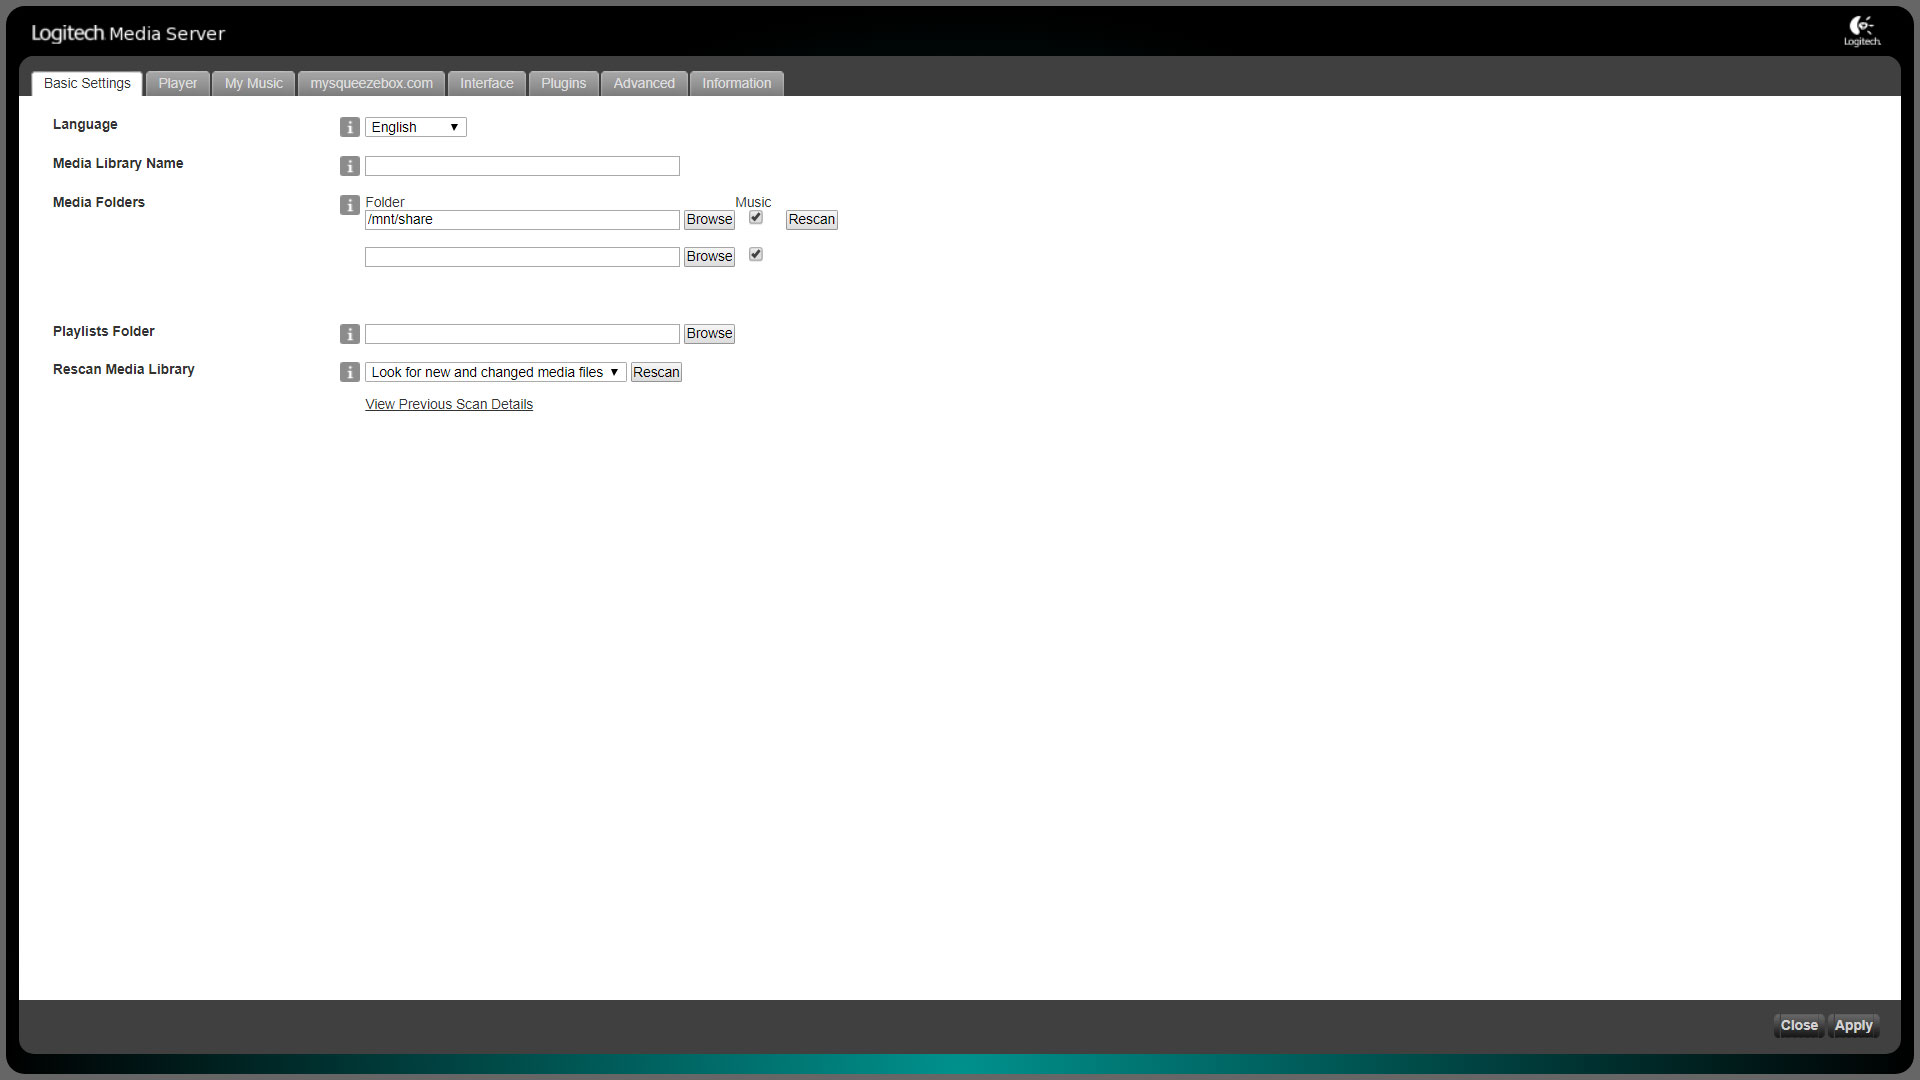
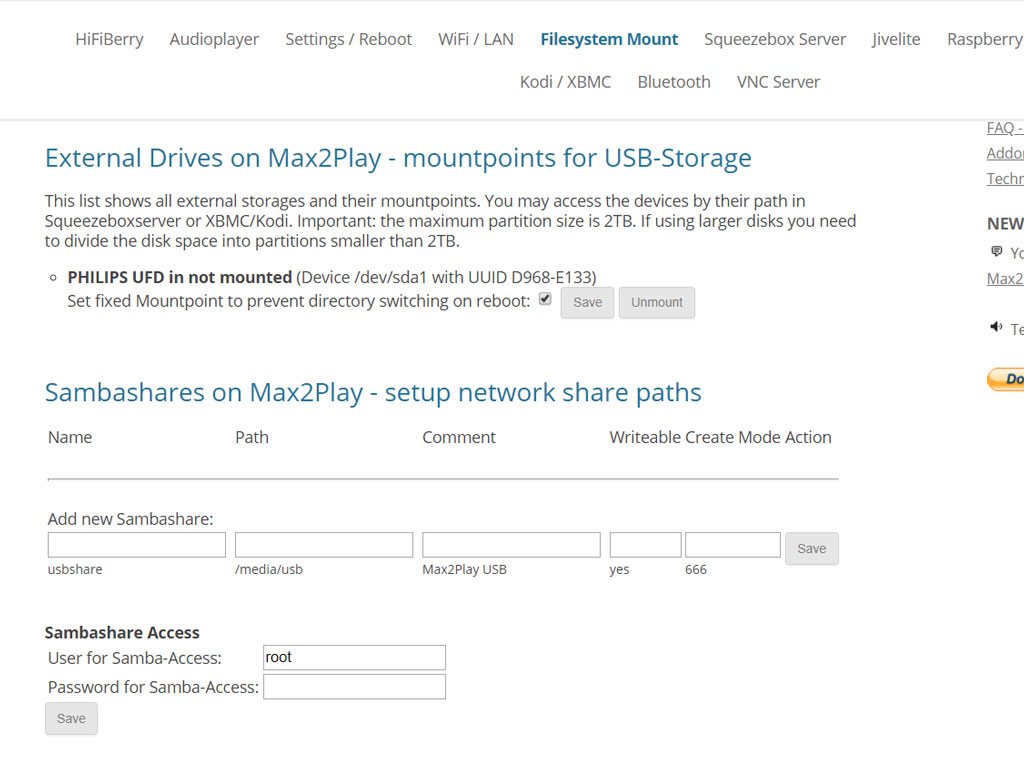
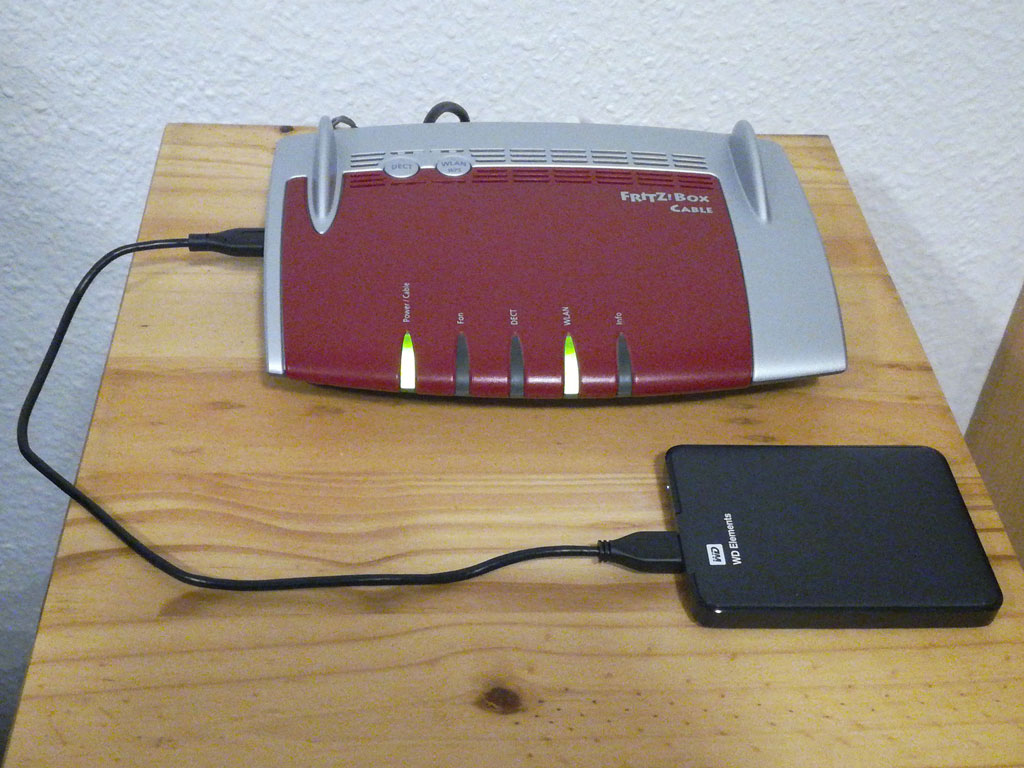
1. Adding Music SourcesThere are many ways to add music to our Max2Play device. The simplest method is to directly connect a USB stick or an external hard drive to the Pi: In the „File System Mount“ tab of the Max2Play web interface, all connected USB storage devices are listed under „External drives to Max2Play“. In order to be able to play the music on our USB stick, we now just have to copy the specified file path (for example /media/usb0) and declare it as a source in the playback system of our choice. In the Squeezebox Server, this is done in the basic settings under „Media folder“. Other possible music sources include Internet streams (Radio, Spotify, etc.), network storages and transfers from Bluetooth, Airplay, DLNA, or UPnP-enabled devices. |
|
|
|
|
|
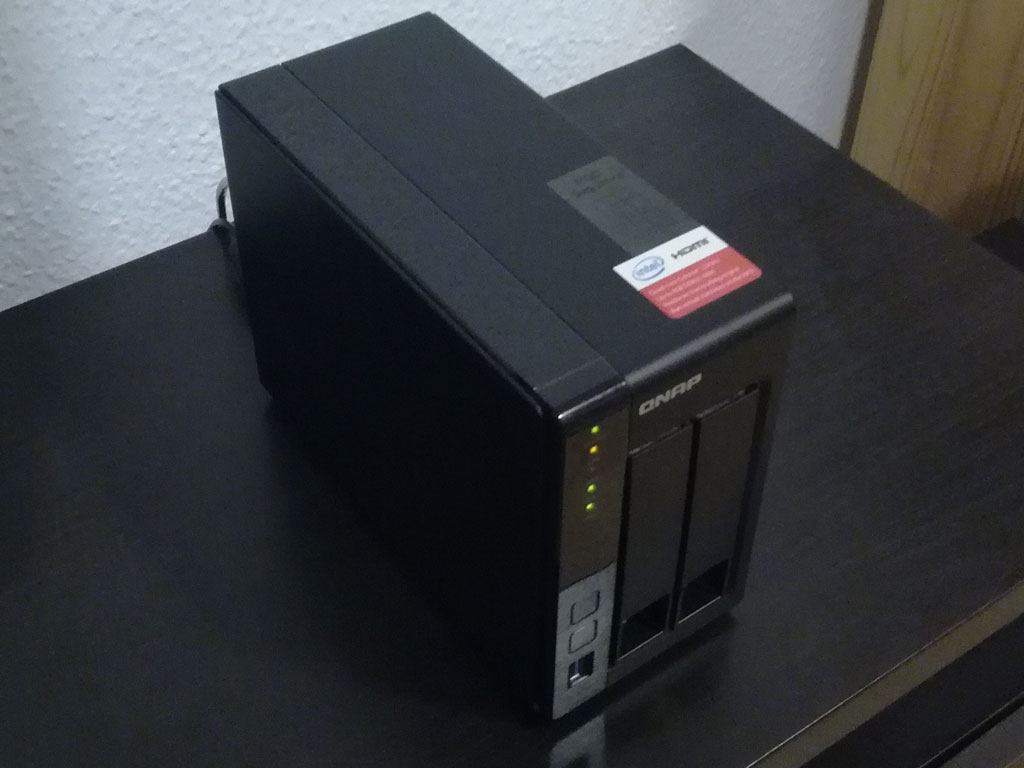
2. What is a network storage?As the name implies, a network storage (or Network Attached Storage) is a storage system that is accessible throughout the network. It must of course be connected to the network and be able to communicate with other devices (mastering transmission protocols). The advantages of such a network memory include the low energy consumption, the simple file access as well as the data security and transmission speeds. The tasks of such a system could be e.g. automatically back up your personal data or use it as a media library to store your photos, music and videos in one place and retrieve them anywhere in your home network. In order to access your data with Max2Play, all you have to do is specify the network path, that means the „directions“ to the folder and your login for the network storage. For this purpose, there is the preinstalled „File System Mount“ plugin. |
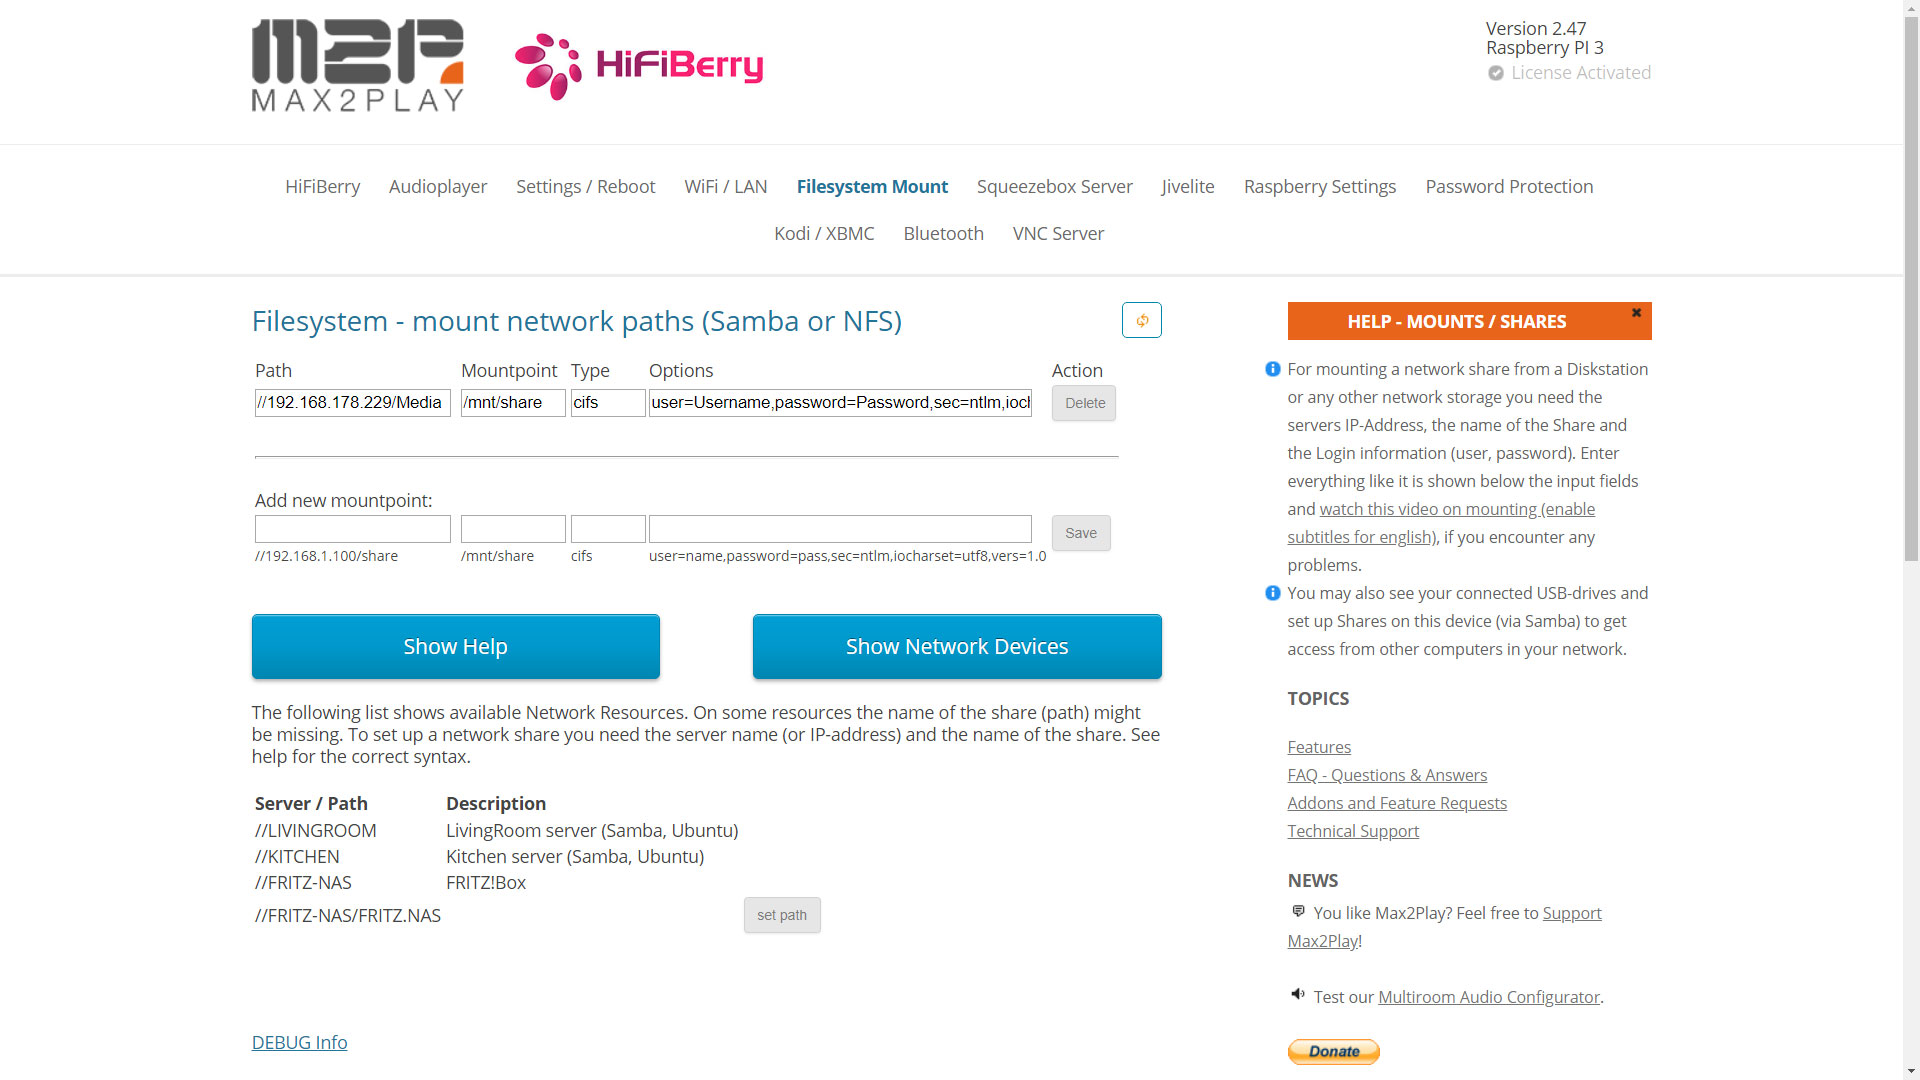
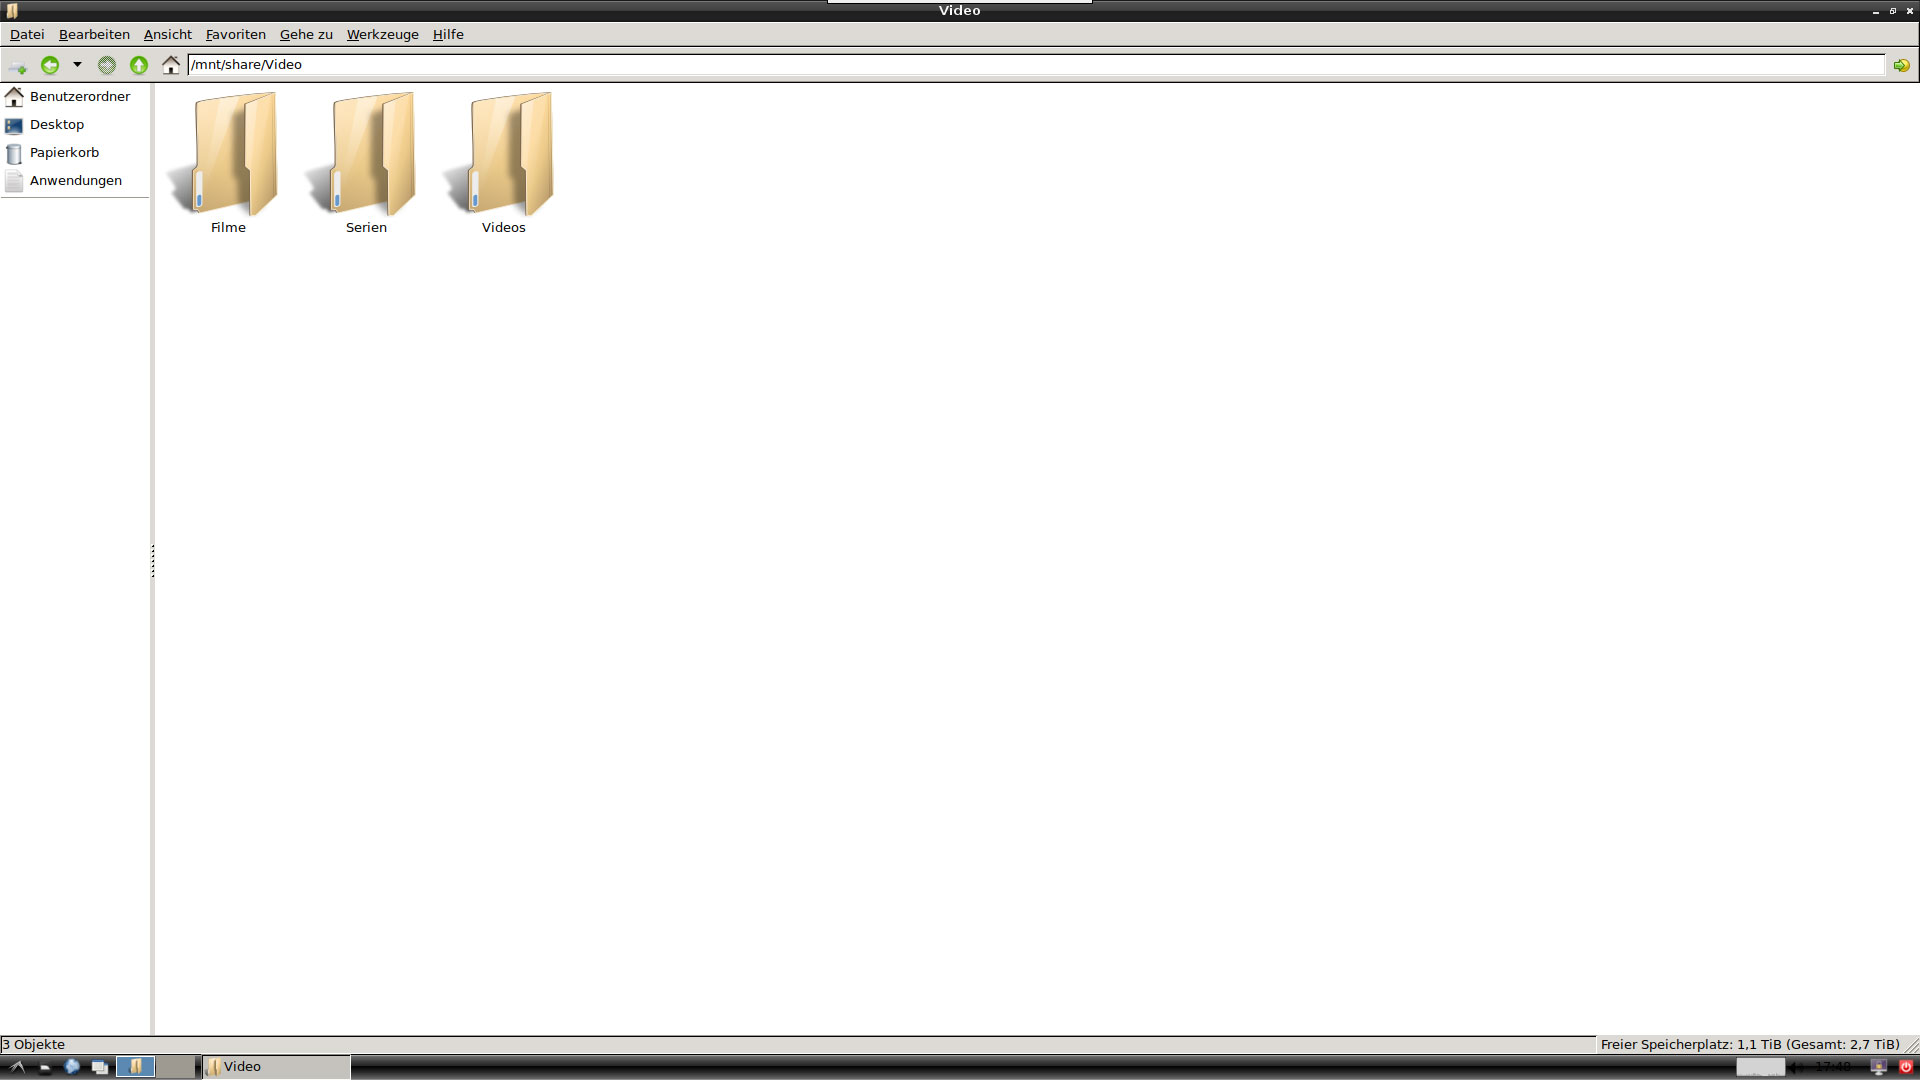
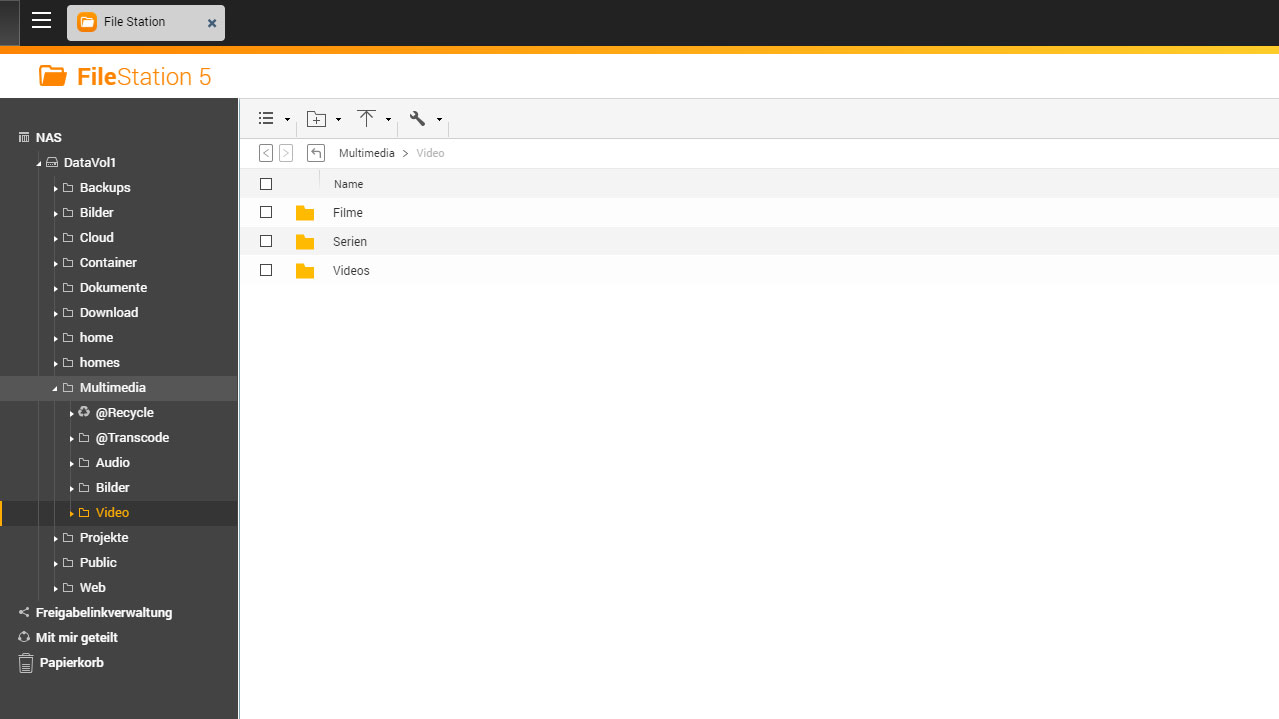
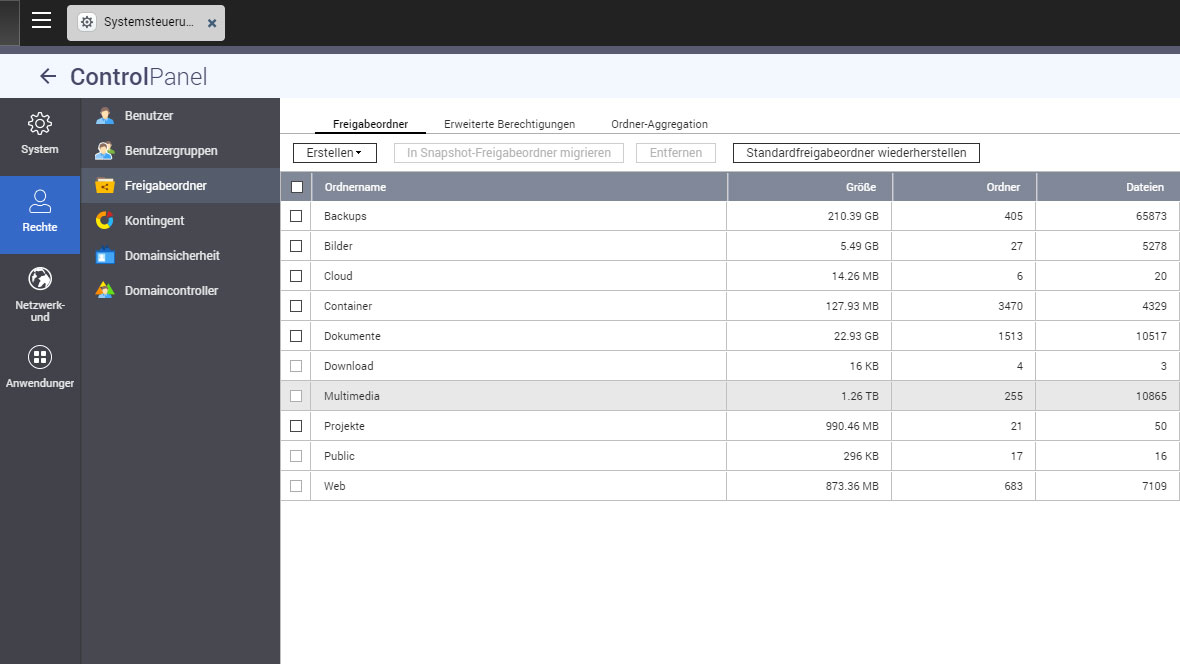
3. Adding a network adressTo add the network address of your media folder Max2Play, go to the tab „File System Mount“. We now want to add a new mountpoint. In the first field, we enter two slashes, followed by the IP address or hostname (for example, „MyNAS“) of our network storage. Add another slash behind it followed by the file path to the desired folder (for example …/root/home/media). The IP address of your network storage can be found in the web interface of your router. Otherwise, you can also have your network devices displayed by clicking on the blue button on the right. In the second field, we now write the file path to the folder in the Max2Play file system, which is then linked to the folder of the network storage (for example, /mnt/share). Please use only folders in the directory /mnt or /media within Max2Play. Depending on which file system protocol your network storage supports (usually nfs for Linux and cifs for Windows systems), you must now enter the corresponding protocol in the third field. In the last field you enter your user ID, that means the name and password of your login to the network storage that’s requested. Best copy the given line under the field and paste it. Then replace „name“ with your username and „pass“ with your password for the share. In any case, do not forget „sec=ntlm“ and, if you’ve used cifs before, „vers=1.0“ (depending on the version of SMB your NAS supports) in the last field! If you have problems finding the right parameters for your share, use the Help button. If everything has been entered correctly, you can click on „Save“. Now the folder of your network storage is accessible via the selected folder in the Raspberry Pi file system. |
|
|
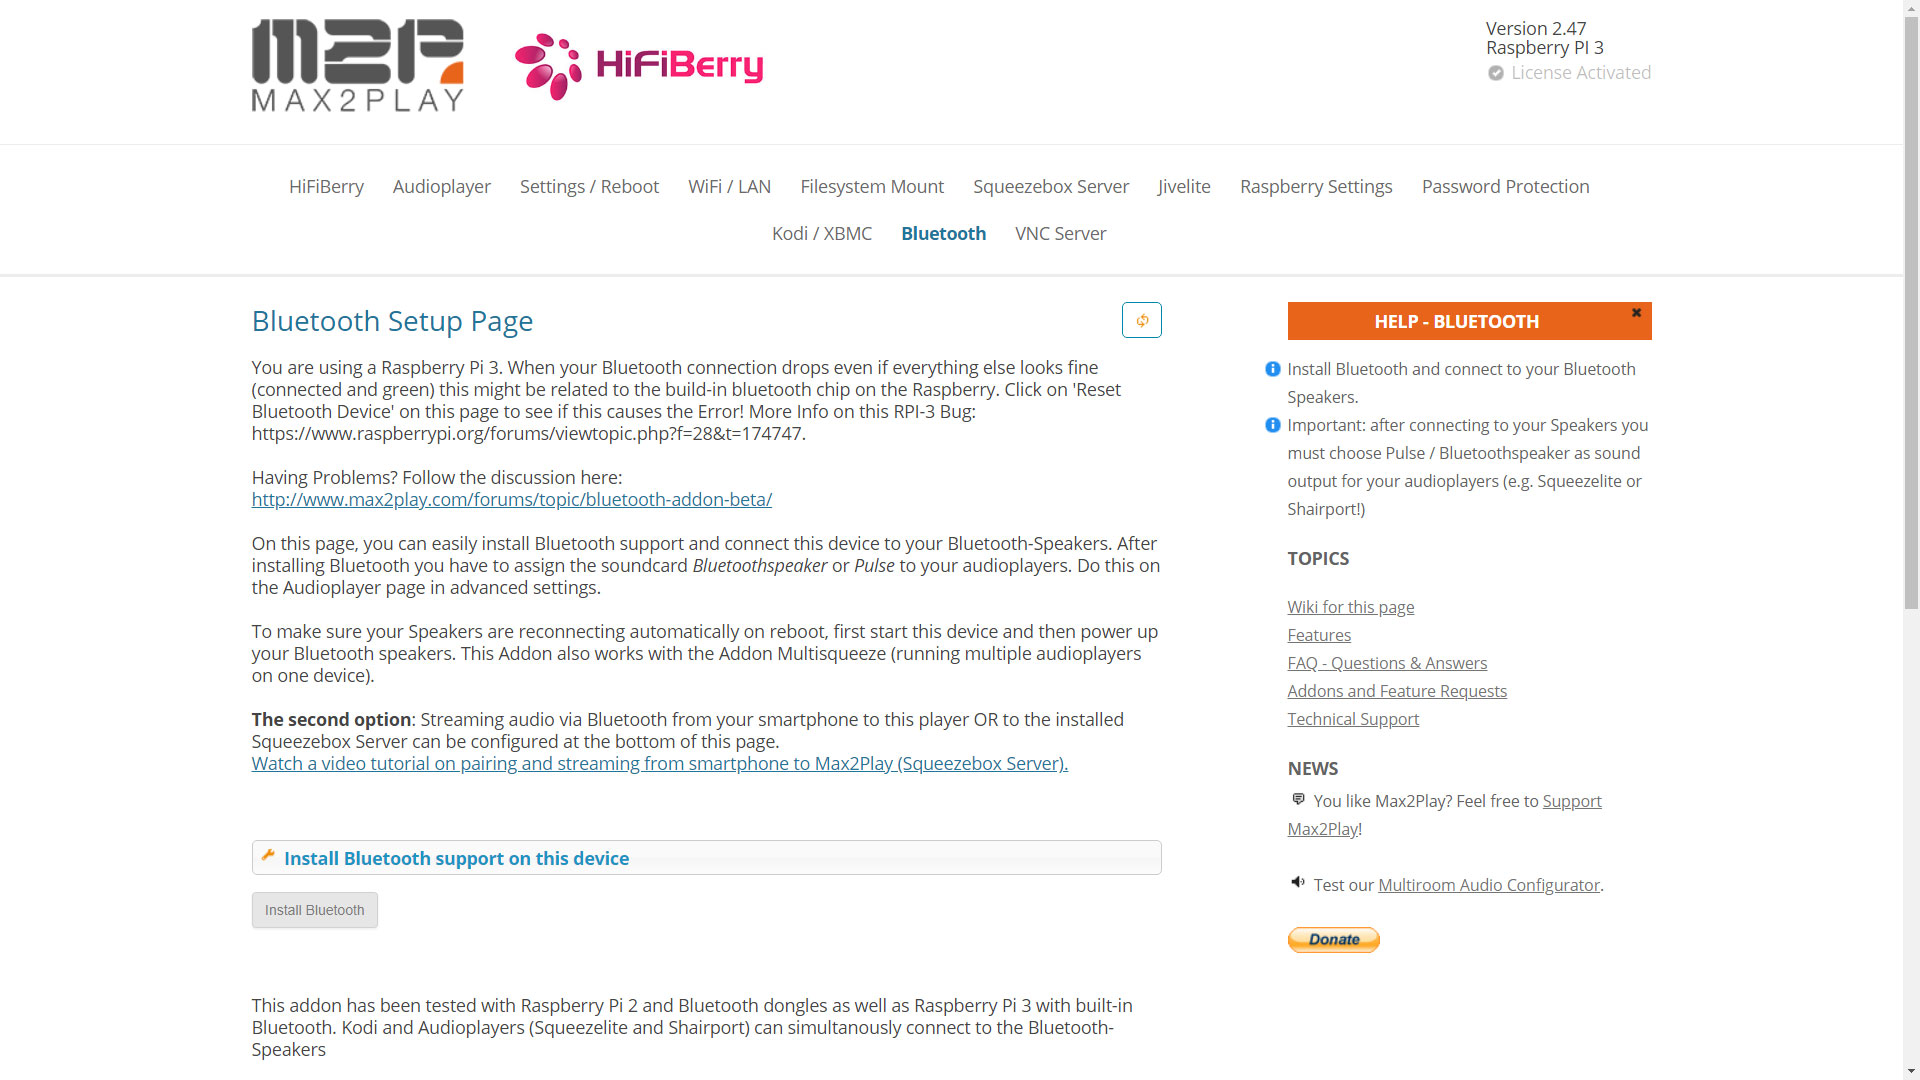
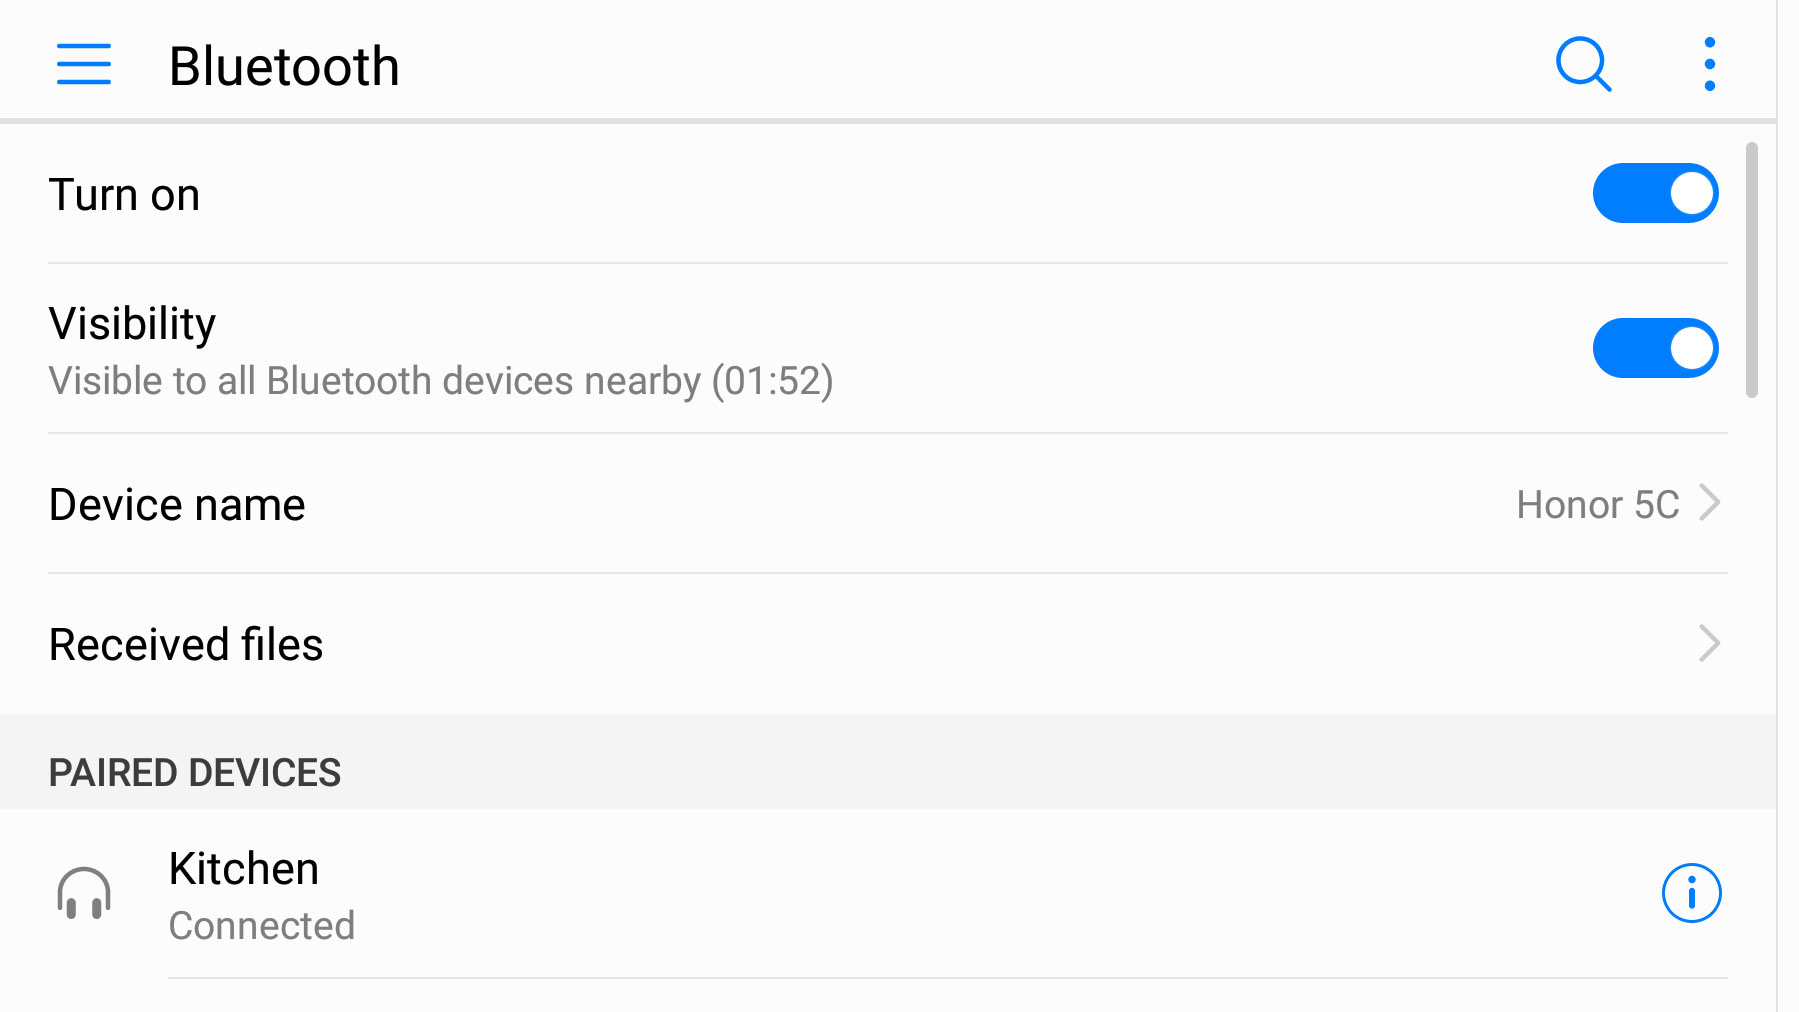
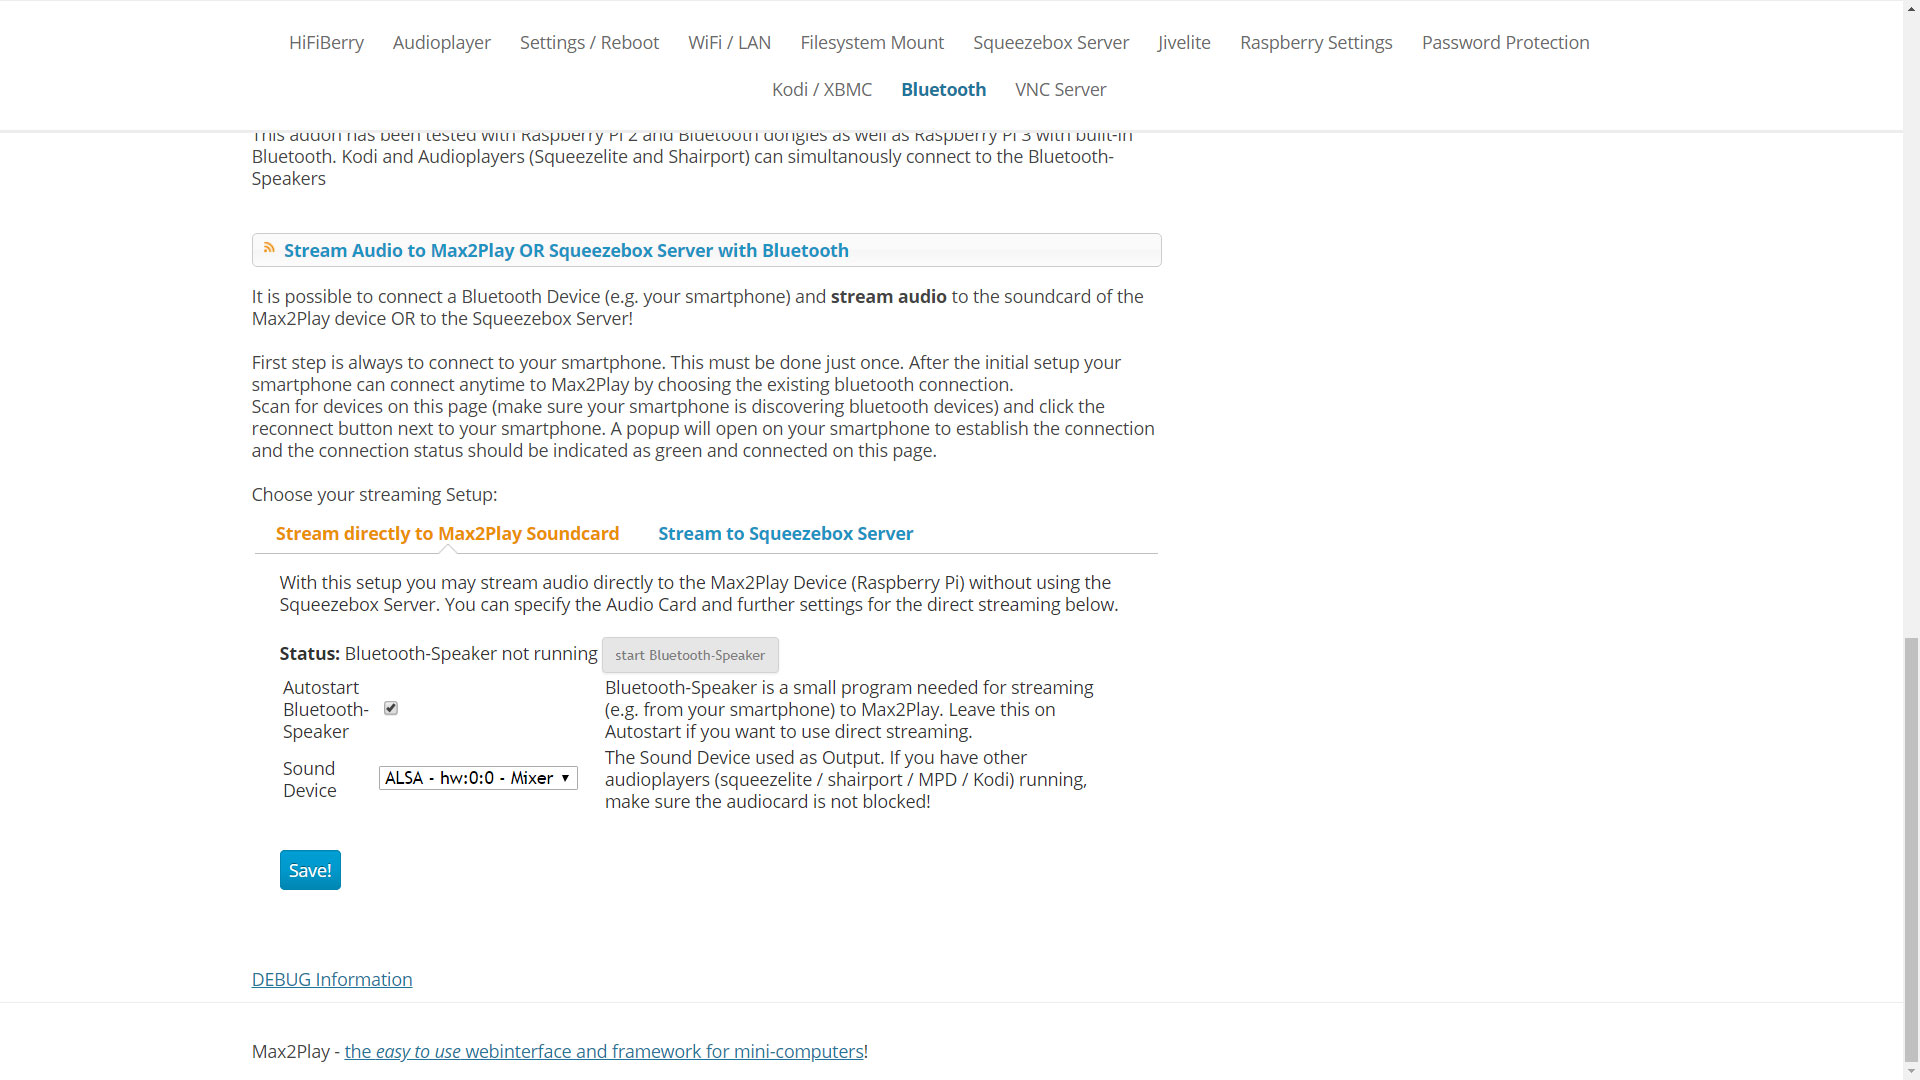
4. Installing BluetoothThe Bluetooth plugin is preinstalled with every Max2Play image. You can install the Bluetooth function by clicking on the corresponding button on the plugin page. The installation will take a few minutes. When you successfully installed it, you can turn on your bluetooth device, be it a speaker or a smartphone. Make sure it is visible to nearby devices and start scanning in Max2Play. After a successful search, you can pair your device by clicking on „Connect“. (You may still need to confirm the connection on your smartphone.) |
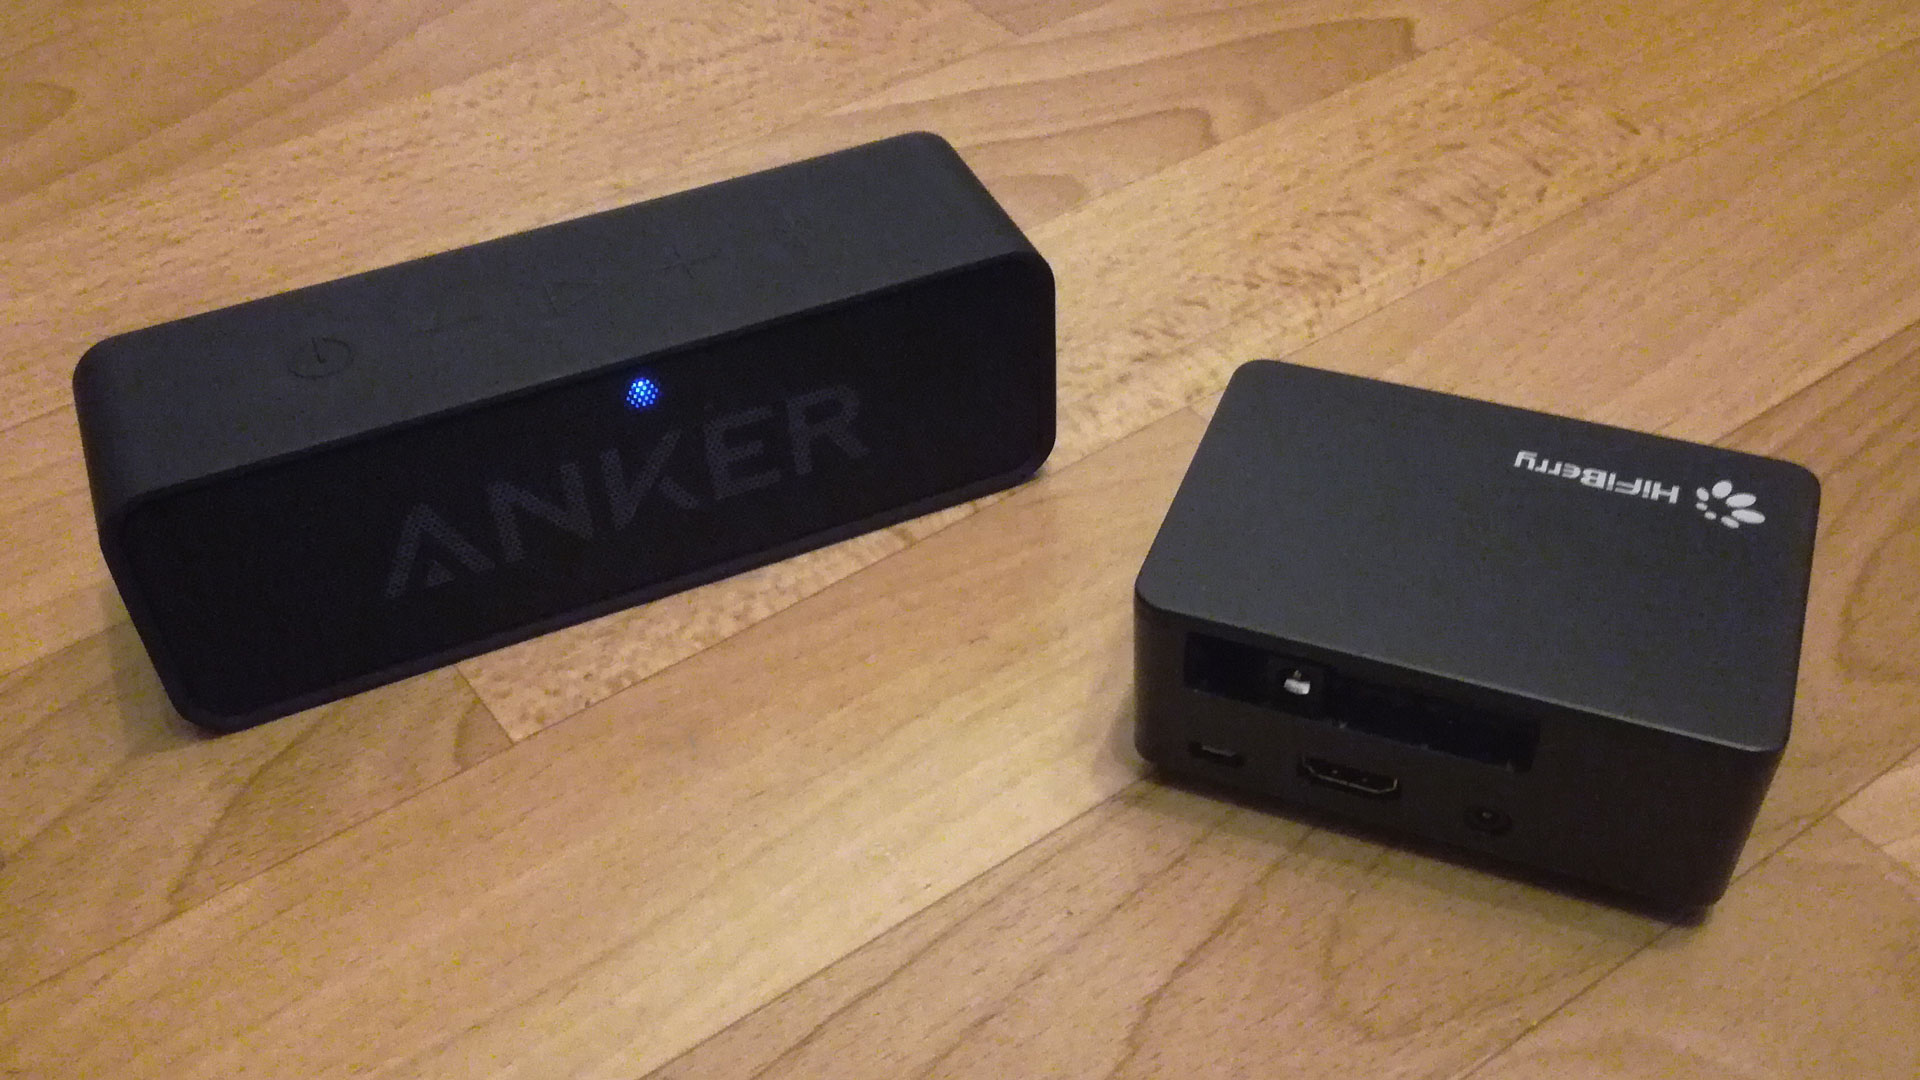
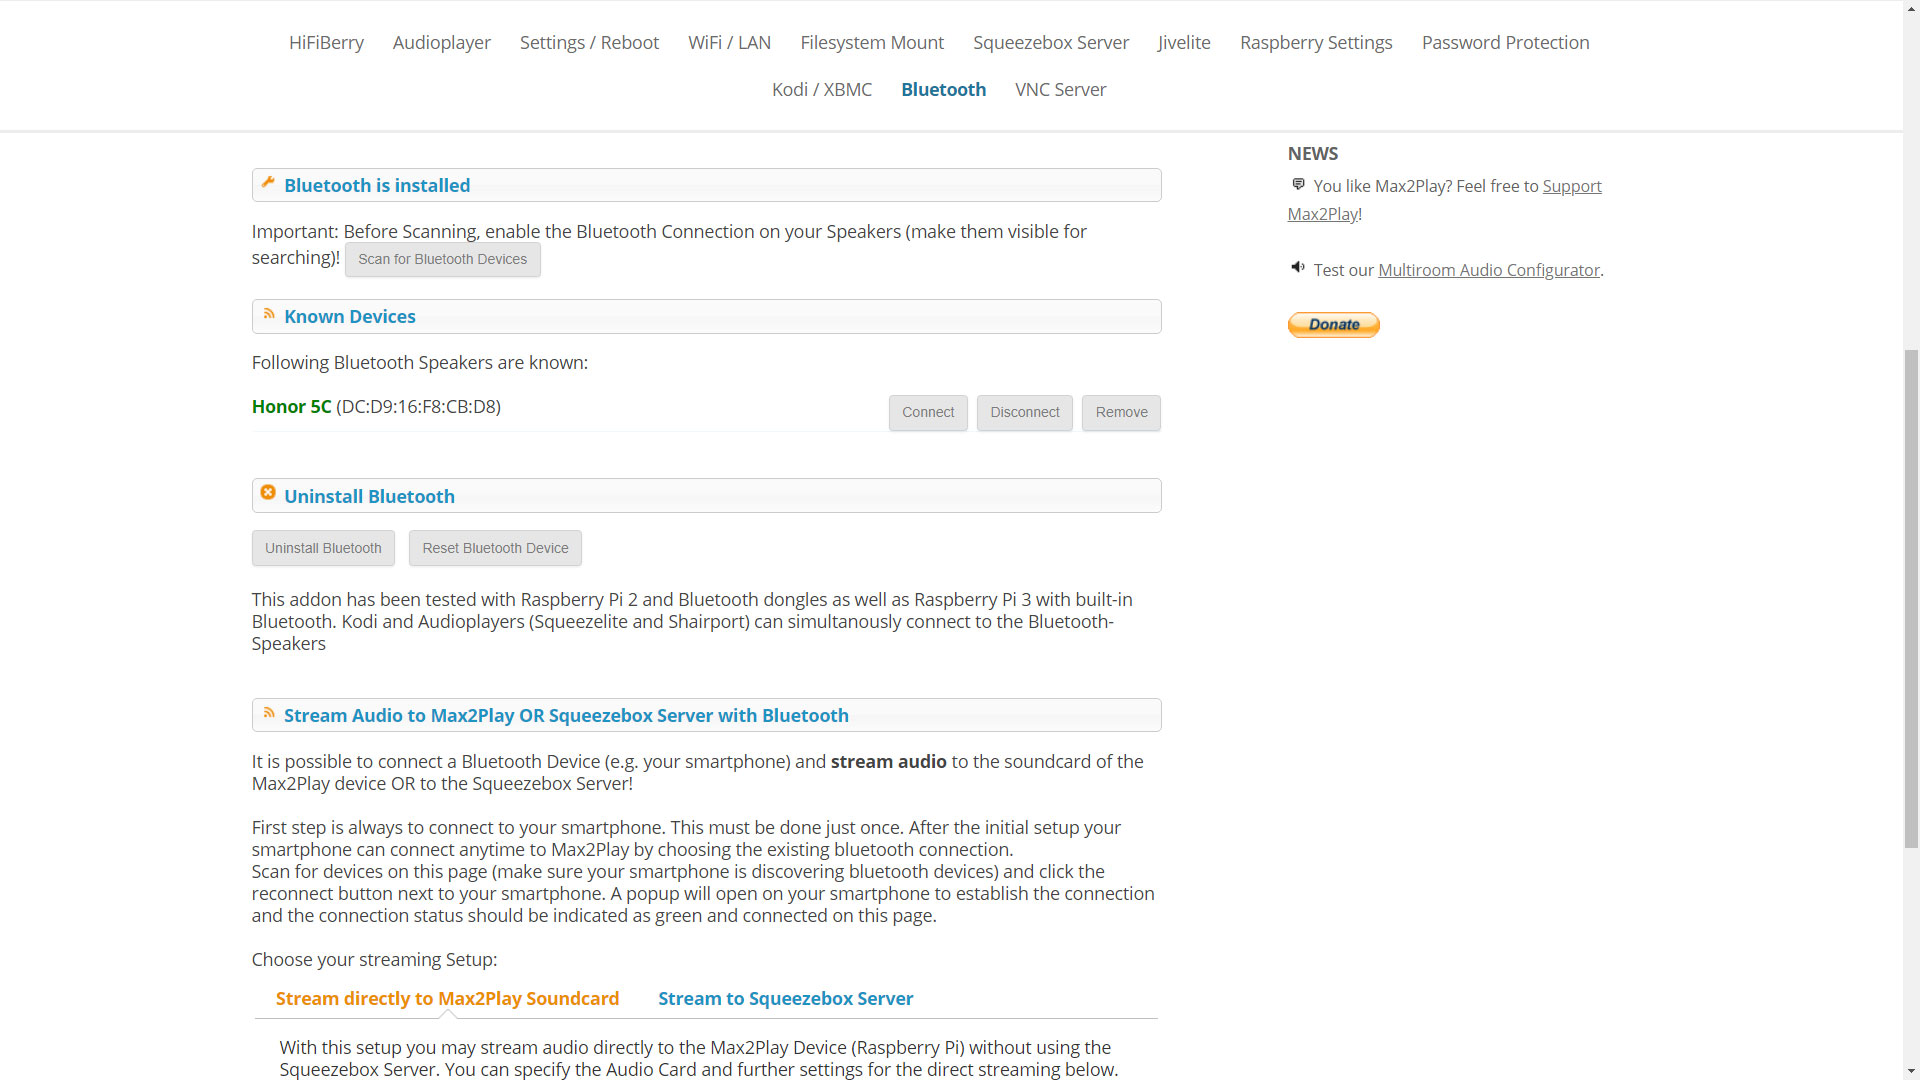
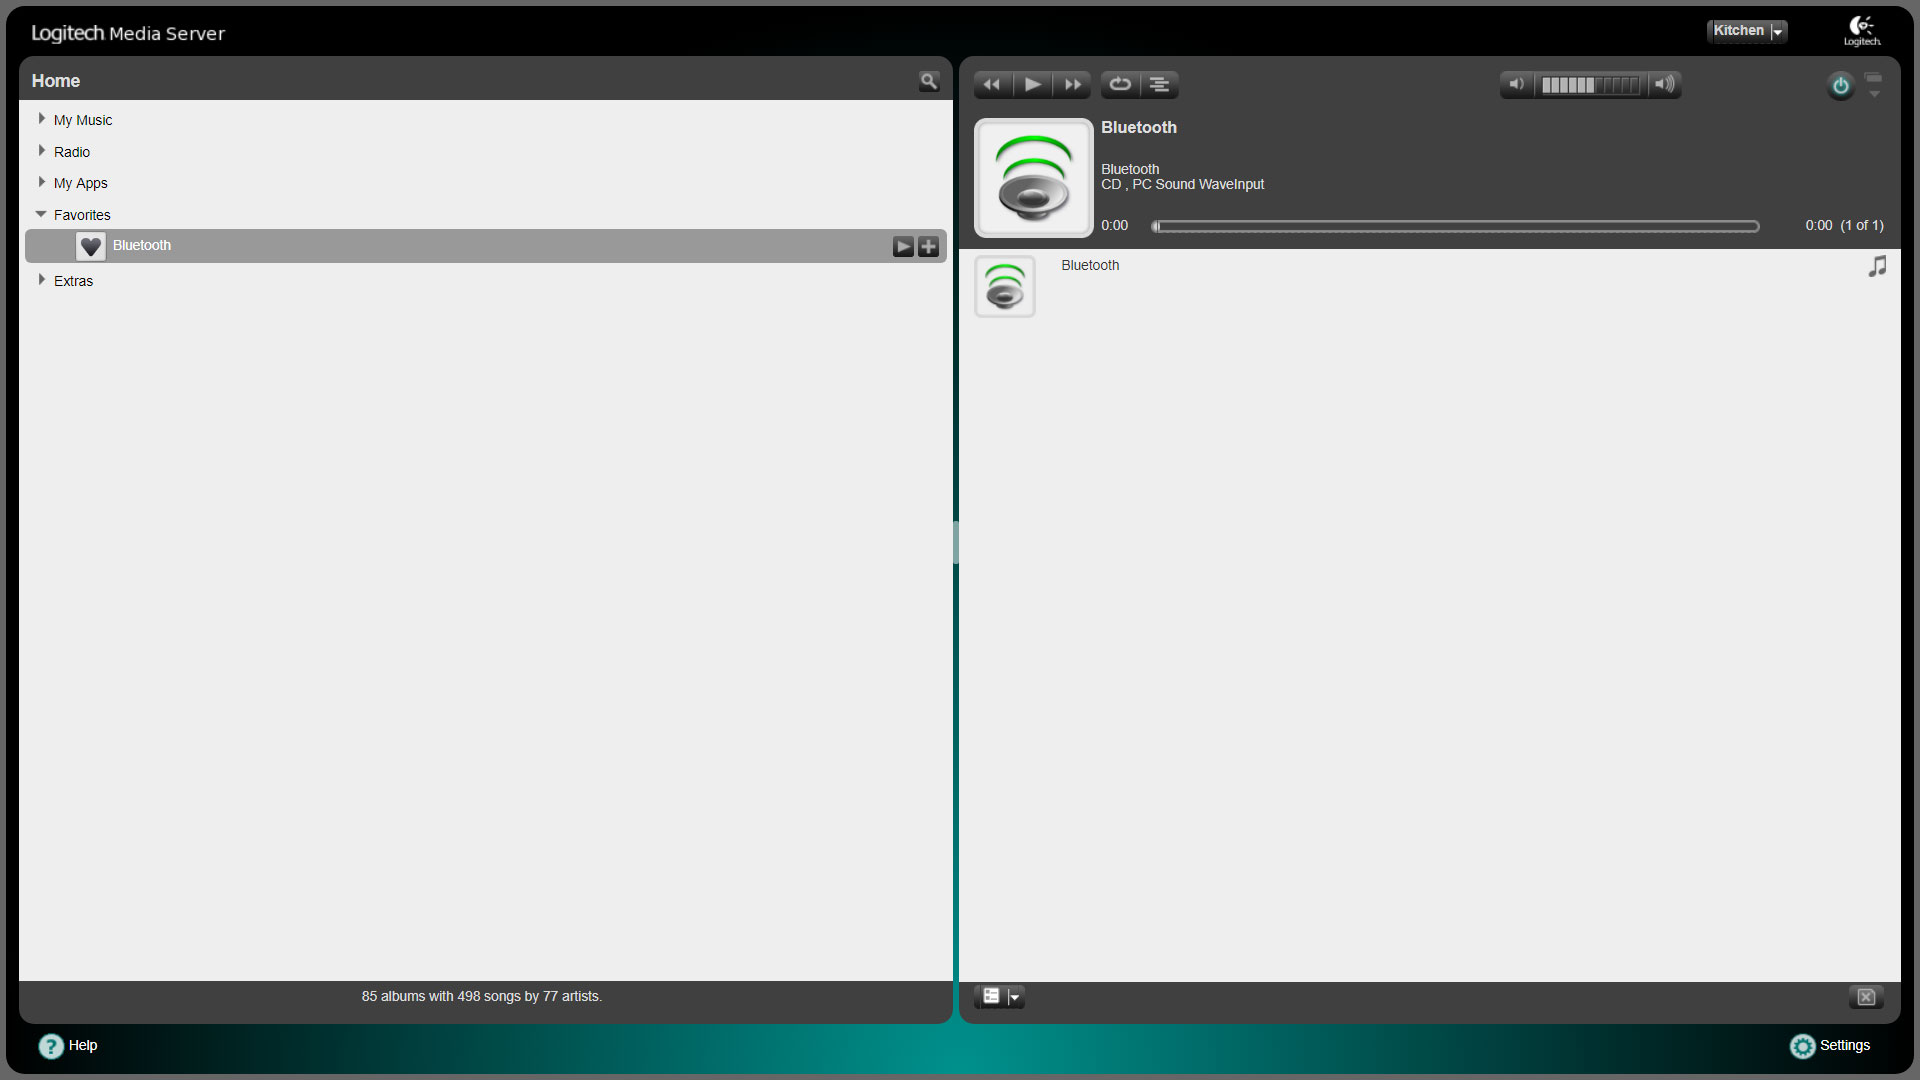
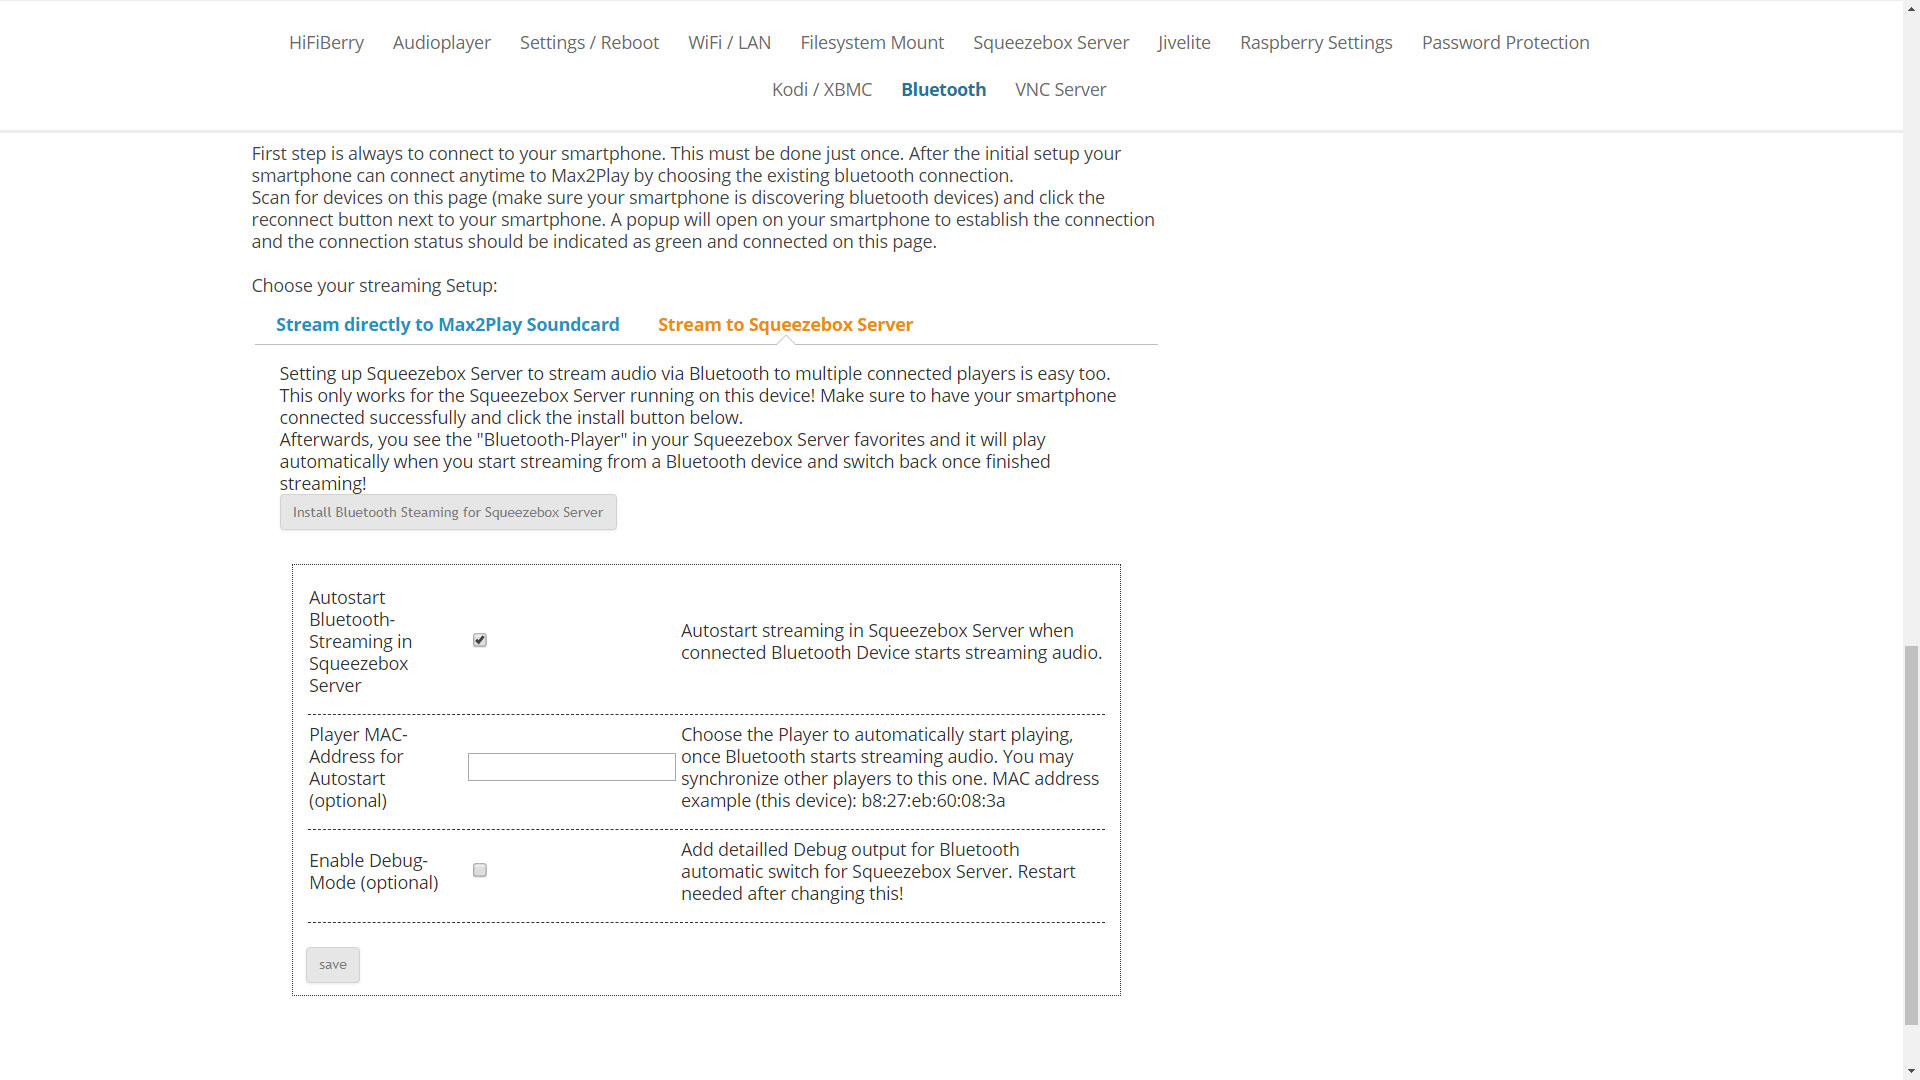
5. Using BluetoothEither you are using a bluetooth device as audio output or as input: Using a Bluetooth speaker as an audio output: In order to use your Bluetooth device as an audio output you have to declare it as an output for each service. In Squeezelite you can find this option in the advanced settings. In Kodi you can set the audio output under Settings/System/Audio. Using a Bluetooth device as an audio source: When using a smartphone or tablet as a Bluetooth audio input device for your Max2Play devices, there are two options: Either you stream directly to the sound card and use Bluetooth as an alternative player to Squeezelite or you stream to the Squeezebox Server. Both can be installed or started on the Bluetooth plugin page. With most modern bluetooth devices, the stream to the Squeezebox server (which must run on the same Max2Play device on which the Bluetooth feature is activated) will be prioritized over other streams as soon as playback starts on the smartphone. In the Squeezebox Server web interface you will find it under „Favorites“. |
|


