Now that we have finished our setup in the kitchen, it’s time to focus on the last zone of our multiroom system with Raspberry Pi and DAC sound card in the bedroom. You will learn how to assemble such a Max2Play bundle and connect it to your audio devices. Furthermore, I will show you some more tips how you can control your Max2Play devices with so-called APIs and how to integrate them in home automation with the OpenHAB Server.
Schlafzimmer
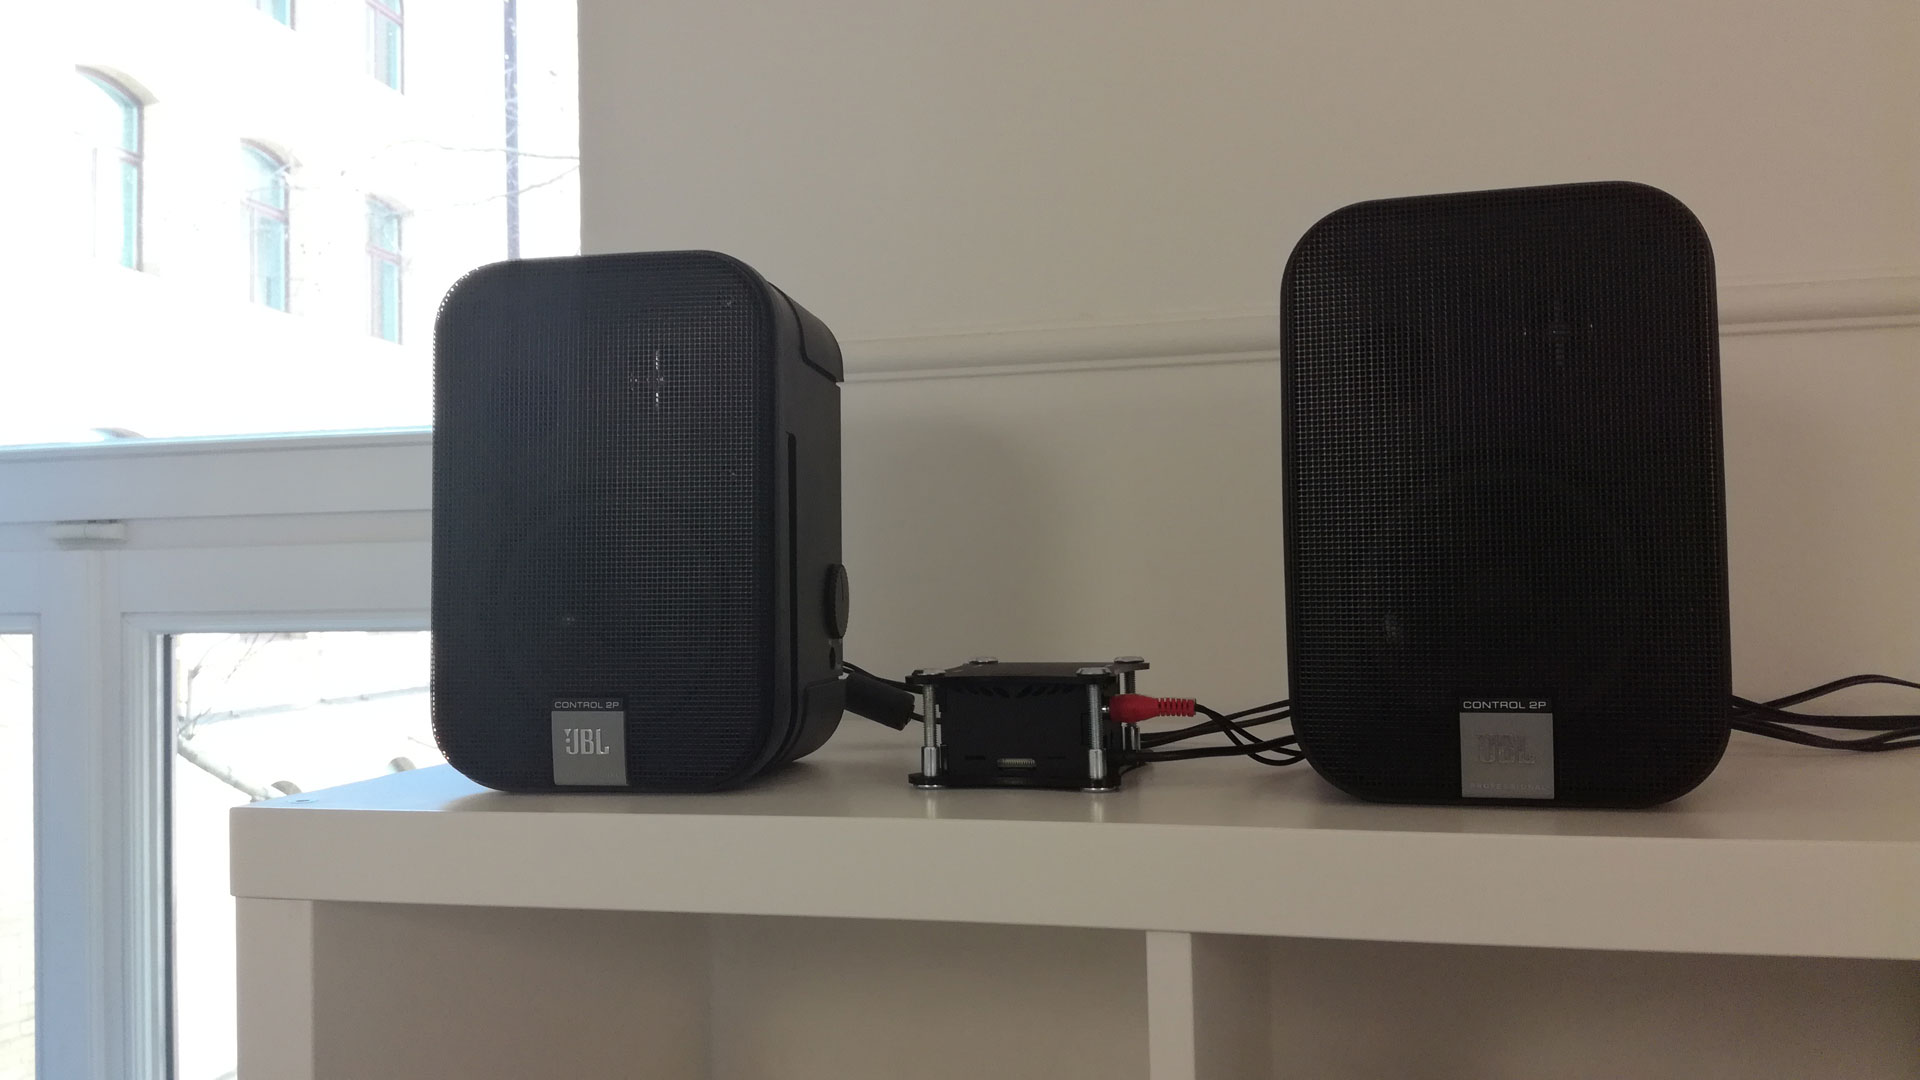
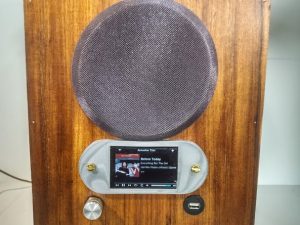
The choice for the bedroom fell on a DAC sound card to use active speakers directly with the Pi. An amplifier setup would have been possible here, too. As opposed to passive speakers, the active ones already have an integrated amplifier. They are connected via cinch (RCA) or audio jack cables.
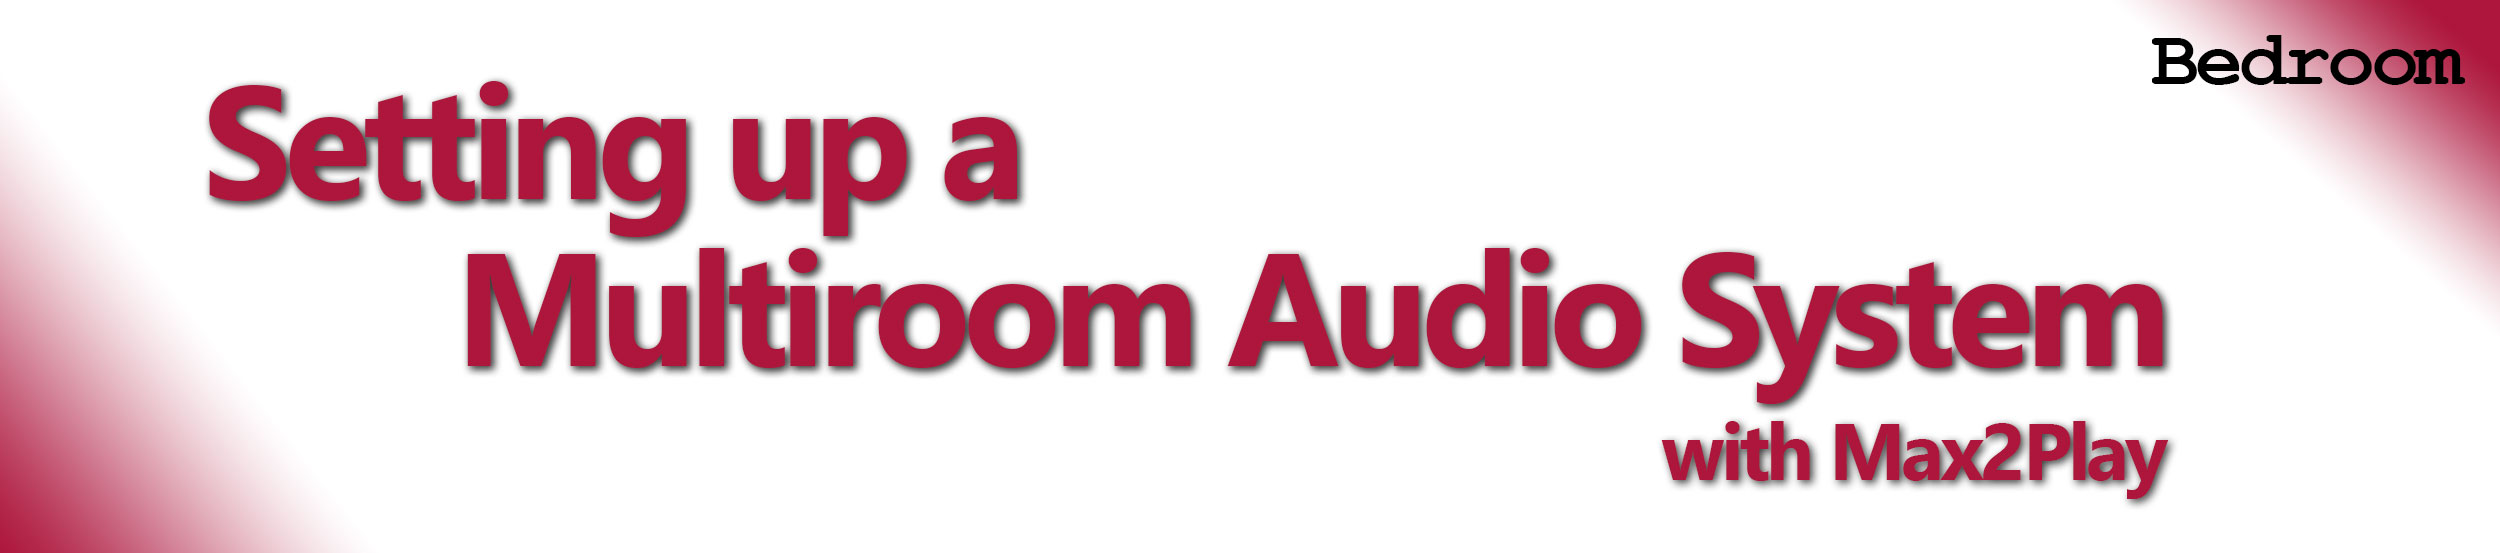
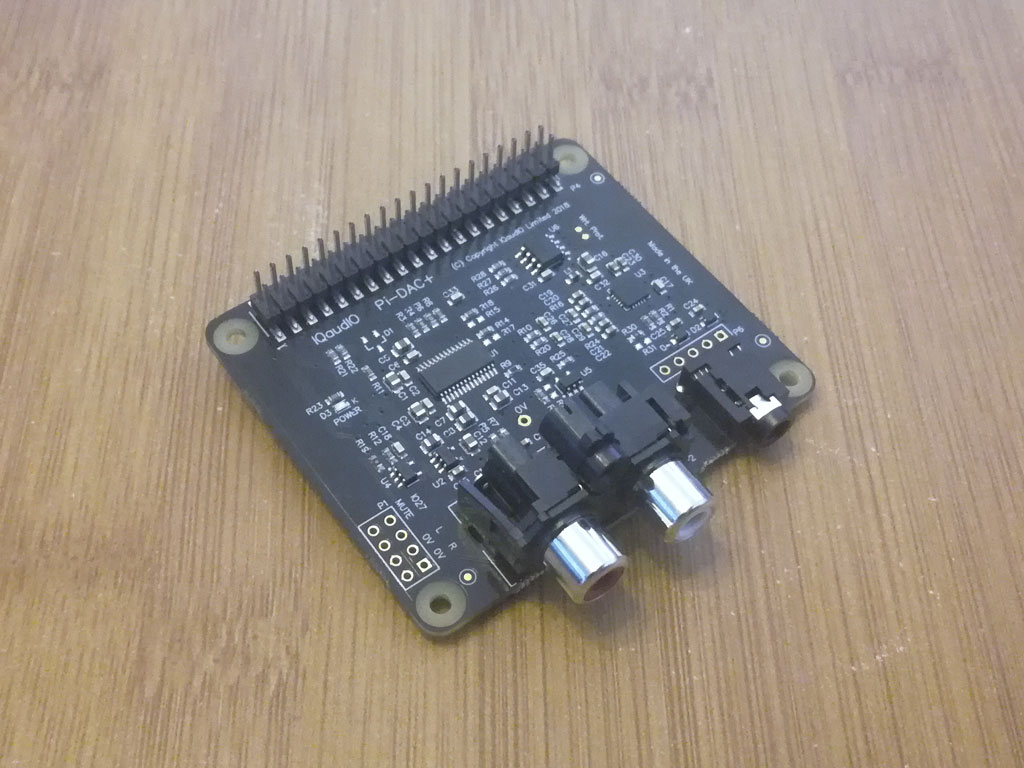
My sound card choice for this zone was the NEW IQaudIO Pi-DAC+ sound card since it is a good sound card for a great value. With Max2Play’s bundle deal you can get all necessary components starting at 119,99€.
To find out which sound card suits your setup best, you may consult the Max2Play Multiroom Audio Configurator or the Sound Card Comparison Charts for further information.
How to Assemble the Bundle
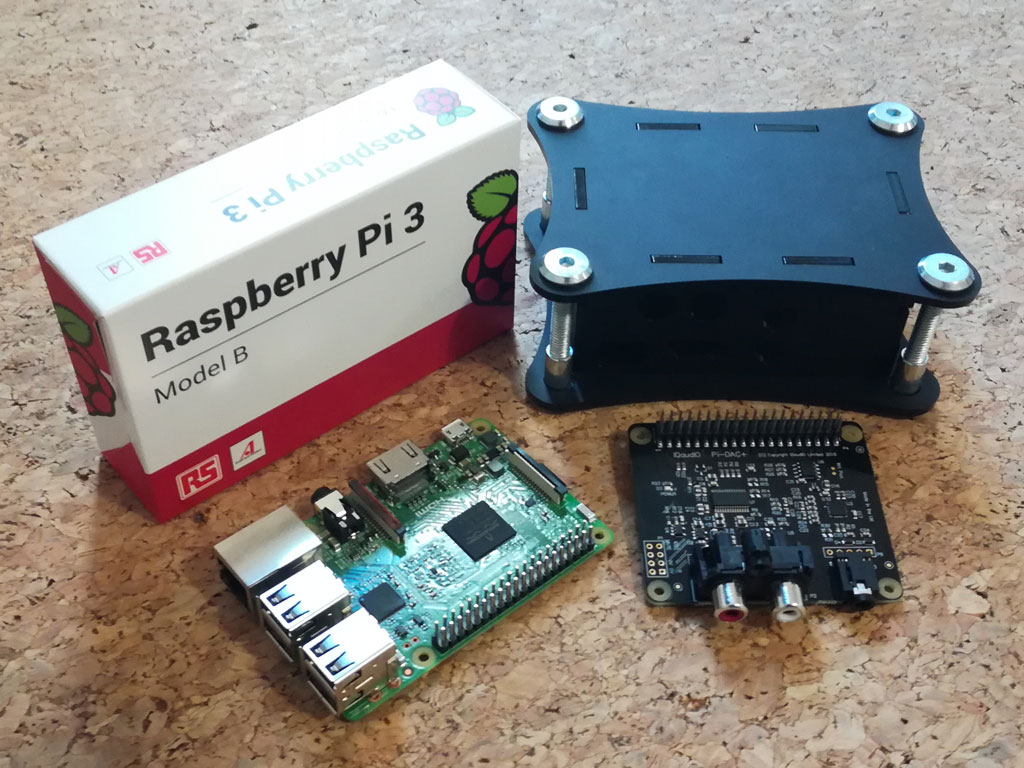
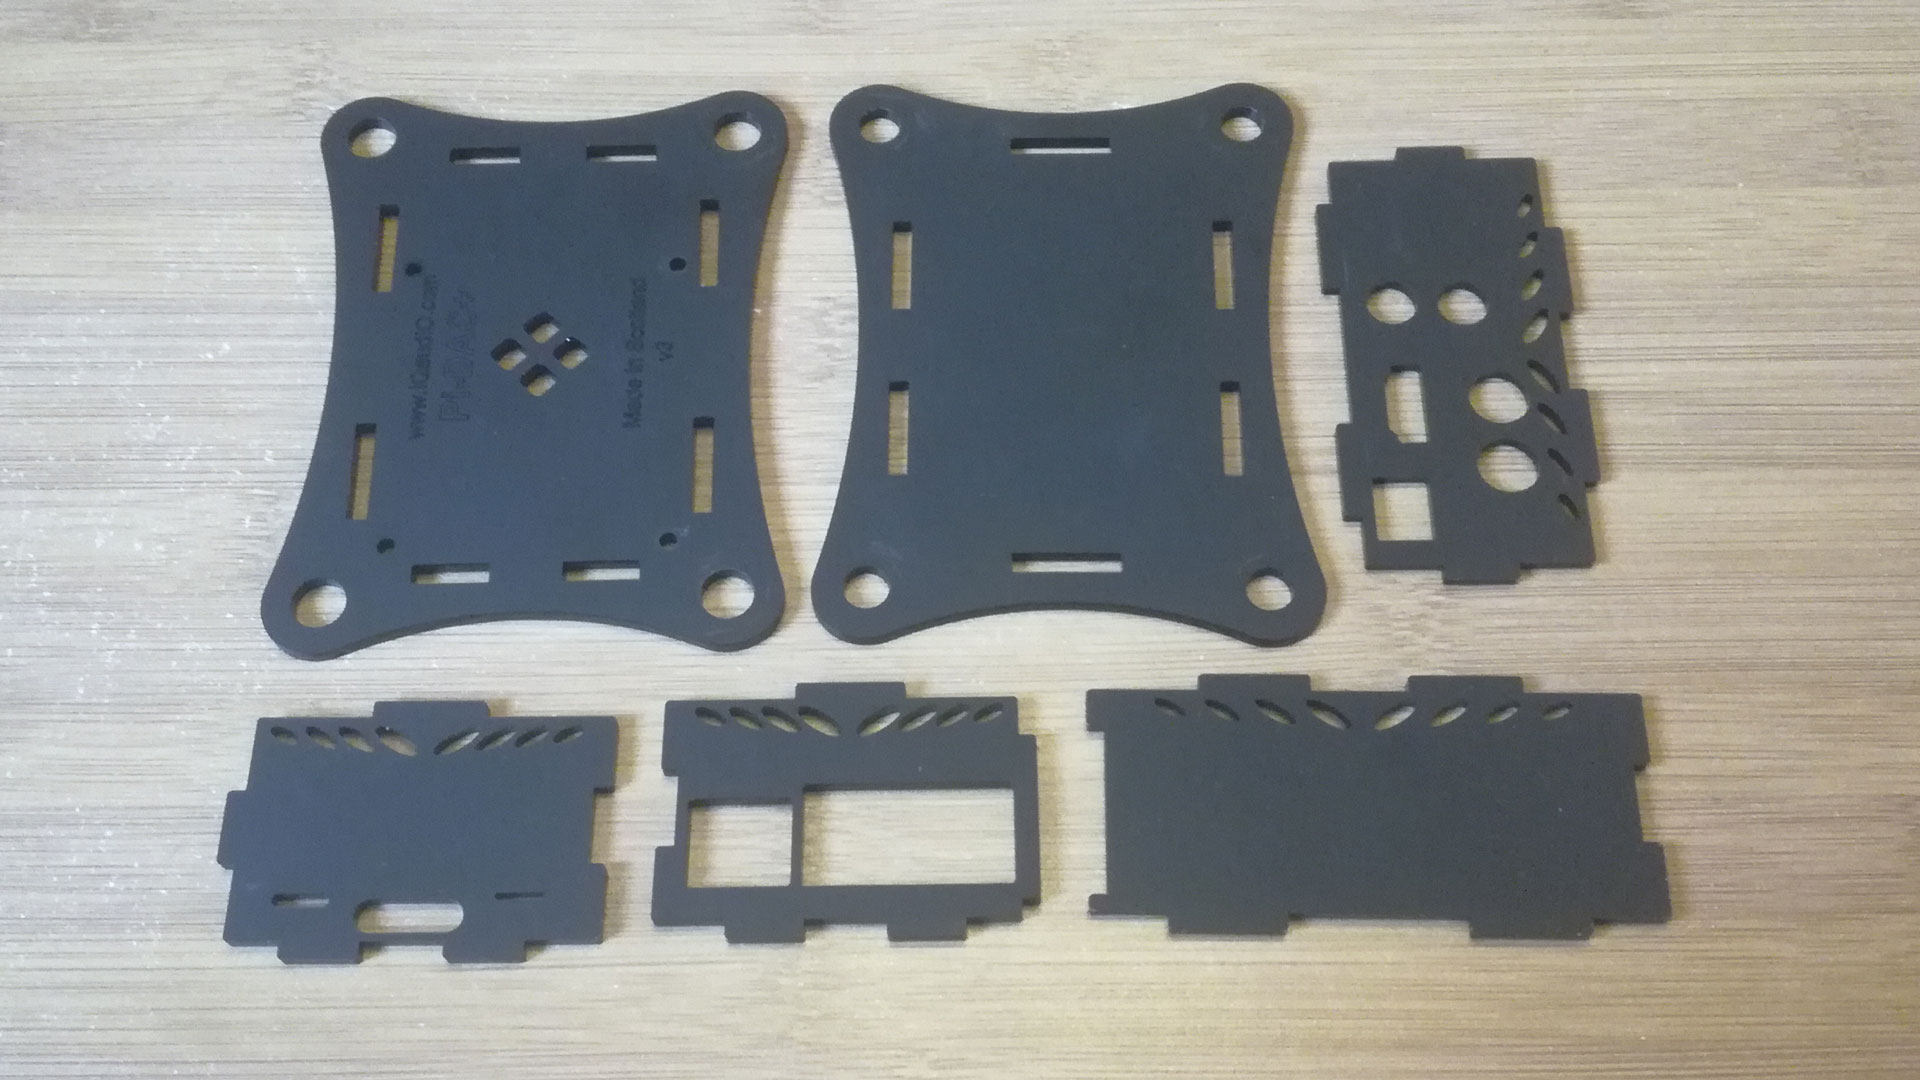
1. UnpackingThe bundle contains the following parts:
|
|
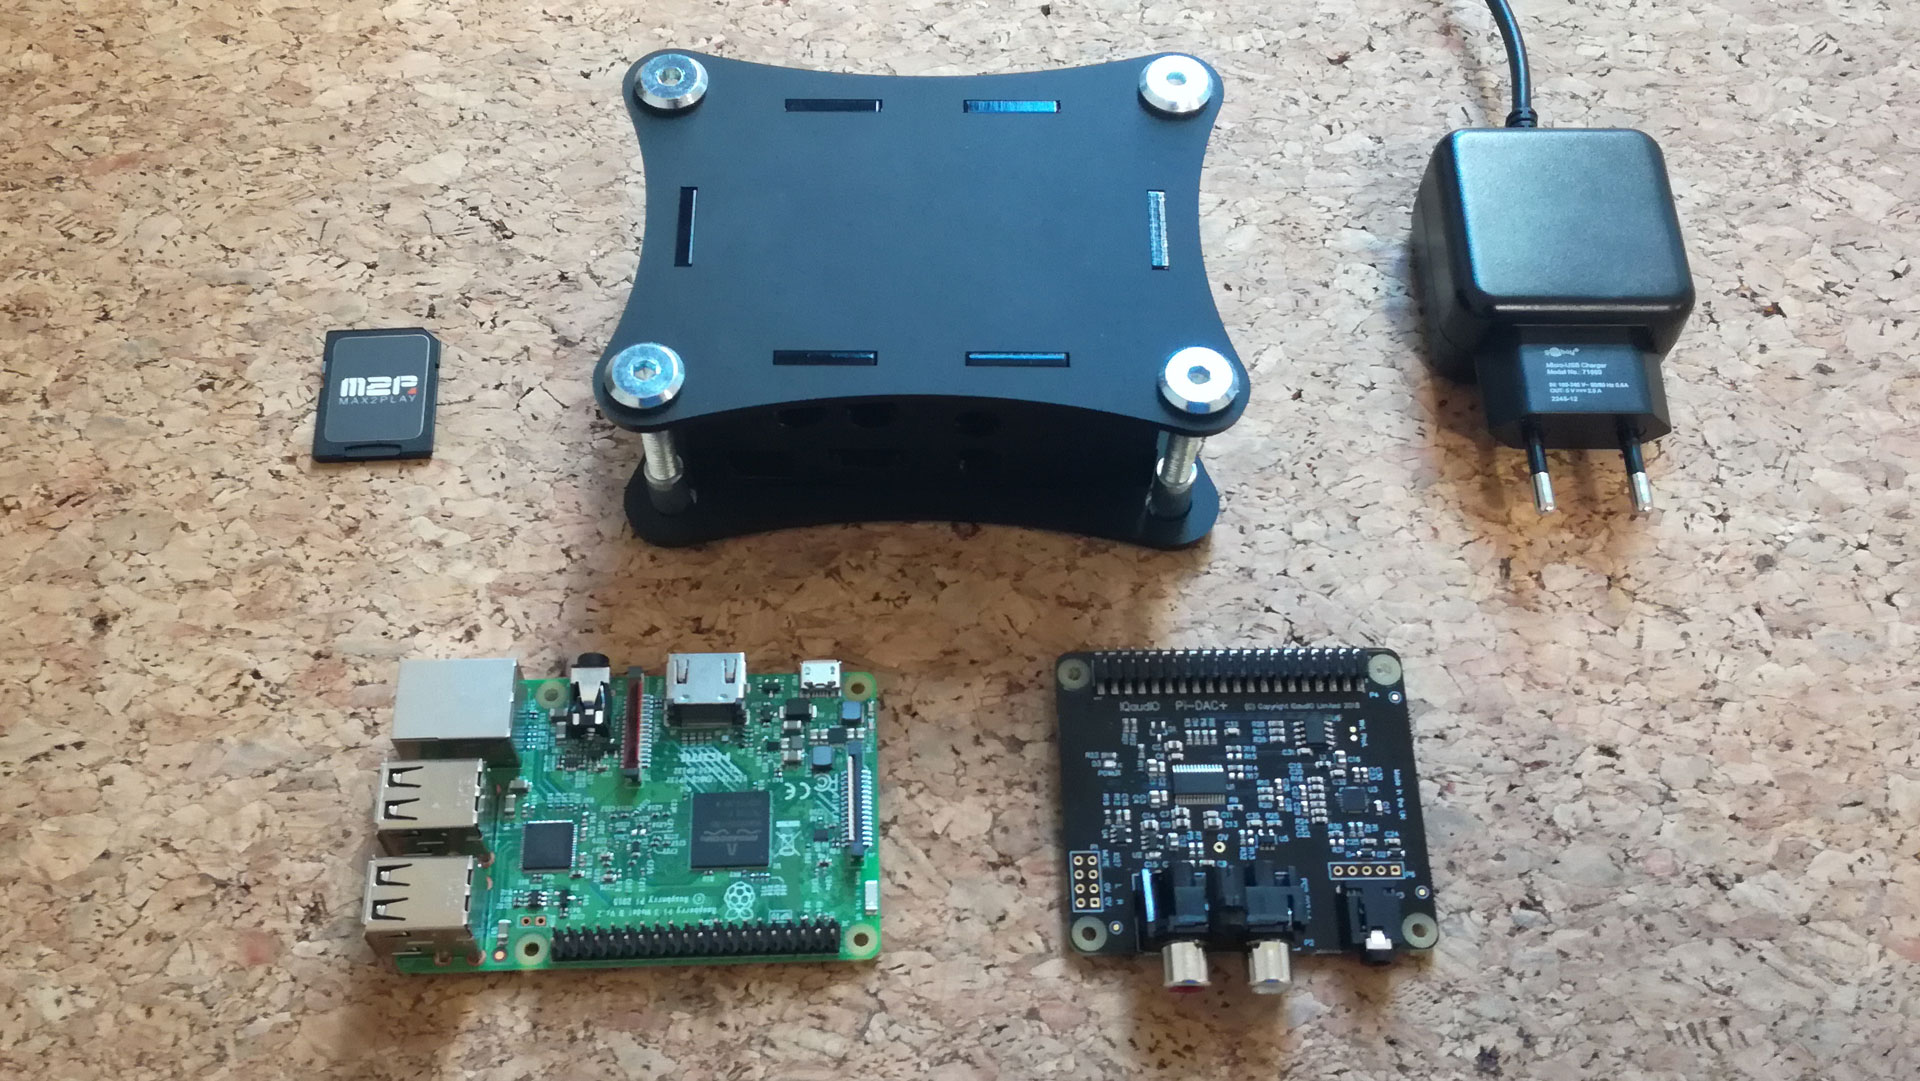
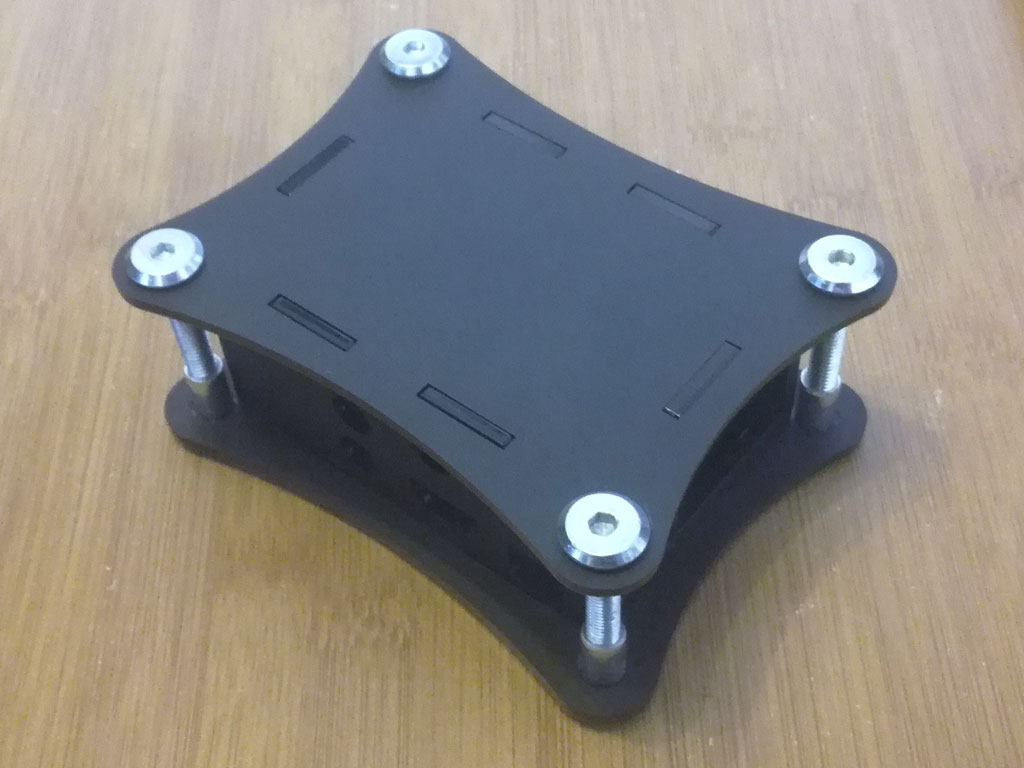
2. Lets Get Started!First you have to guide the 4 small metal screws through the corresponding holes on the Raspberry from below and fix them with the metal spacers from the other side, as seen in this picture. |
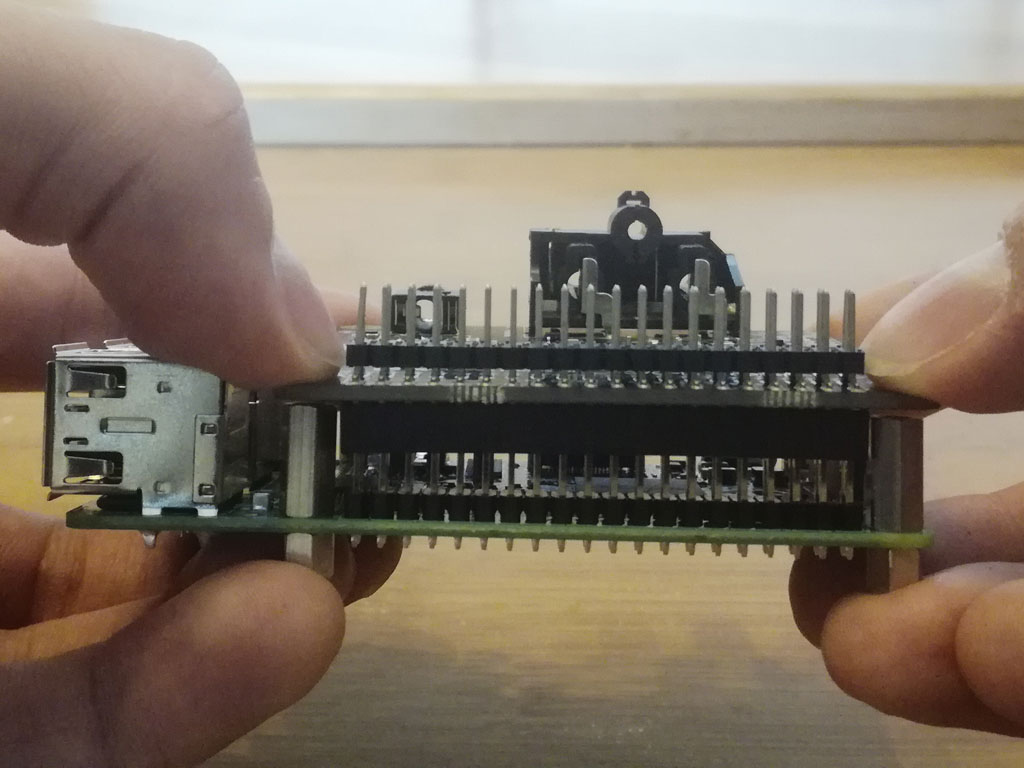
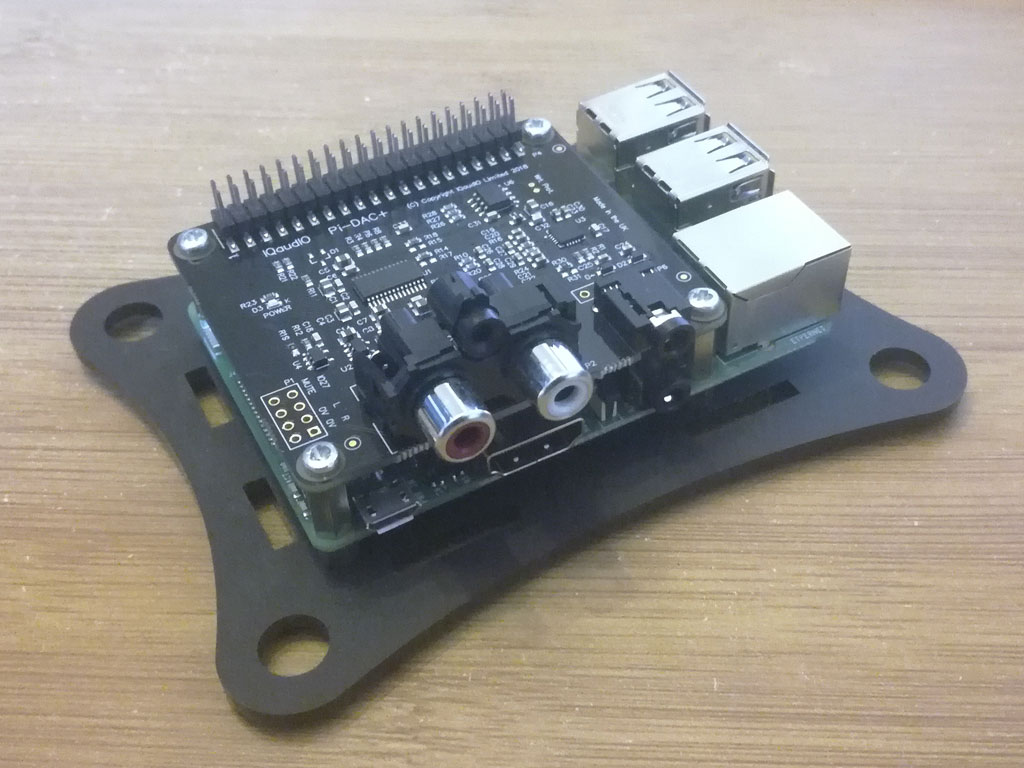
3. Putting the Boards TogetherNow you can put the sound card ontop of the Raspberry Pi. That’s what the so-called GPIO pins are intended for. These are 20 small pin pairs that provide for the transfer of data between sound card and Pi. You have to hold Pi and sound card as I pictured here and gently push the card down until the spacers sit firmly on the Pi. After that, the remaining screws have to be screwed from below through the holes of the Pi into the spacers. Now insert the Max2Play SD card into the corresponding slot. If you have not purchased an SD card with a pre-installed Max2Play image, you can read in our Wiki how to burn the image yourself to an SD card. |
|
|
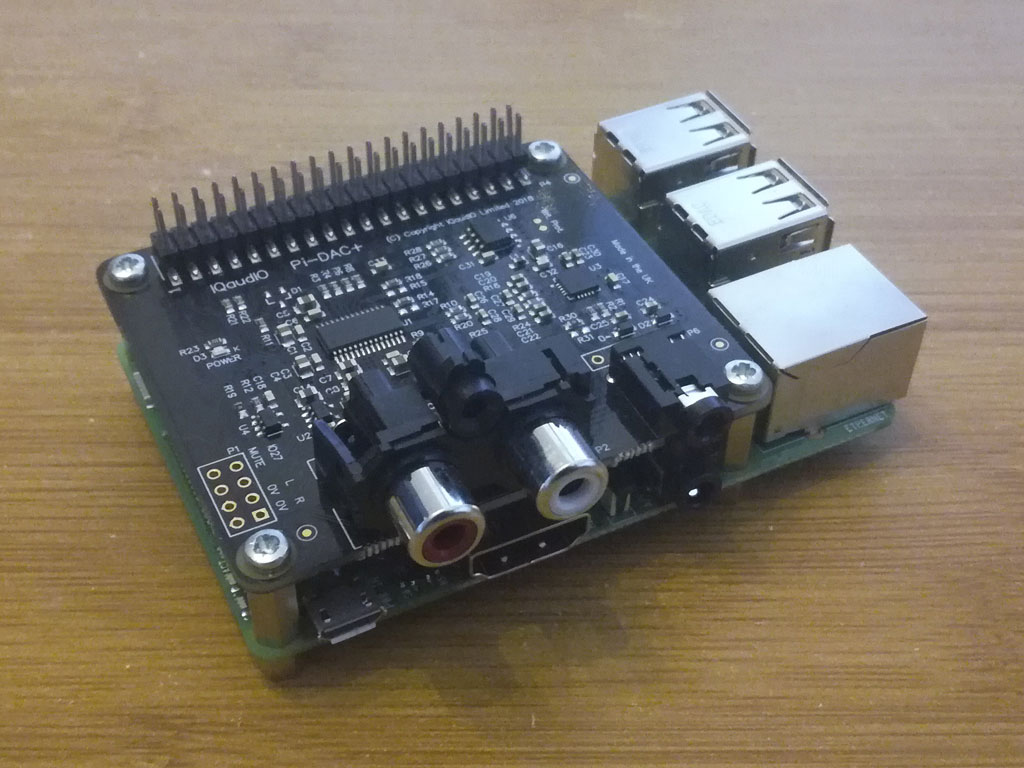
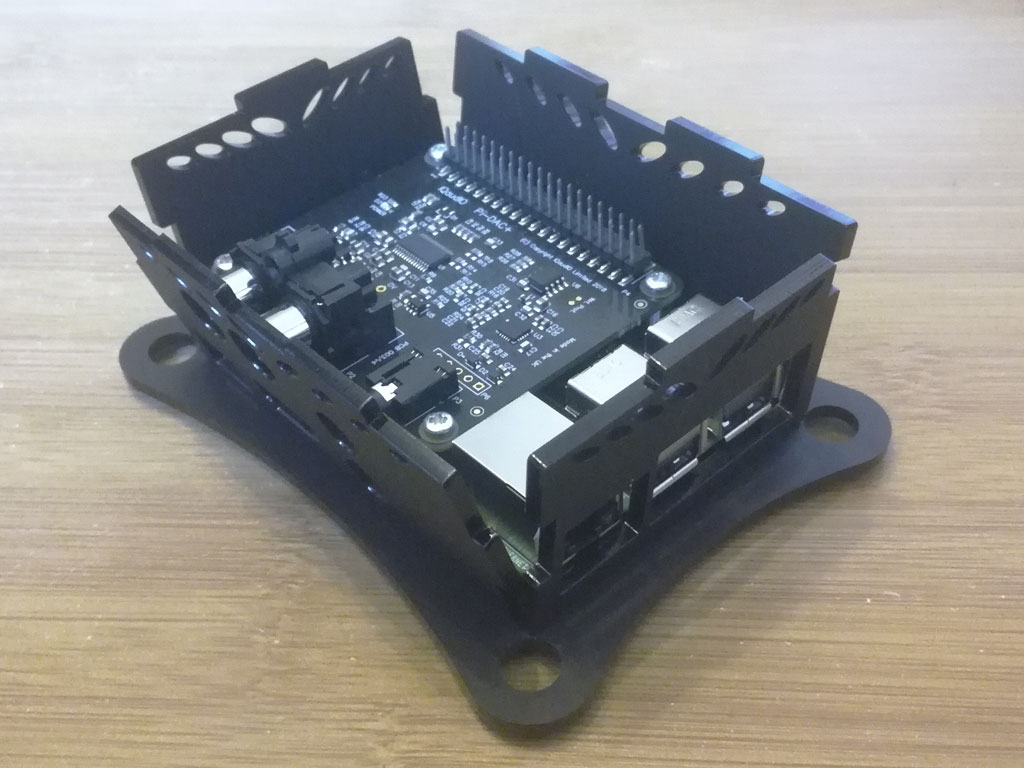
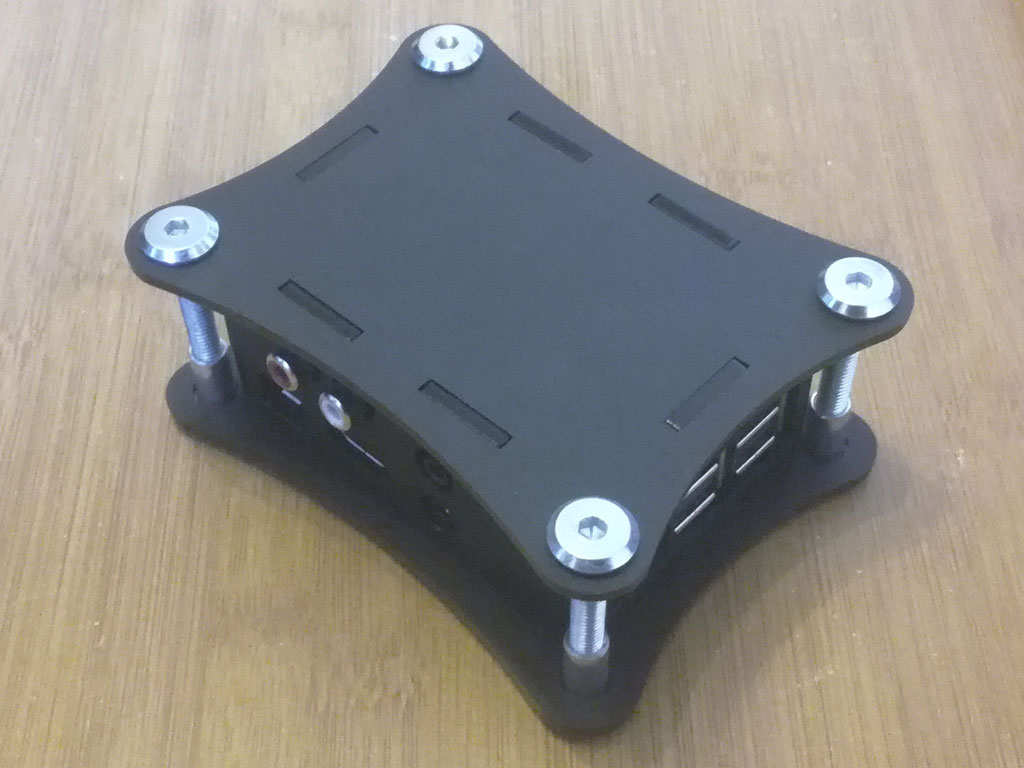
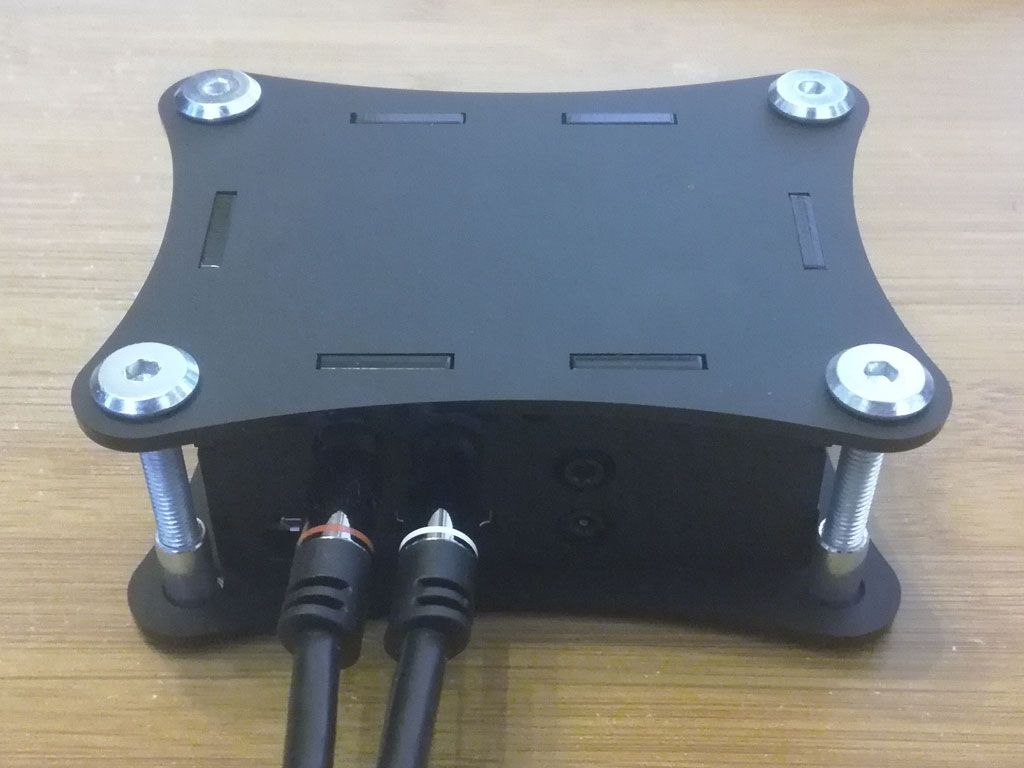
4. The CaseRemove the safety film from all panels. Put the Pi on top of the bottom panel and secure it with the remaining 4 screws. To add the side panels, you might have to loosen the screws a little. Adhere to the corresponding holes on the bottom panel and the Pi’s ports. When all side panels are assembled, you can add the top panel onto them. Now you can secure the whole system by fastening the four large metal spacers on each corner of the case. |

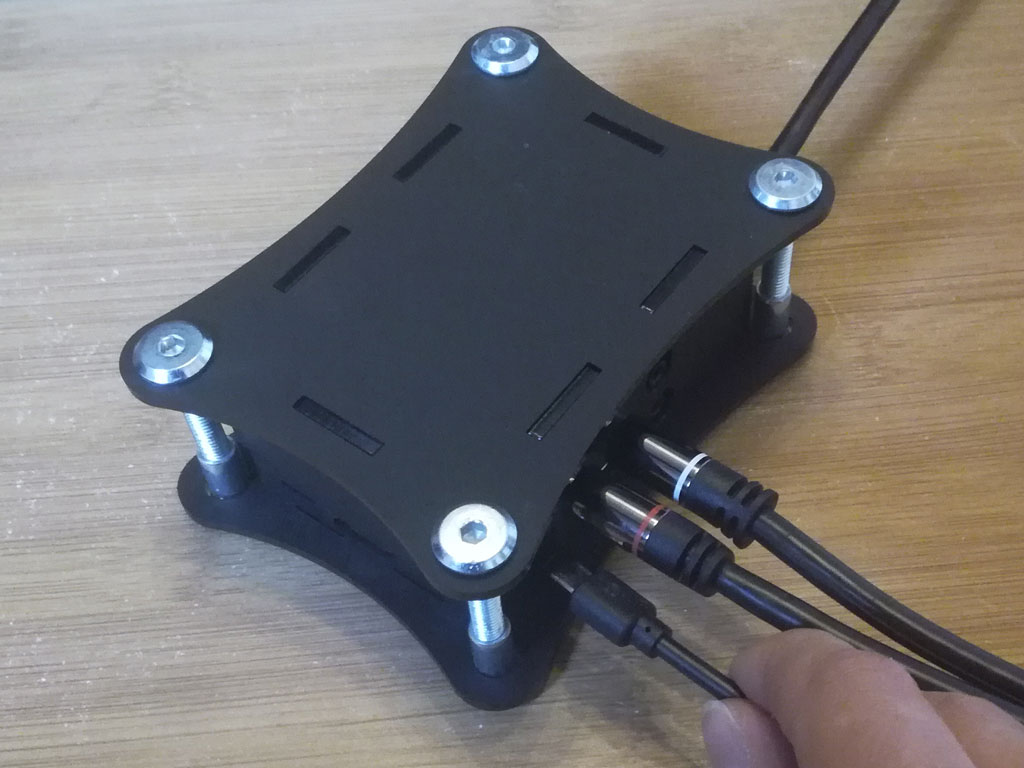
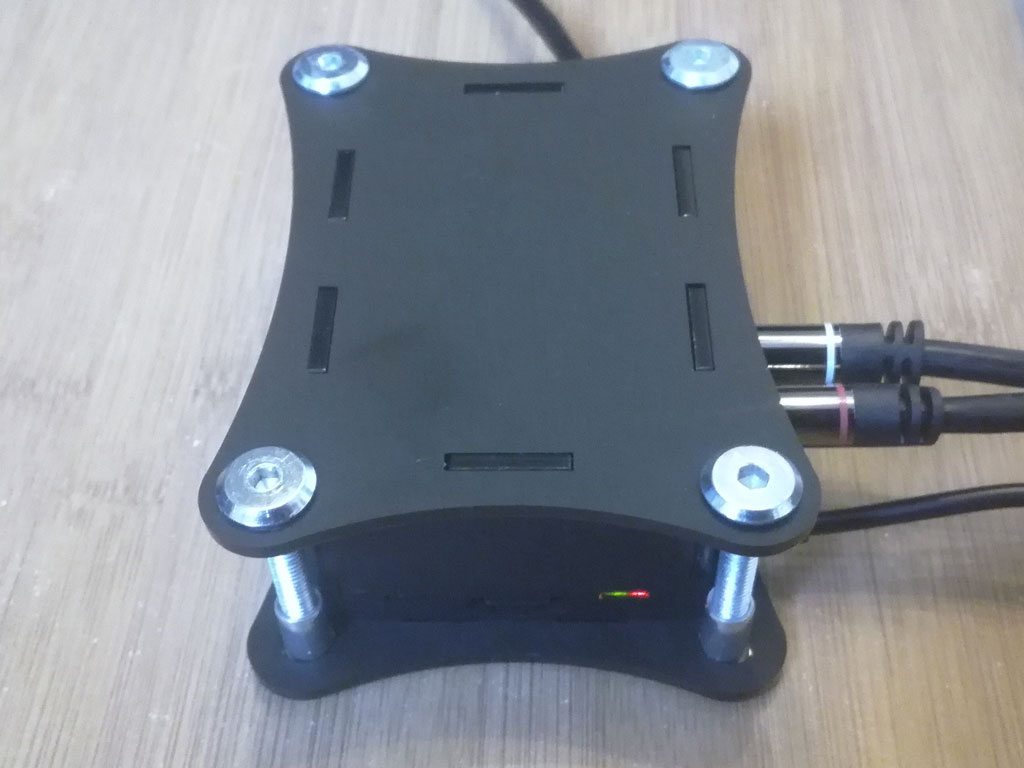
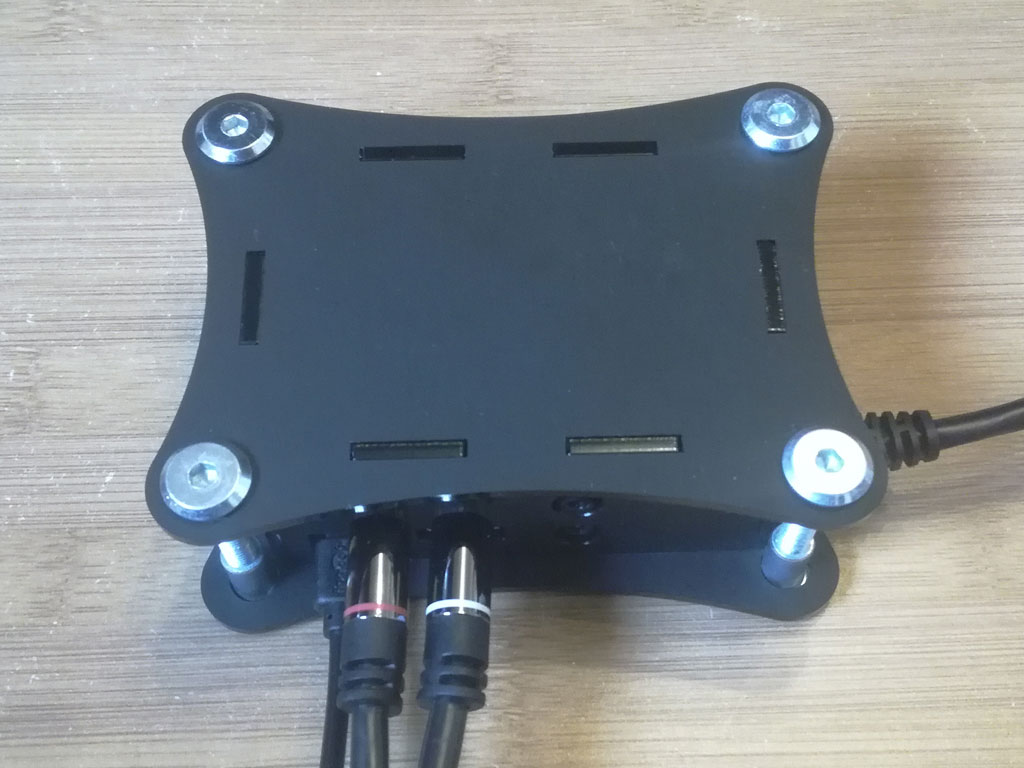
5. ConnectionsYour Max2Play device is ready! Before you connect the power supply and start the system up, you need to connect the Pi to the internet. It is best to use a LAN cable for that. But you can also integrate it into the home network via WiFi. Use the WPS function of your router or the Raspberry Pi’s automatic access point feature for that. After booting up and an unsuccessful WPS search, the Pi automatically switches to Access-Point-mode thanks to Max2Play, so you can easily find your device in the Wi-Fi search on your smartphone (or other WiFi device). The password is „mypasscode“ by default. If the connection is successful, you can make the necessary settings in the web interface to connect your device to the internet. |
|
![]() Now I’ll show you how to create shortcuts with API for basic commands of the Squeezebox Server.
Now I’ll show you how to create shortcuts with API for basic commands of the Squeezebox Server.
API-Examples
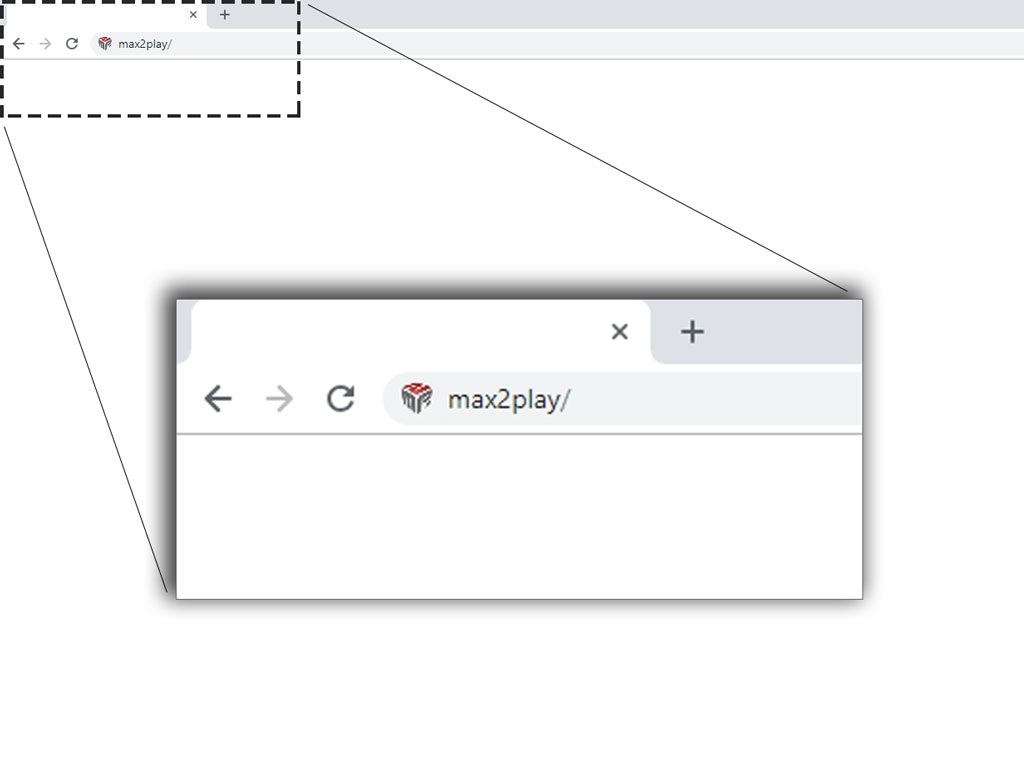
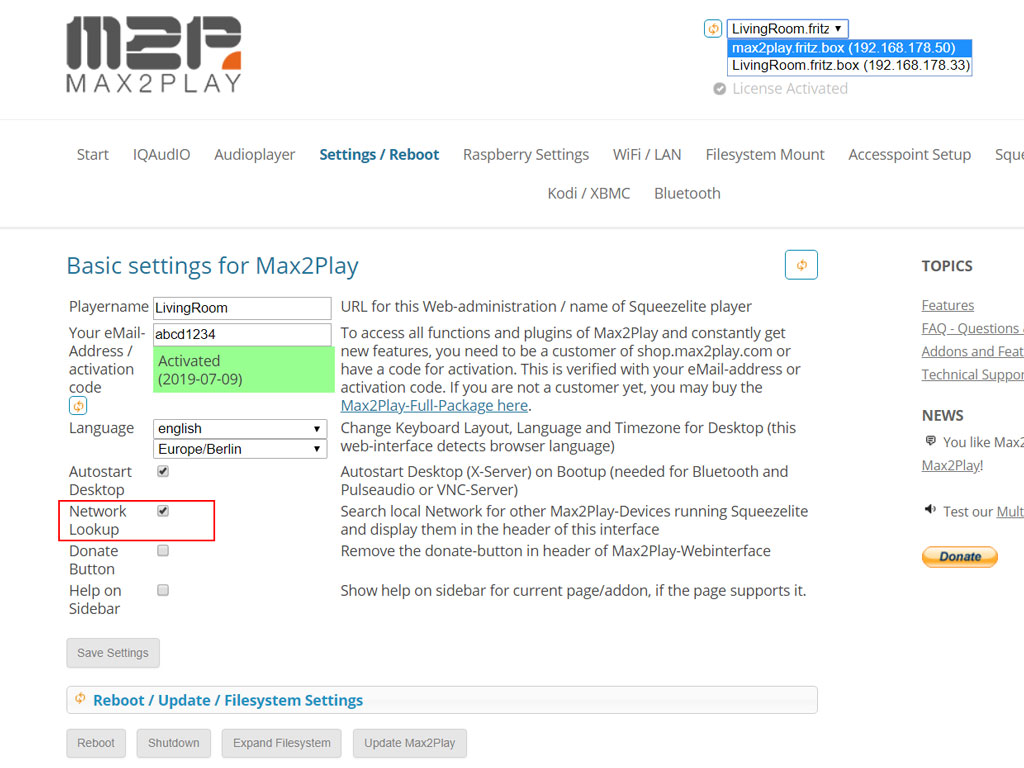
1. The Ground WorkYou can access the web interface by entering „max2play/“ in the URL bar of your browser or by using the network lookup feature on another Max2Play device in the Settings/Reboot menu. Make the first steps as you did in the previous articles. This time, you need to choose „IQaudIO“ from the list of manufacturers and select the Pi-DAC+ as your sound card. Activated the „Advanced“ selection as a preset for multiroom rename our player the Settings/Reboot tab under “Playername” (e.g. „bedroom“). Voila, the setup is ready to use as another zone in your multiroom system. You can sync and play individually as you like from your preferred control device (App, Jivelite, DLNA, etc.) |
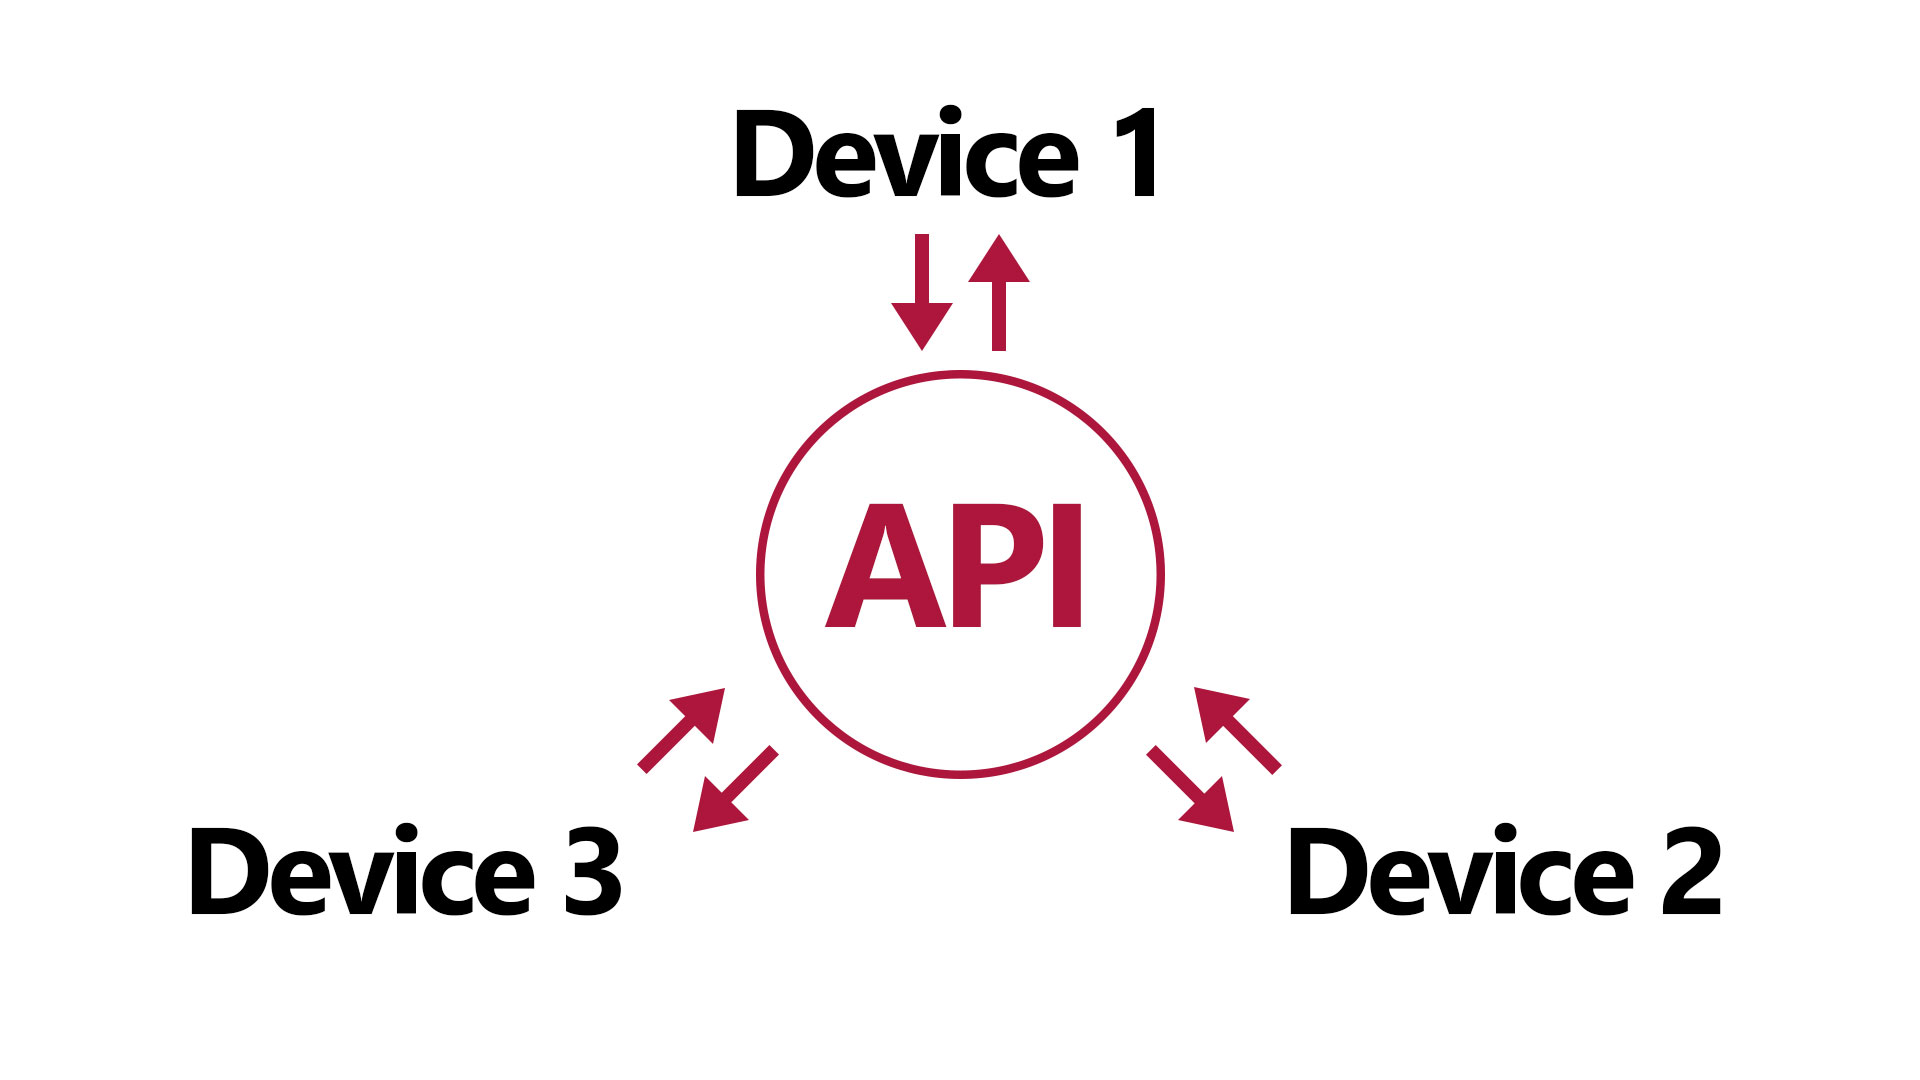
2. APis – What are they and how to use themAn API is, simply put, an interface for communication between different components, like your Max2Play device, a home automation software like OpenHAB and in this case your smartphone. For example: An app on your phone communicates with the home automation software, letting it know that it just connected to your home network WiFi. As a response you can let it send a play-command to your Max2Play device to start playing music as soon as you enter the home network – fully automatic and without your input. To set up such an if-then scenario, you can use our API-Examples plugin. It offers a list of simple HTTP commands that you can use to control your player from the interface of your choice. Just copy them to be embedded in the systems you would like to use. |
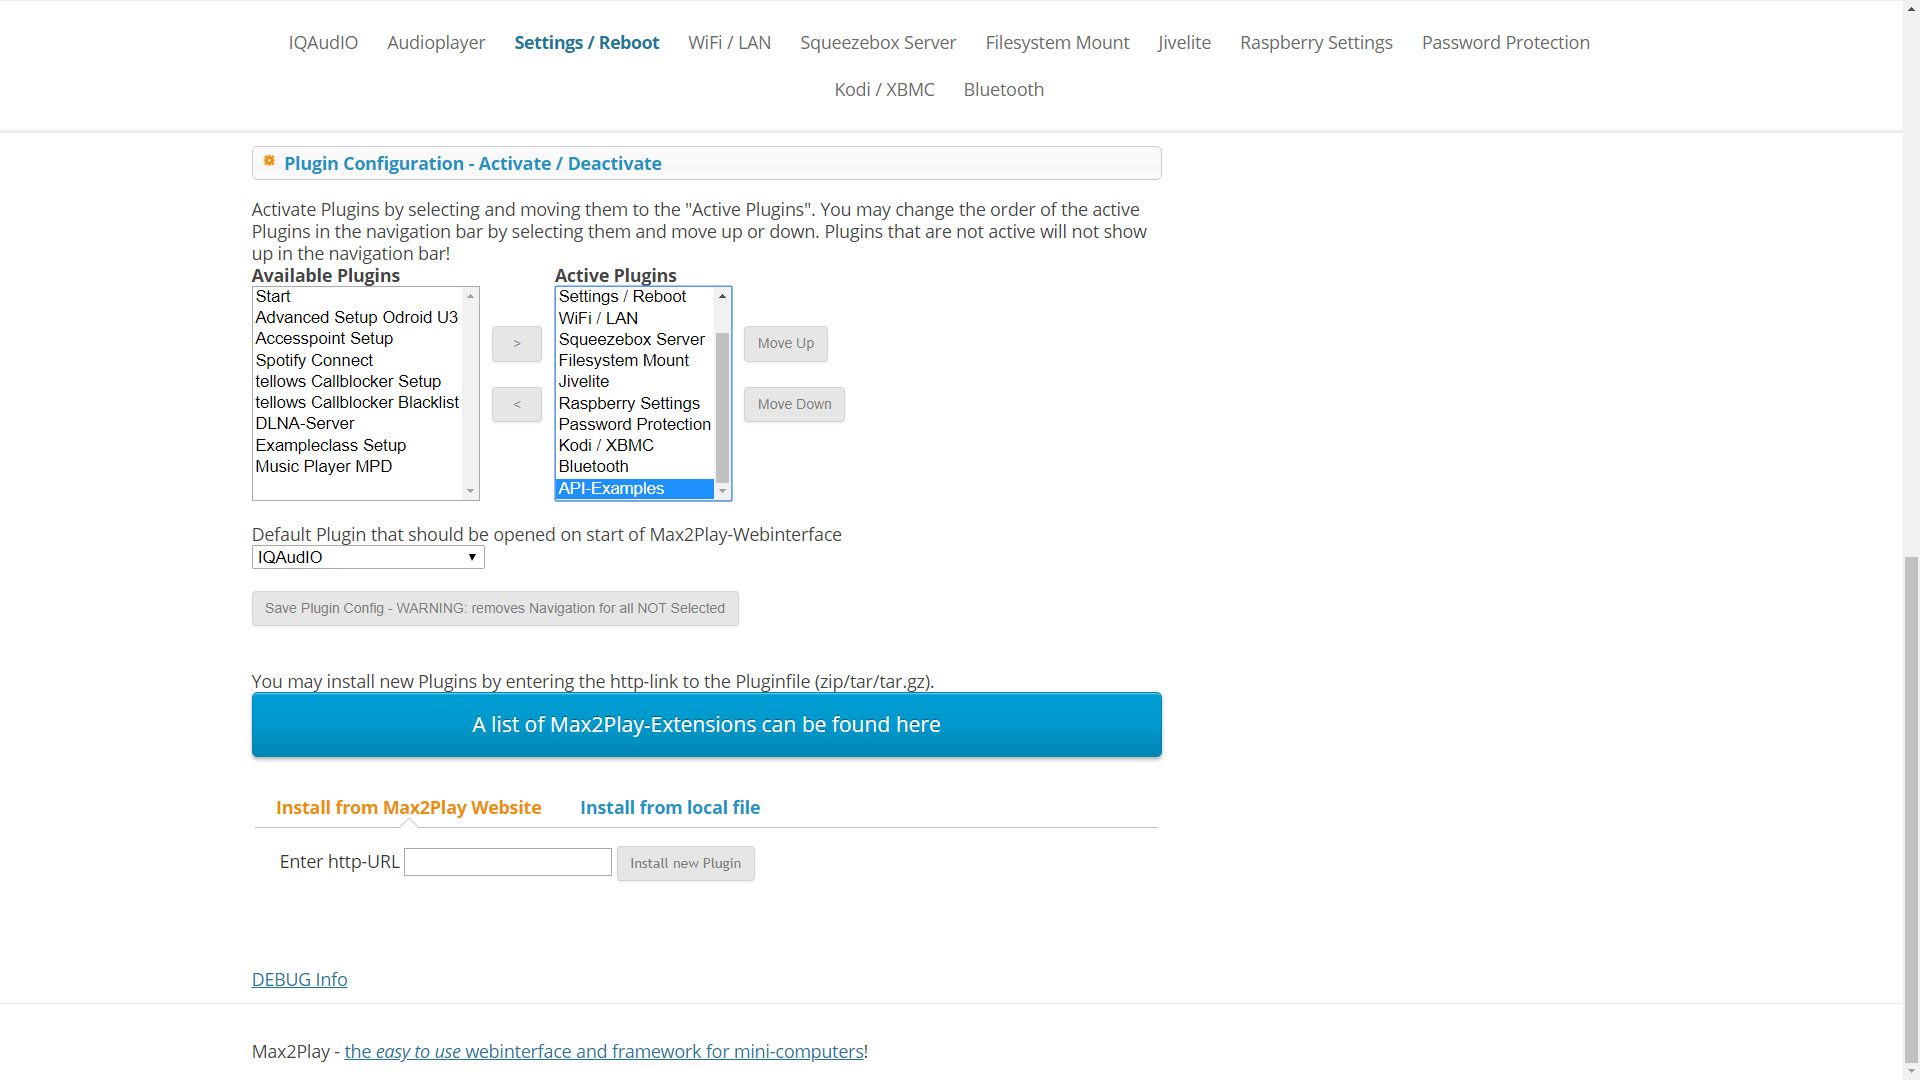
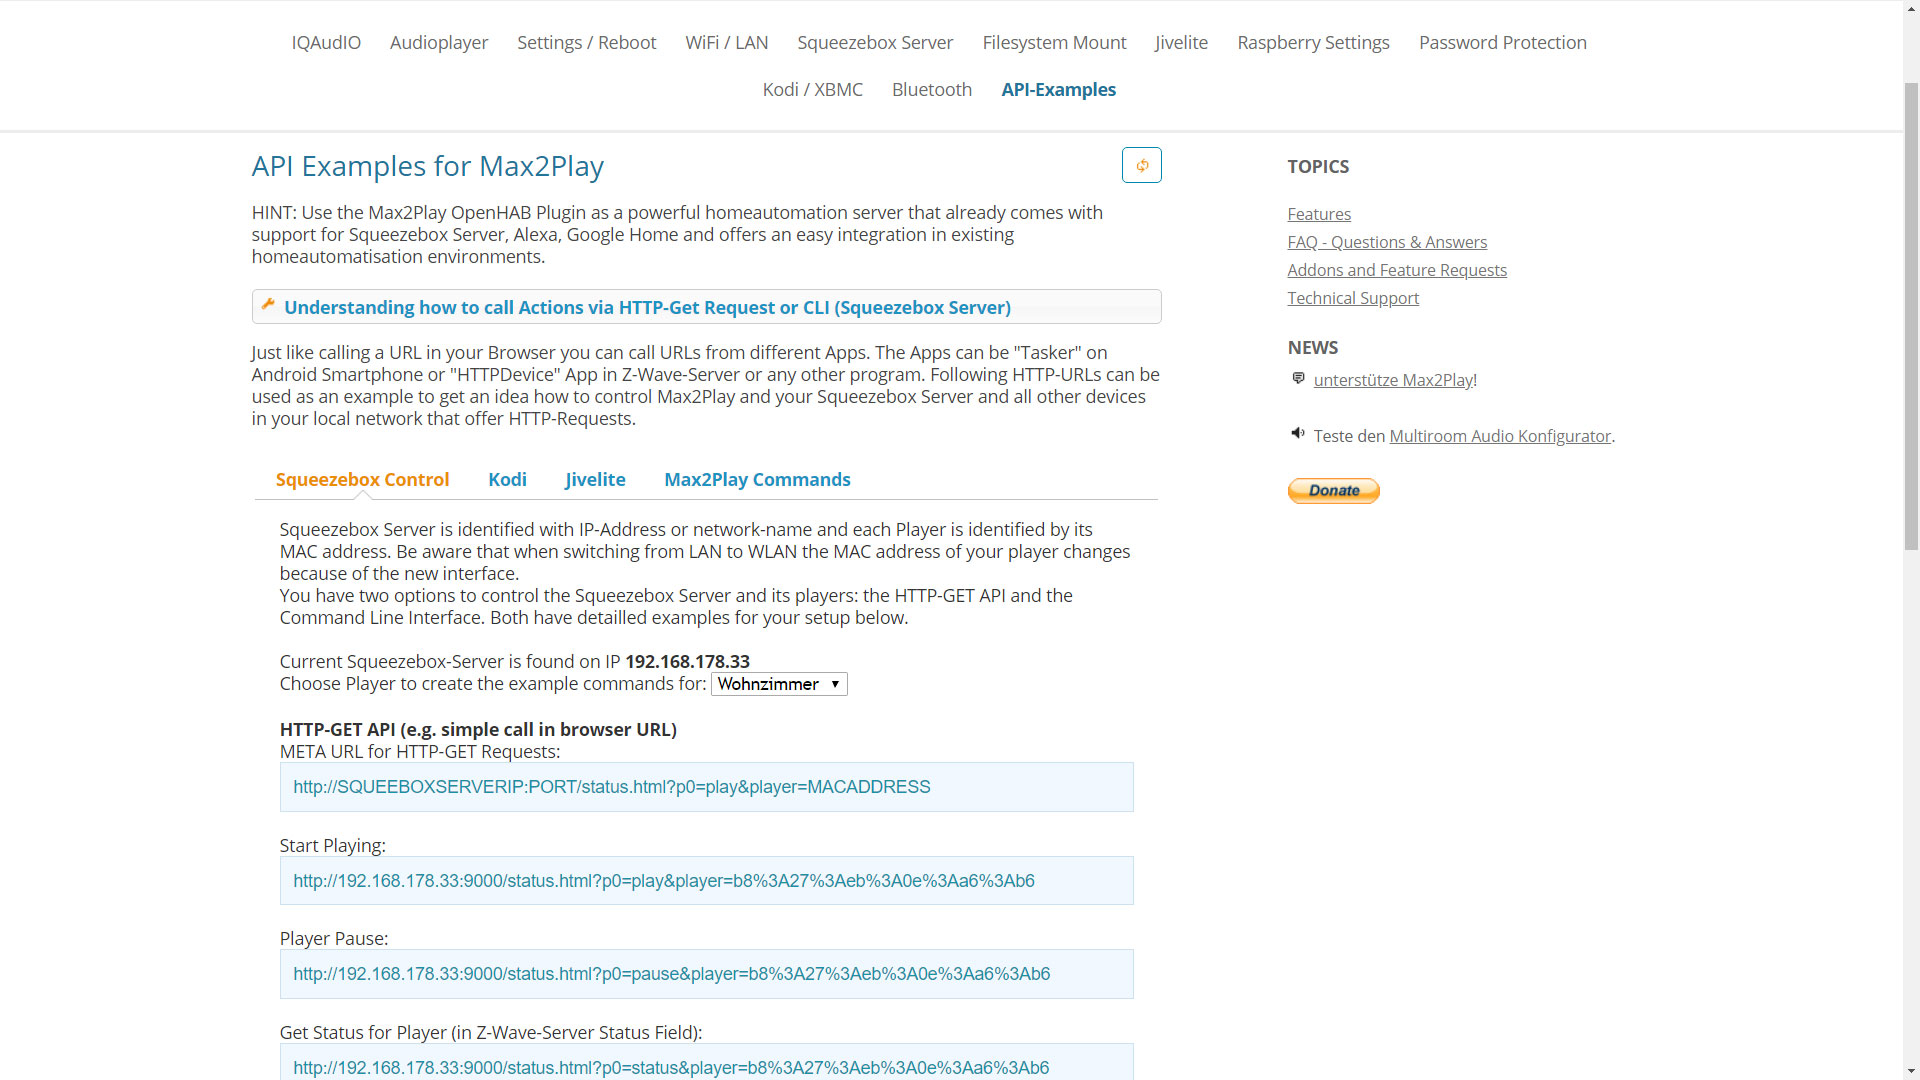
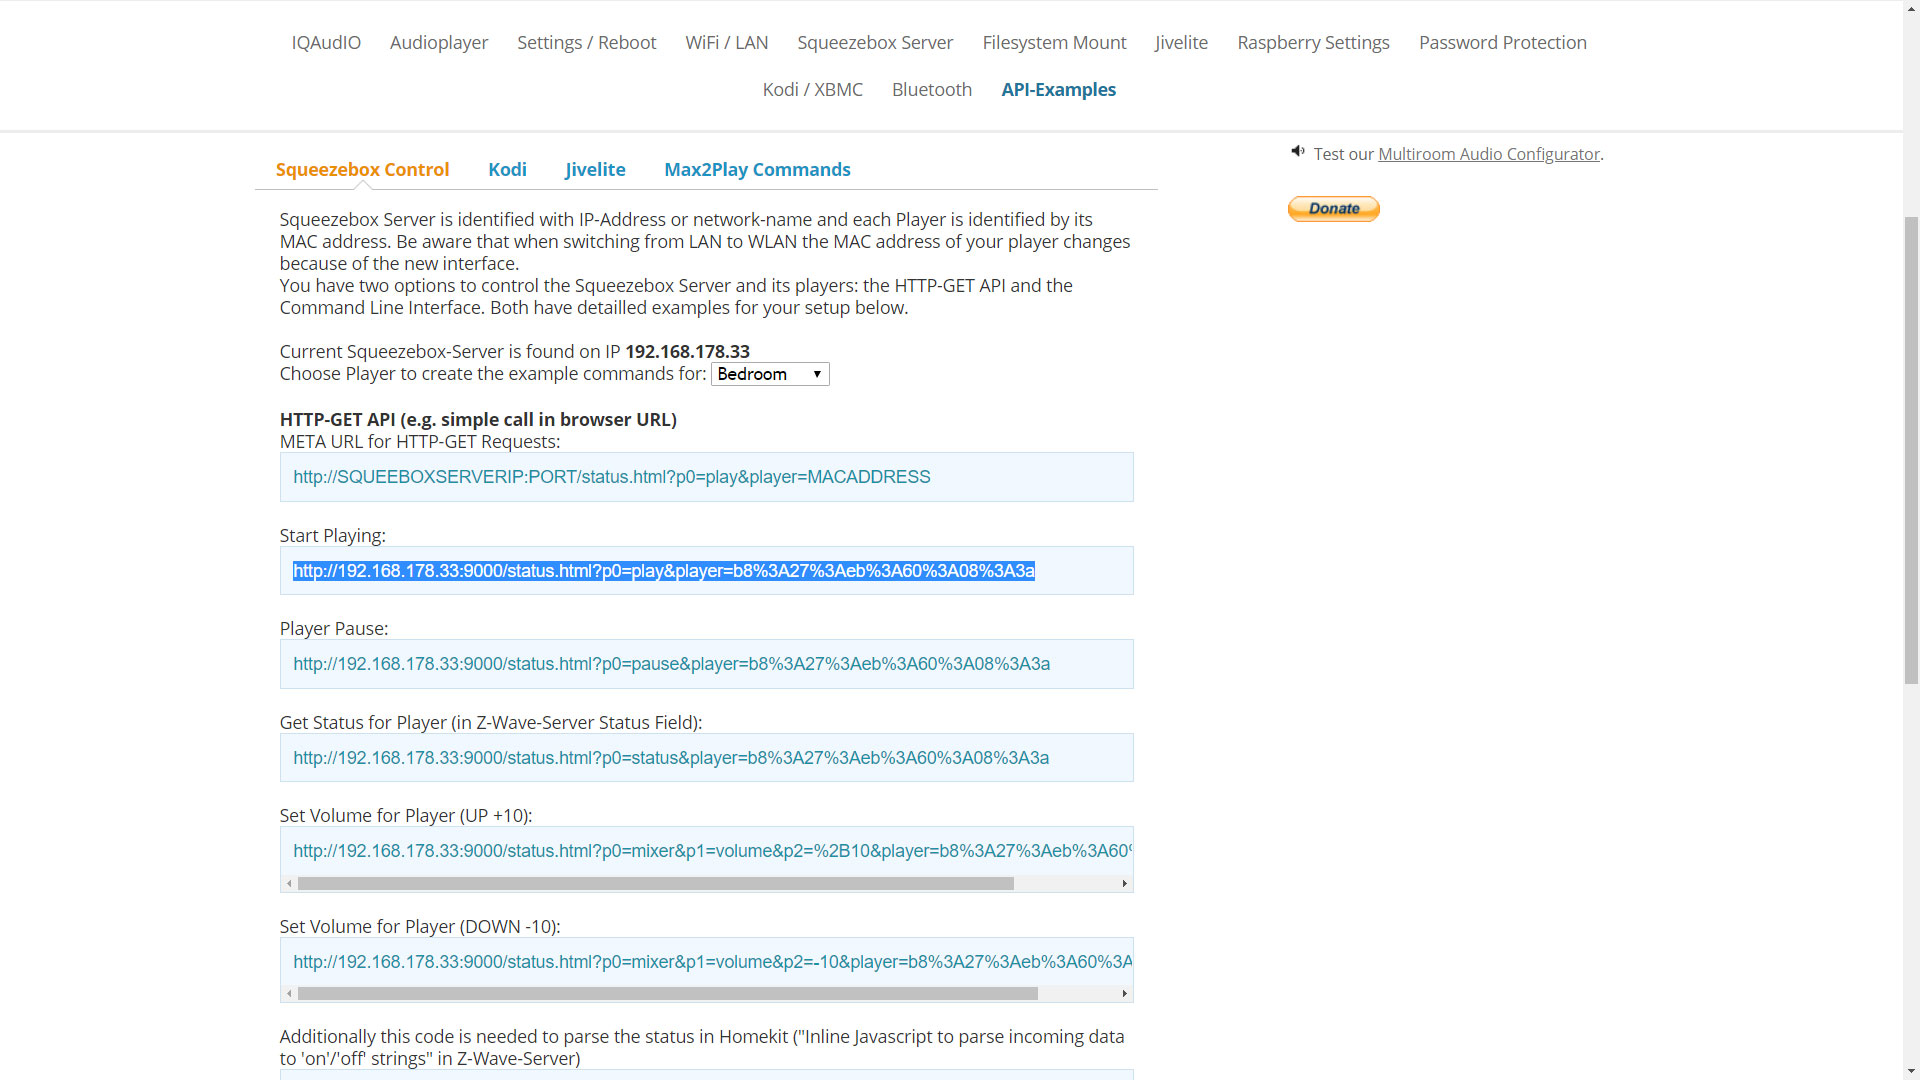
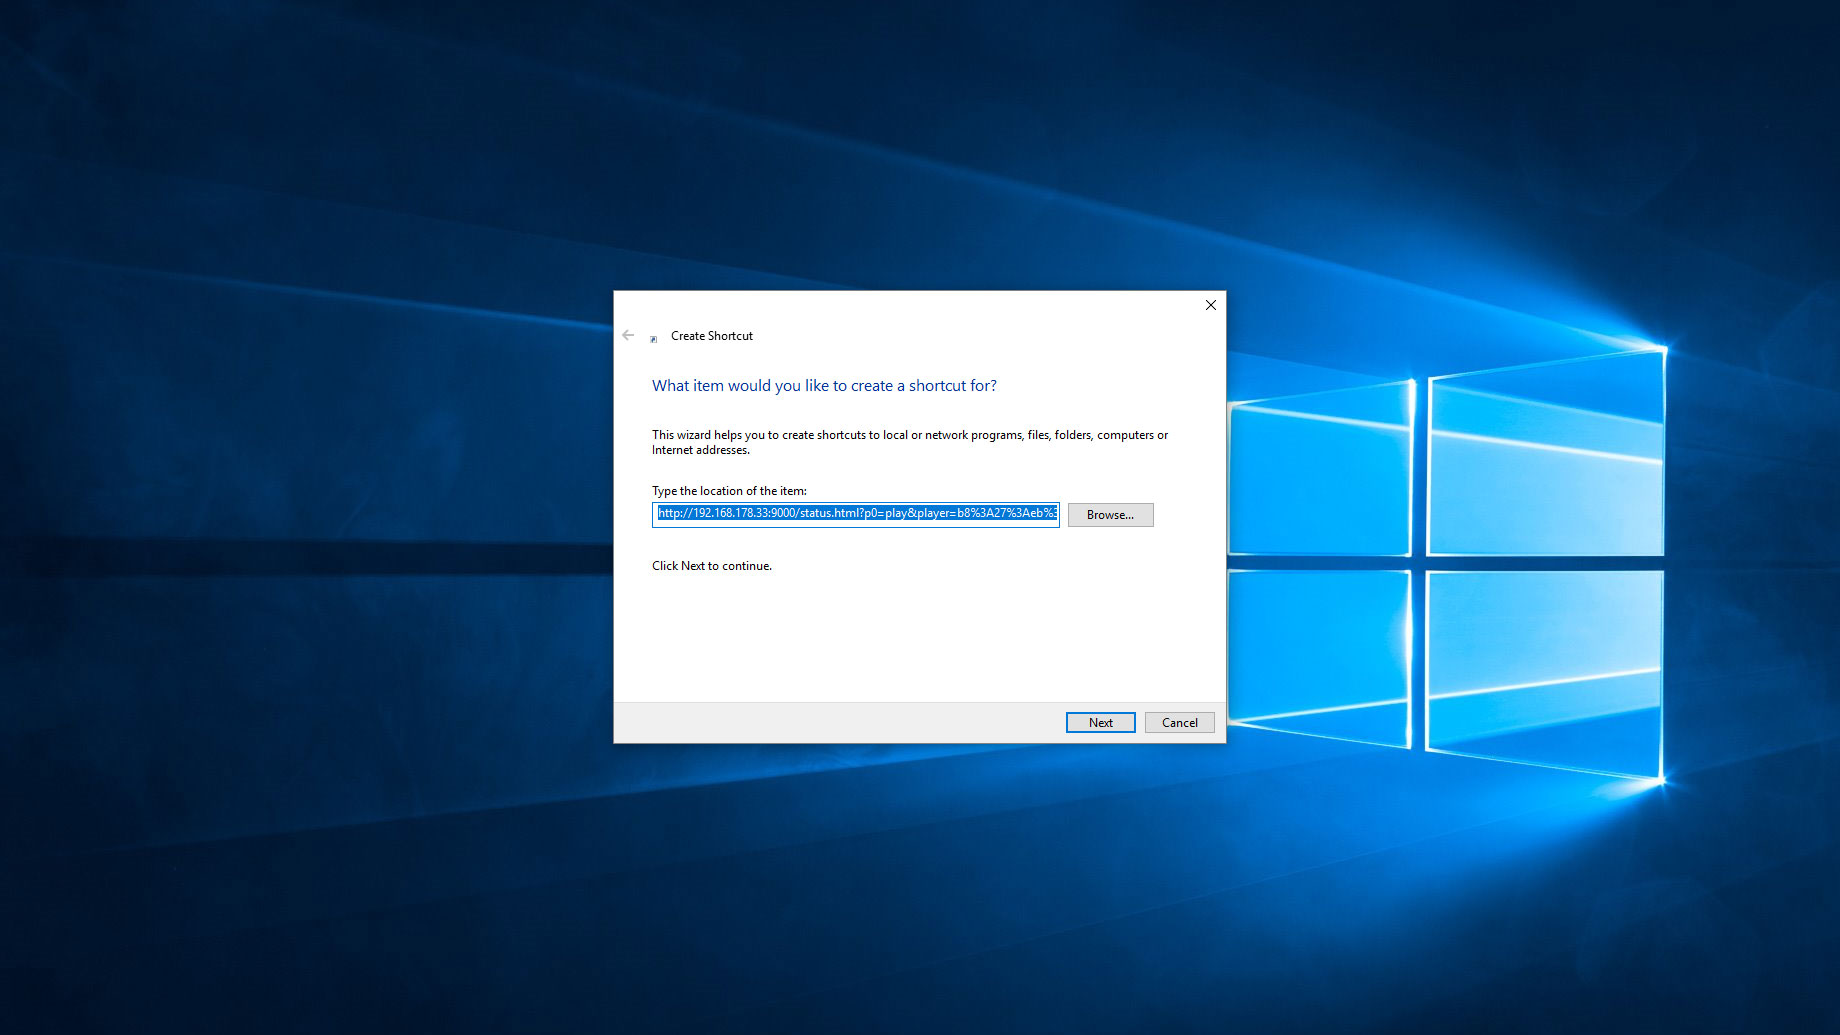
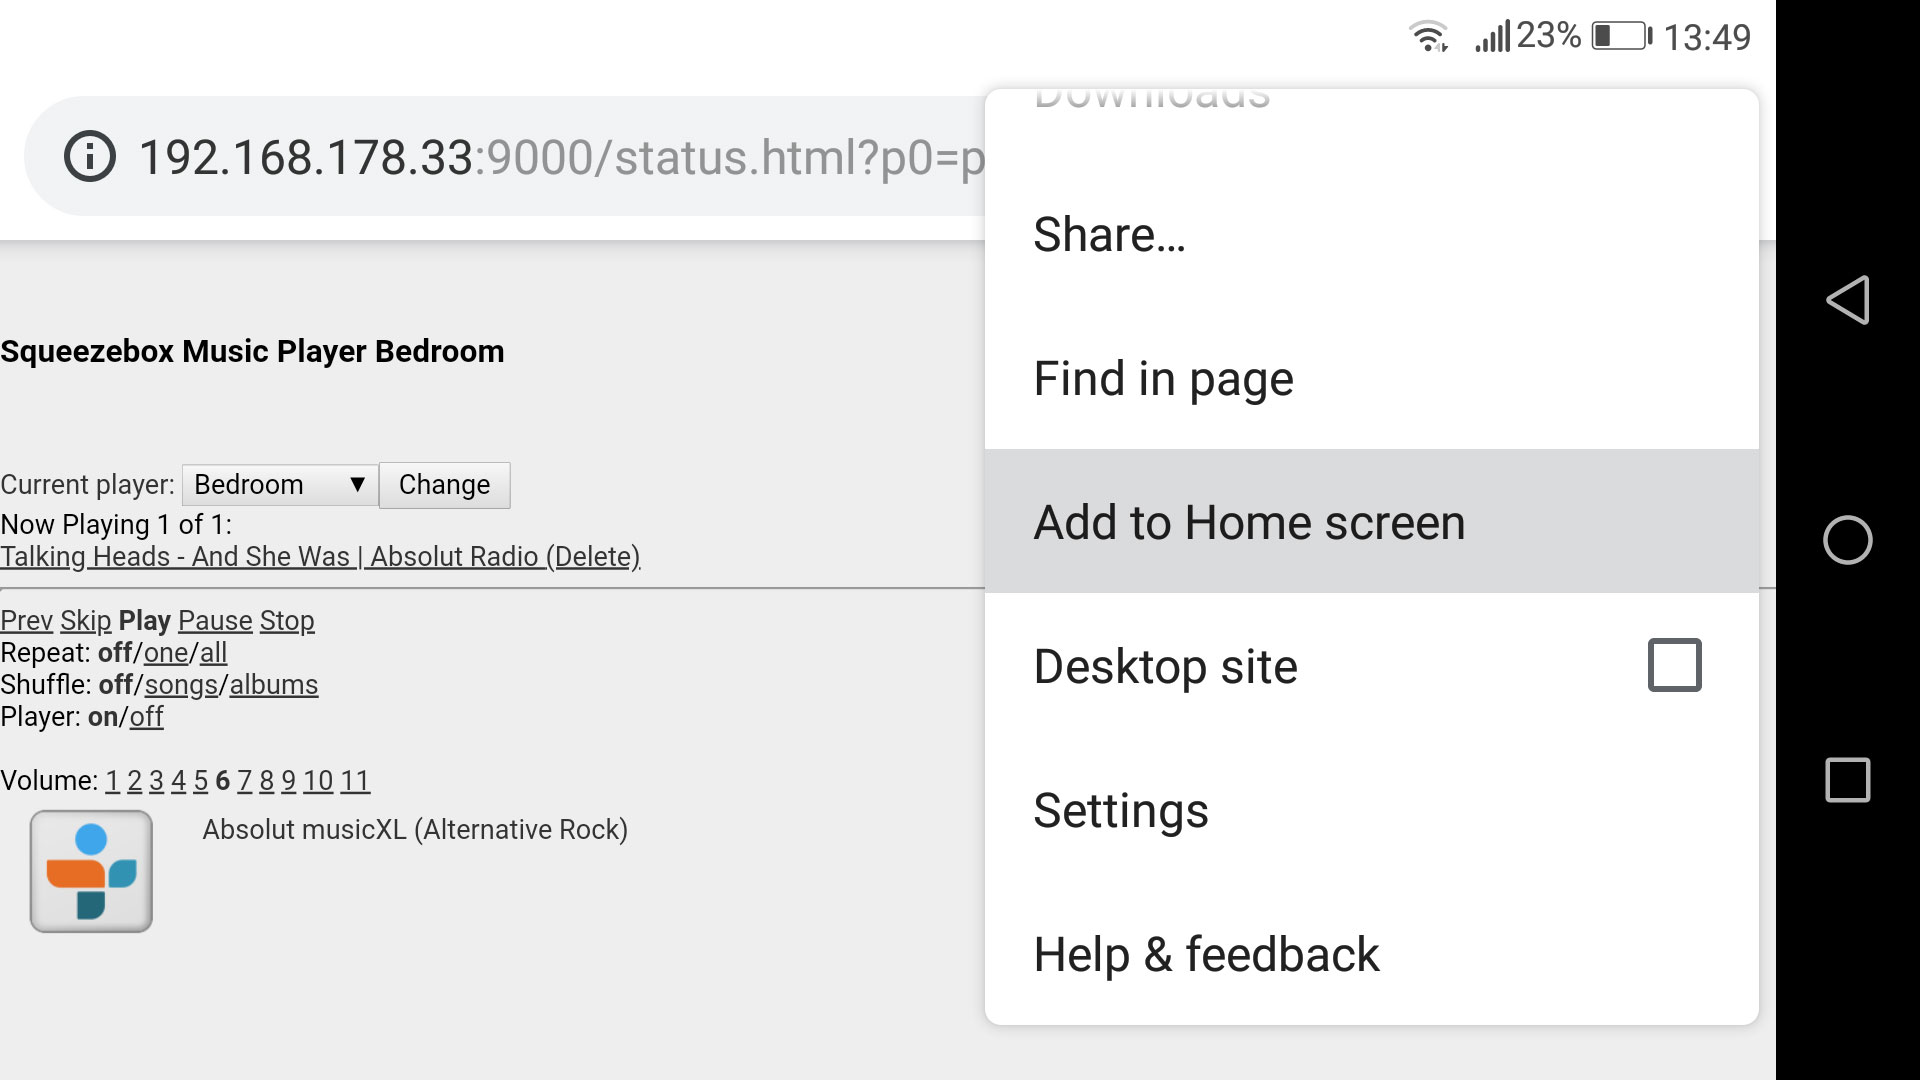
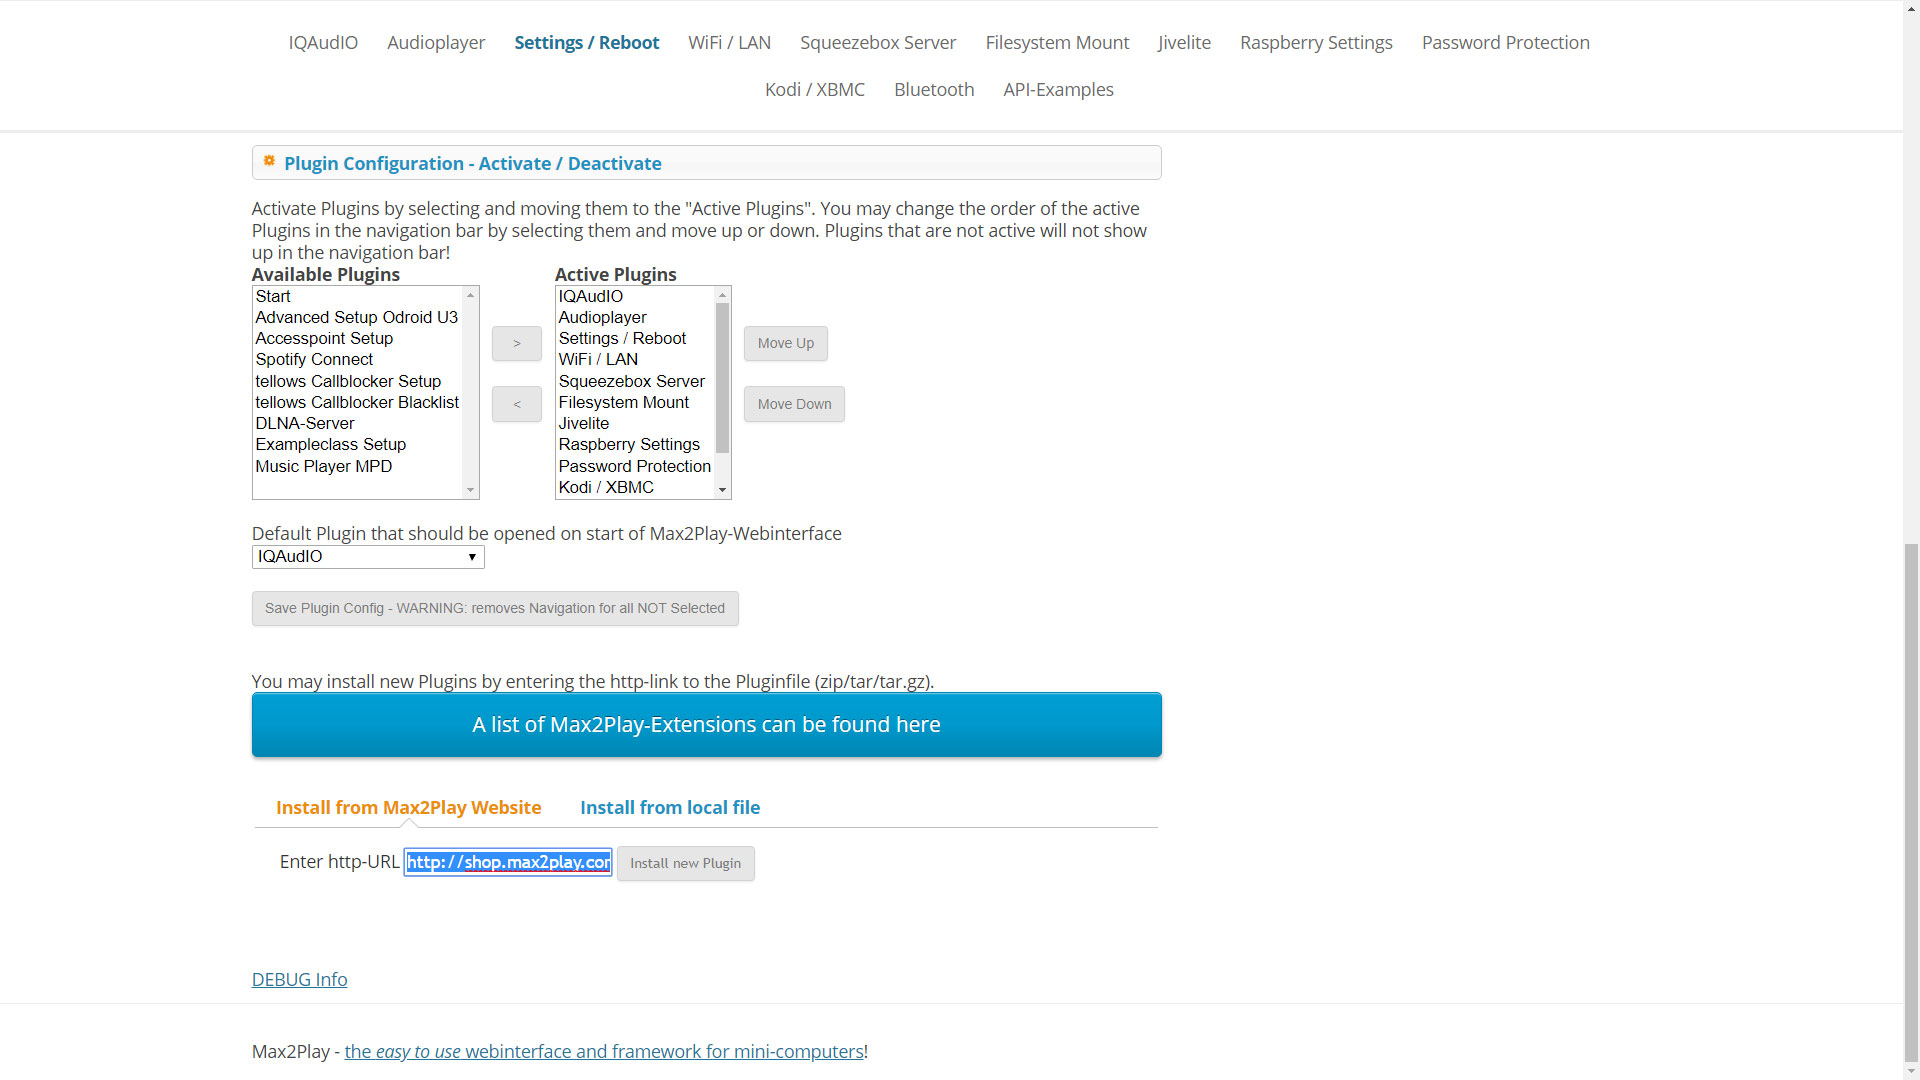
3. Add API-Examples PluginThe Plugin is already preinstalled with the newest Max2Play Image and you just have to activate it from the list of Inactive Plugins in the Settings/Reboot menu. In the API-Examples menu itself, you can choose between the four tabs Squeezebox Control, Jivelite, Kodi, Max2Play. We will use the Squeezebox for this example. The corresponding tab displays the IP of the Squeezebox Server that is currently running. Below that you can now select your player zone of choice in a drowdown menu. The URLs for the player will dynamically change according to your selection. Now you can just copy the URL for the command to your clipboard and add them as a shortcut to applications or an existing home automation system’s interface. |
|
|
|
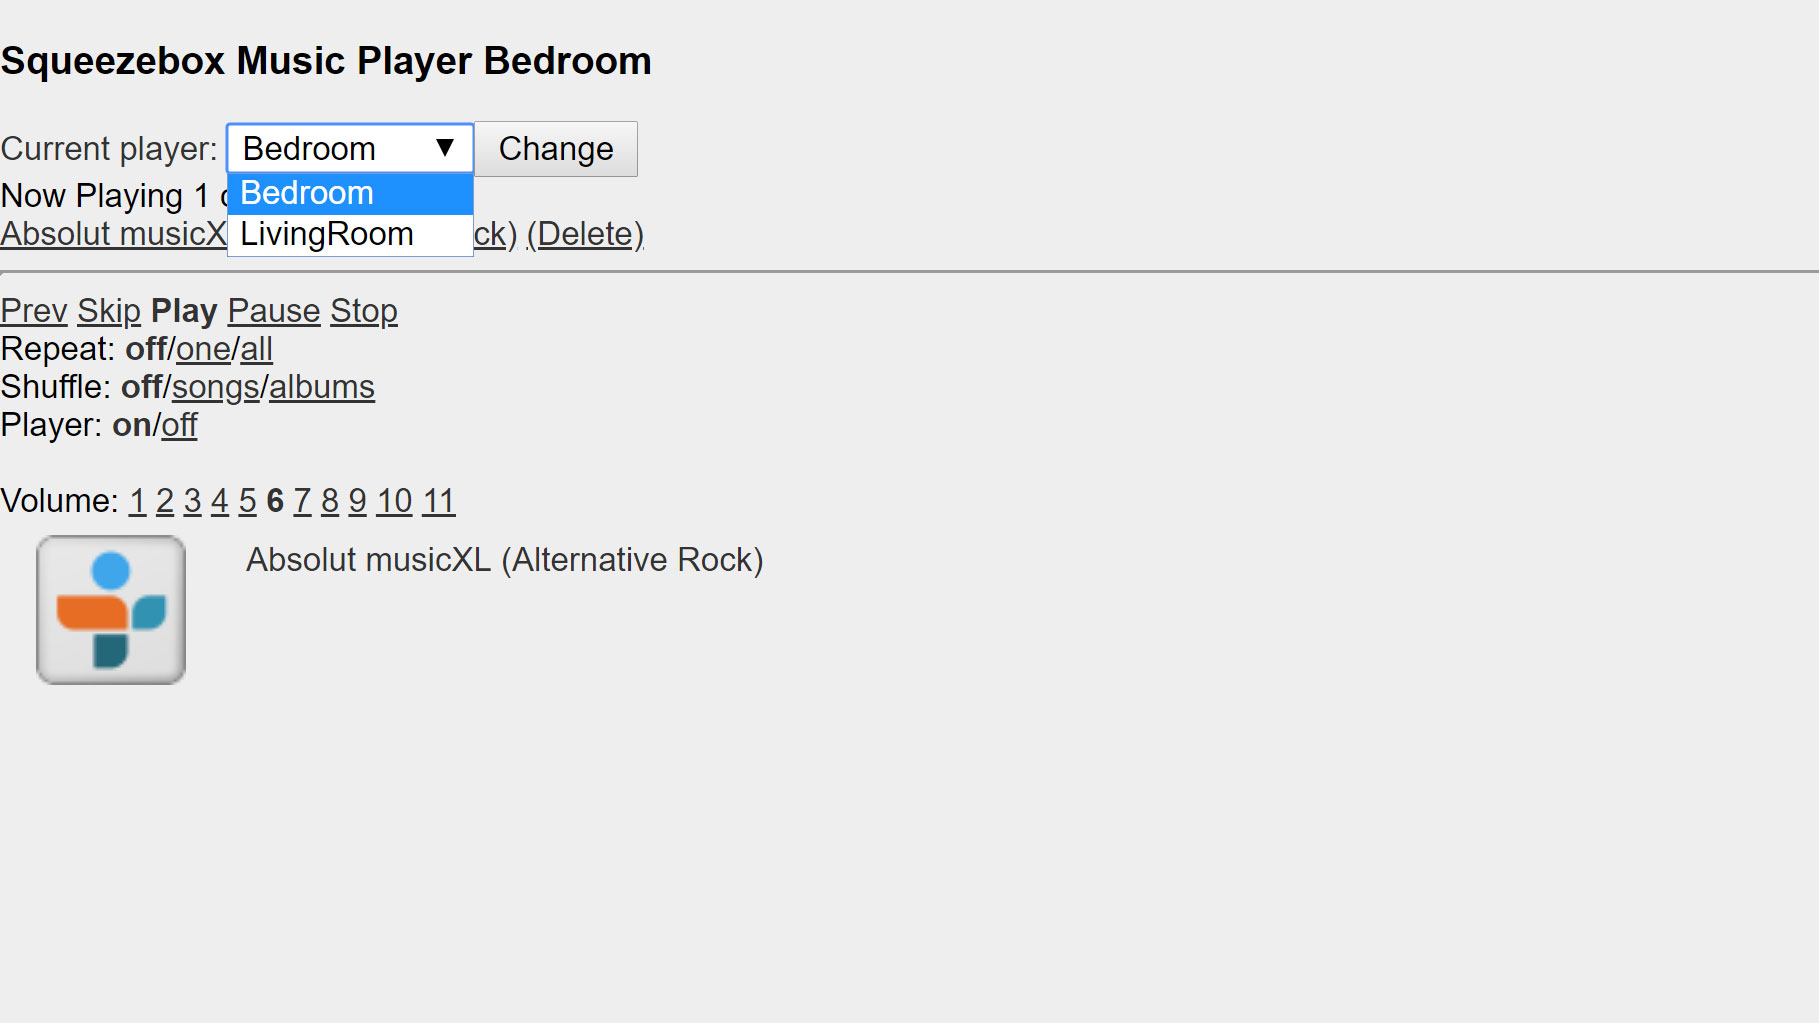
4. Use APIsBefore you integrate these commands you can first check their functionality in your browser. Just copy the Play command and paste it in the ULR bar of your browser. If you enter it, the playback of the corresponding player should automatically start and small control interface of the Squeezebox Server should open up. |
![]() In this section, I will explain how you can use APIs with a corresponding software.
In this section, I will explain how you can use APIs with a corresponding software.
Home automation
1. Functionality of Home AutomationHome automation systems are intended to make your life easier. You connect different smart devices with each other and control them centrally on a smartphone or tablet in most cases. A lot of the communication can also be automated, for example you could time-start the heating in the morning and the lighting in the evening, have your coffee machine start brewing at a set time or have music start playing when you enter your home. These applications of home automation all require respective hardware and software infrastructures to work properly However, even with smaller apps and servers, you can start creating some useful home automation routines to get started with the subject. |
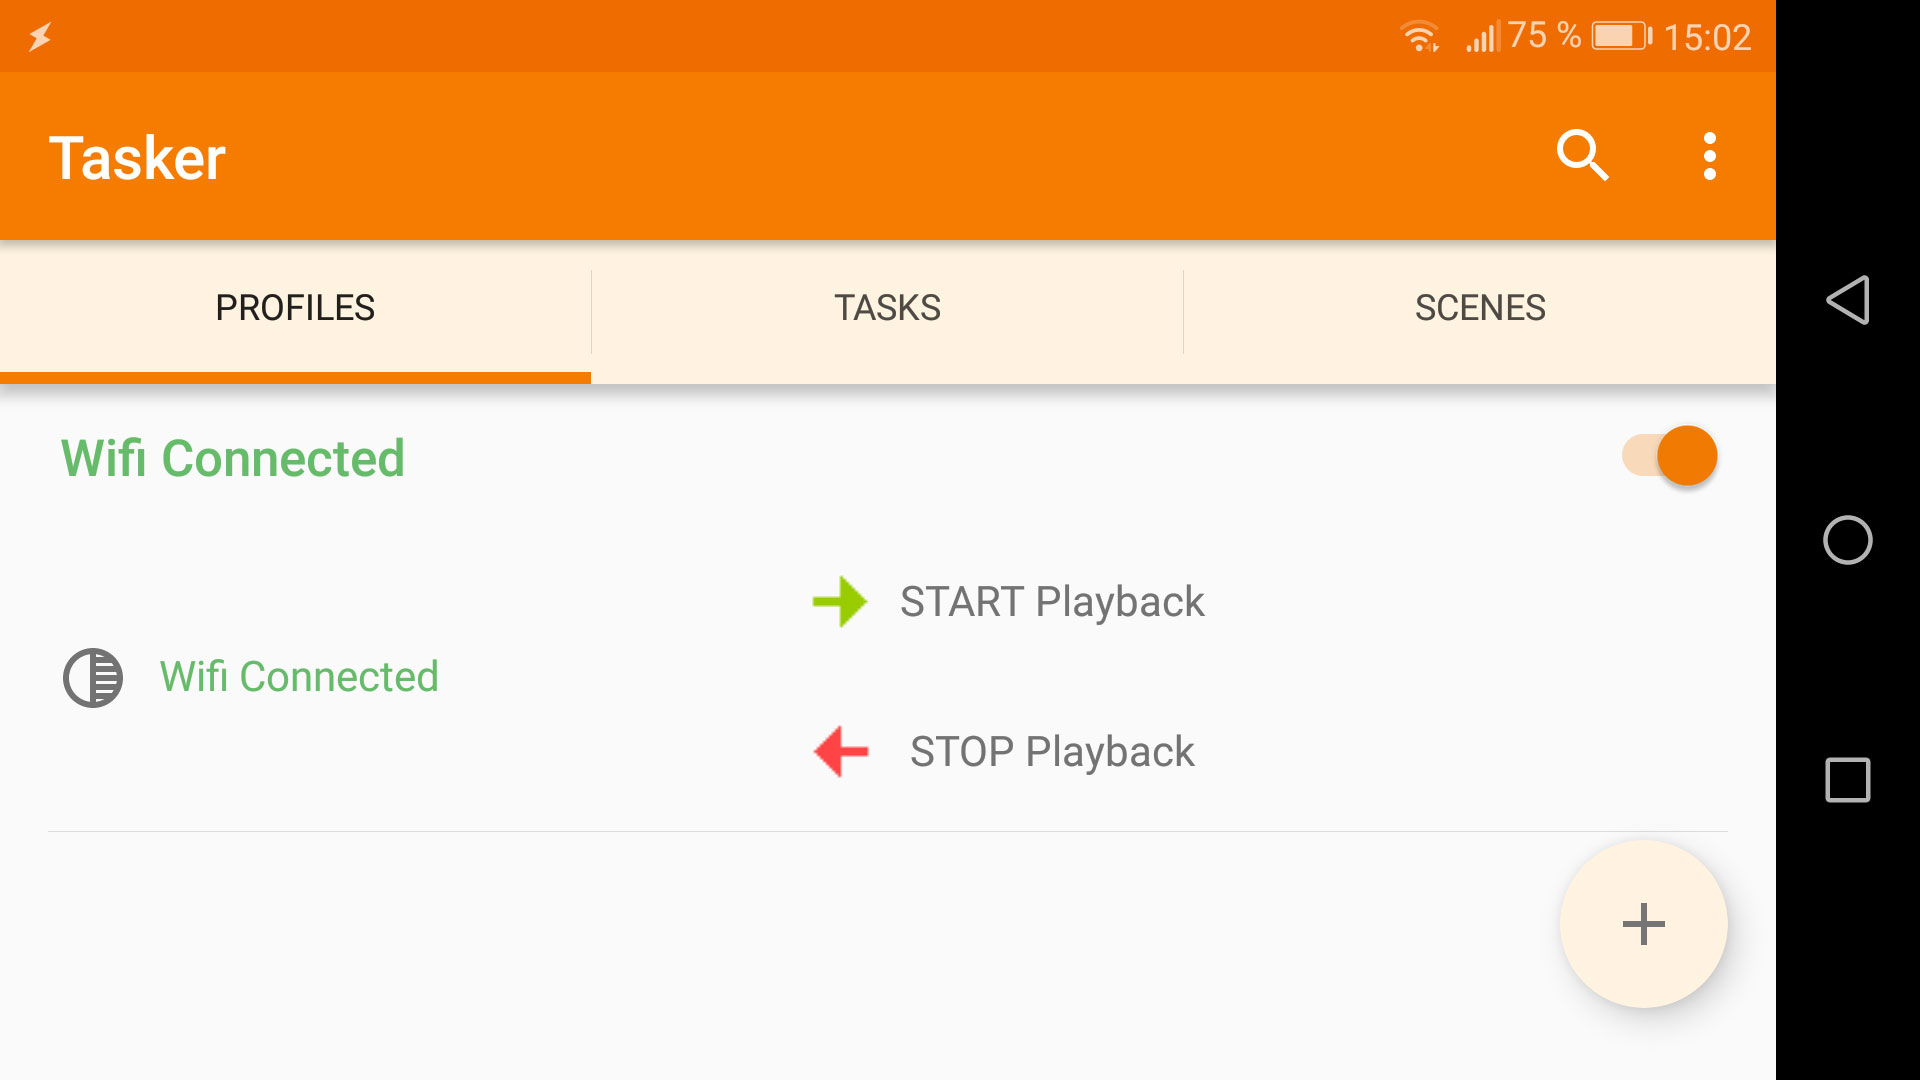
2. Tasker AppTasker is an app that can execute certain actions when a given set of requirements are met. Such simple if-then relationships that Tasker excels at are for example ‘display pop-up message when it’s my birthday’ or ‘send an HTTP request to my home automation system when I enter the local network.‘ You can then add more than one requirement to your task, to specify your automation further. You could even add a task for when you leave the local network to specify what happens when your requirement is no longer met. The creation of an if-then relation in Tasker is very intuitive. A simple instance of this is pictured here: Once the requirement that the smartphone is connected to your WiFi is met, the task „START playback“ is executed and the corresponding http request (=action) is sent to the Squeezebox Server. |
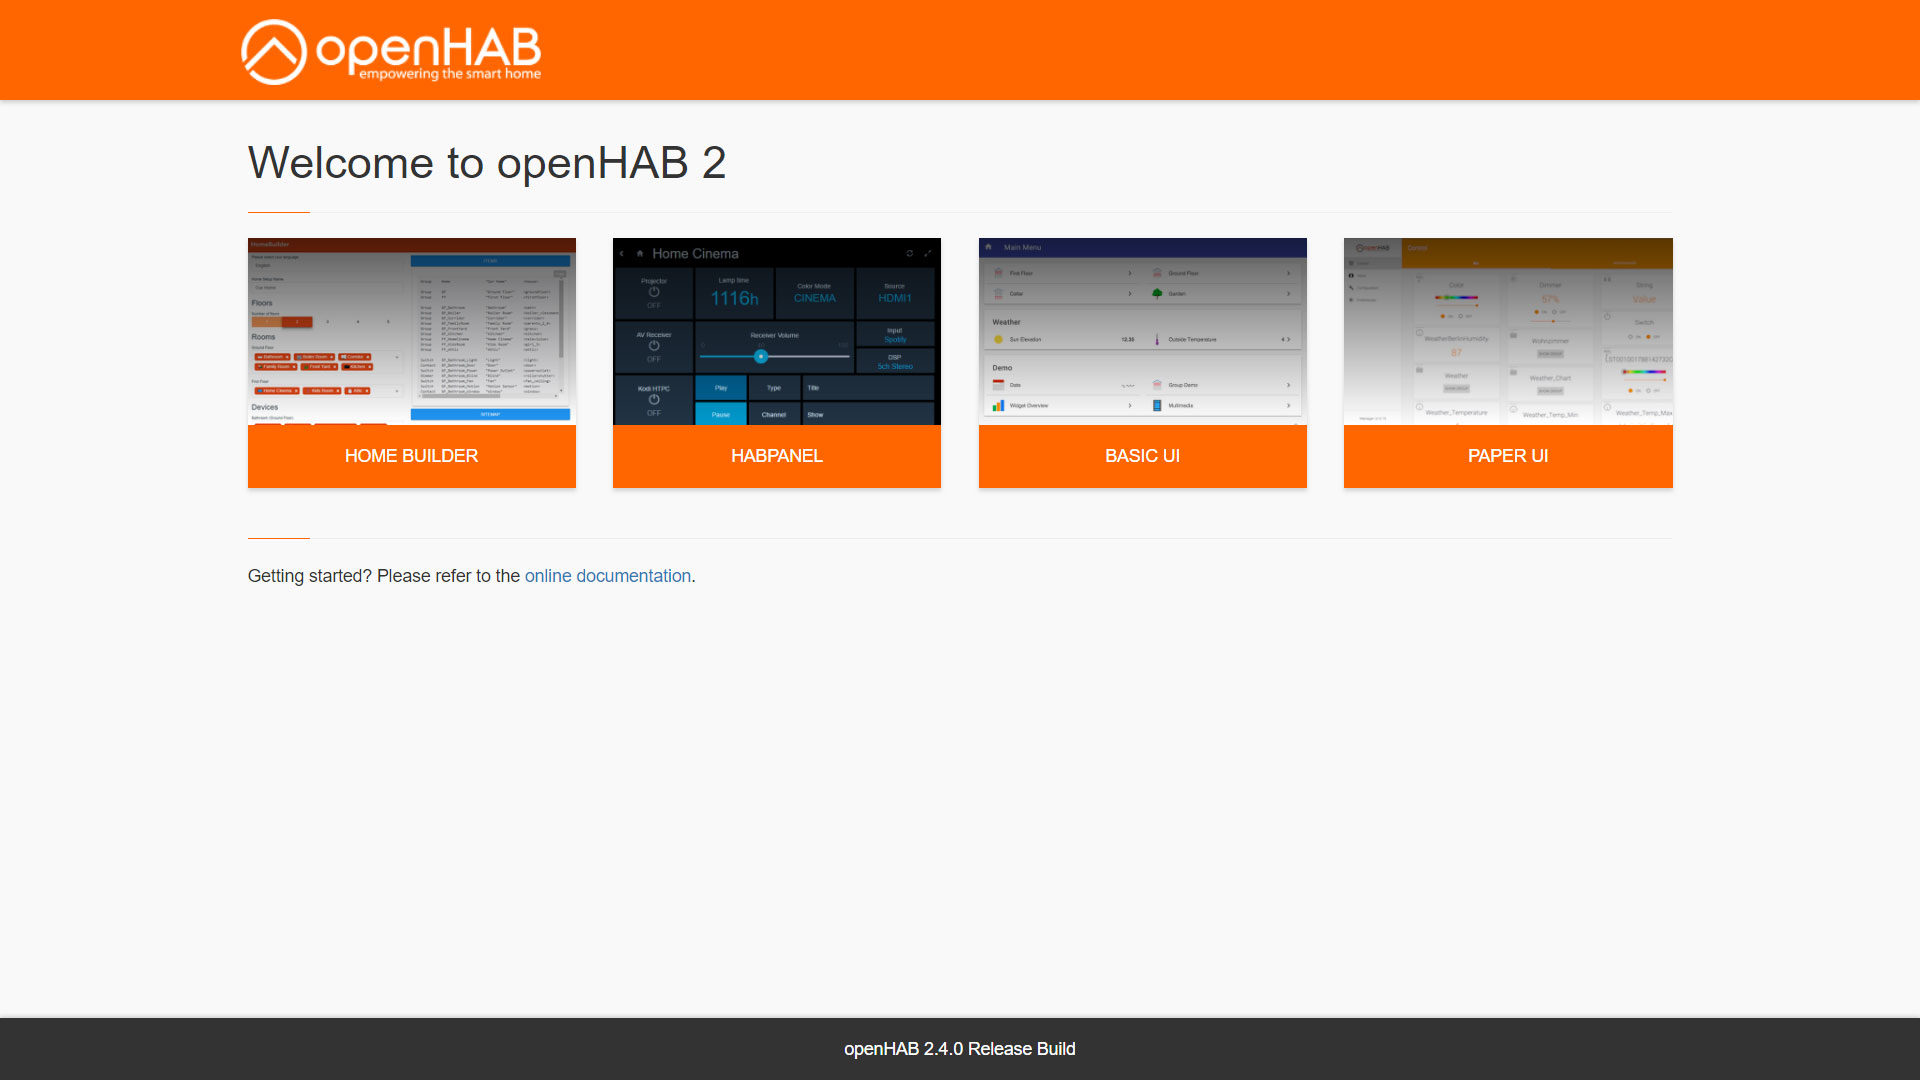
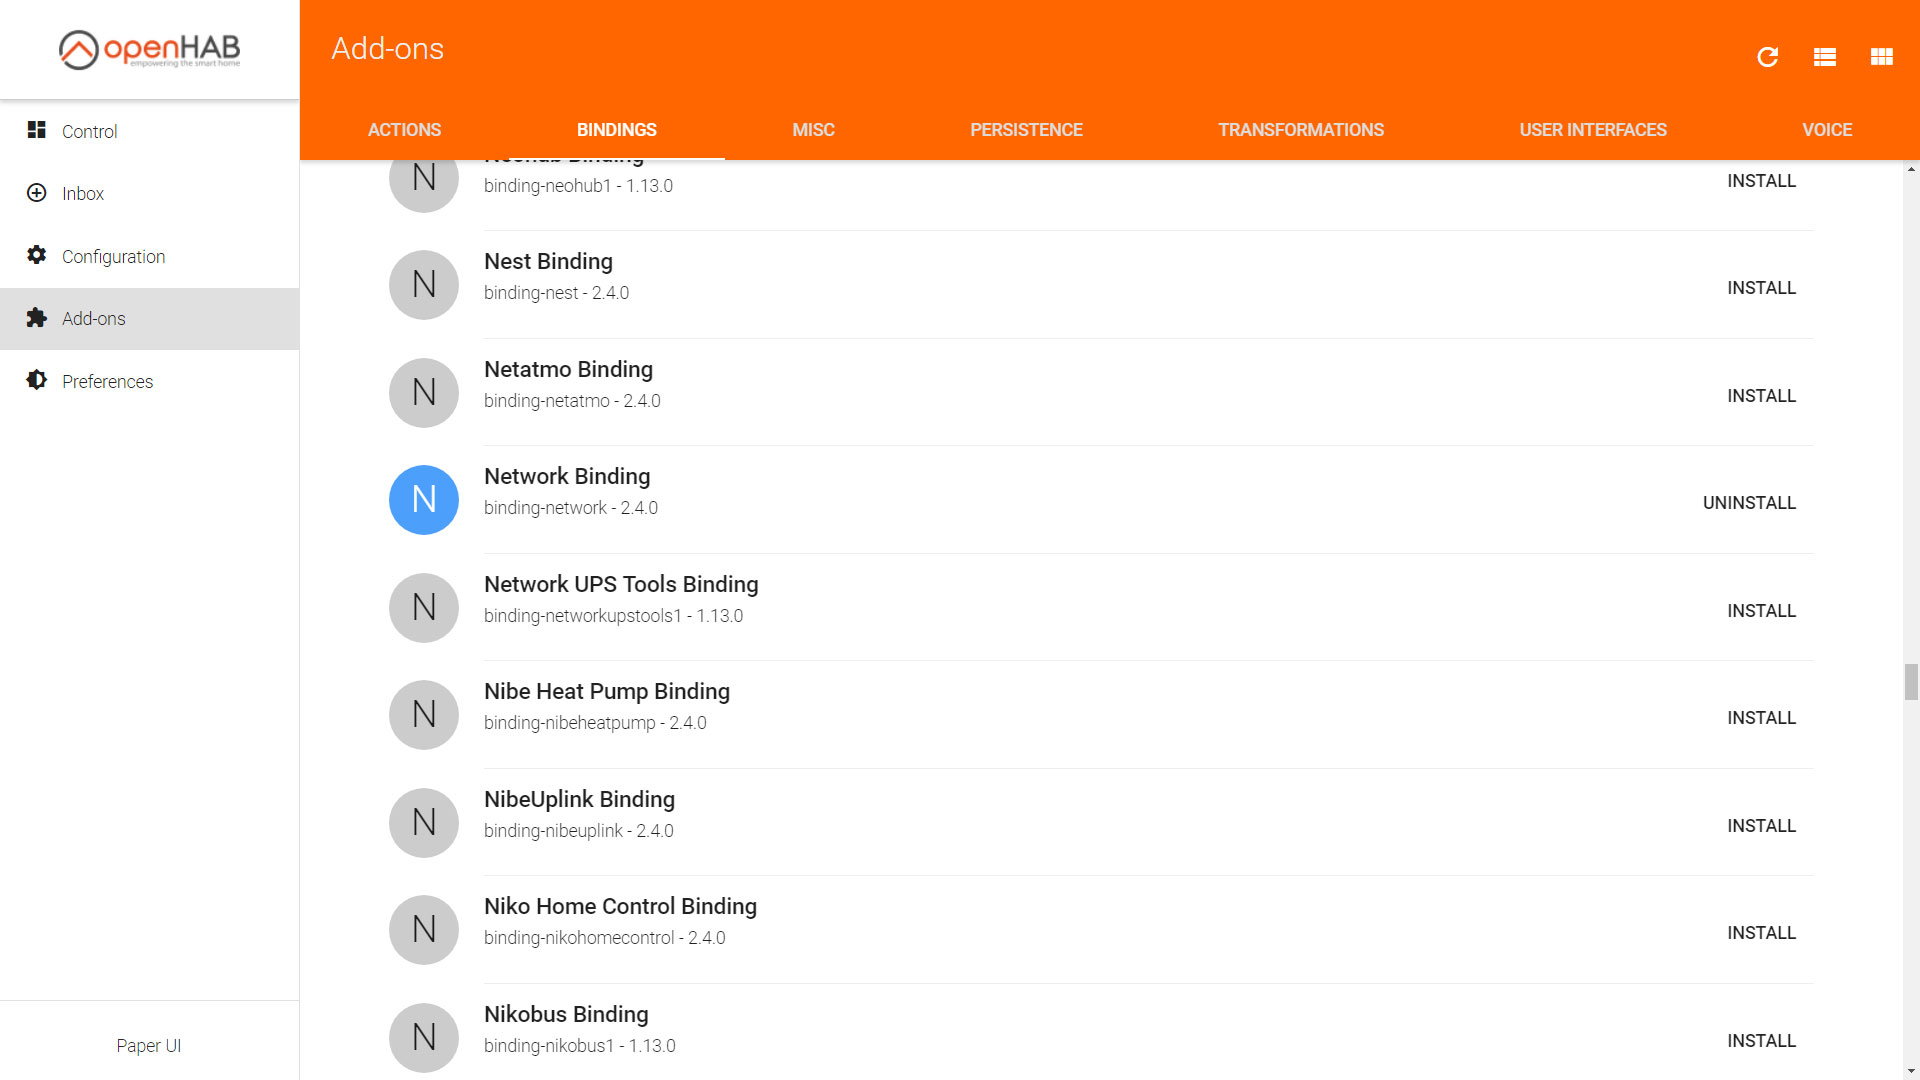
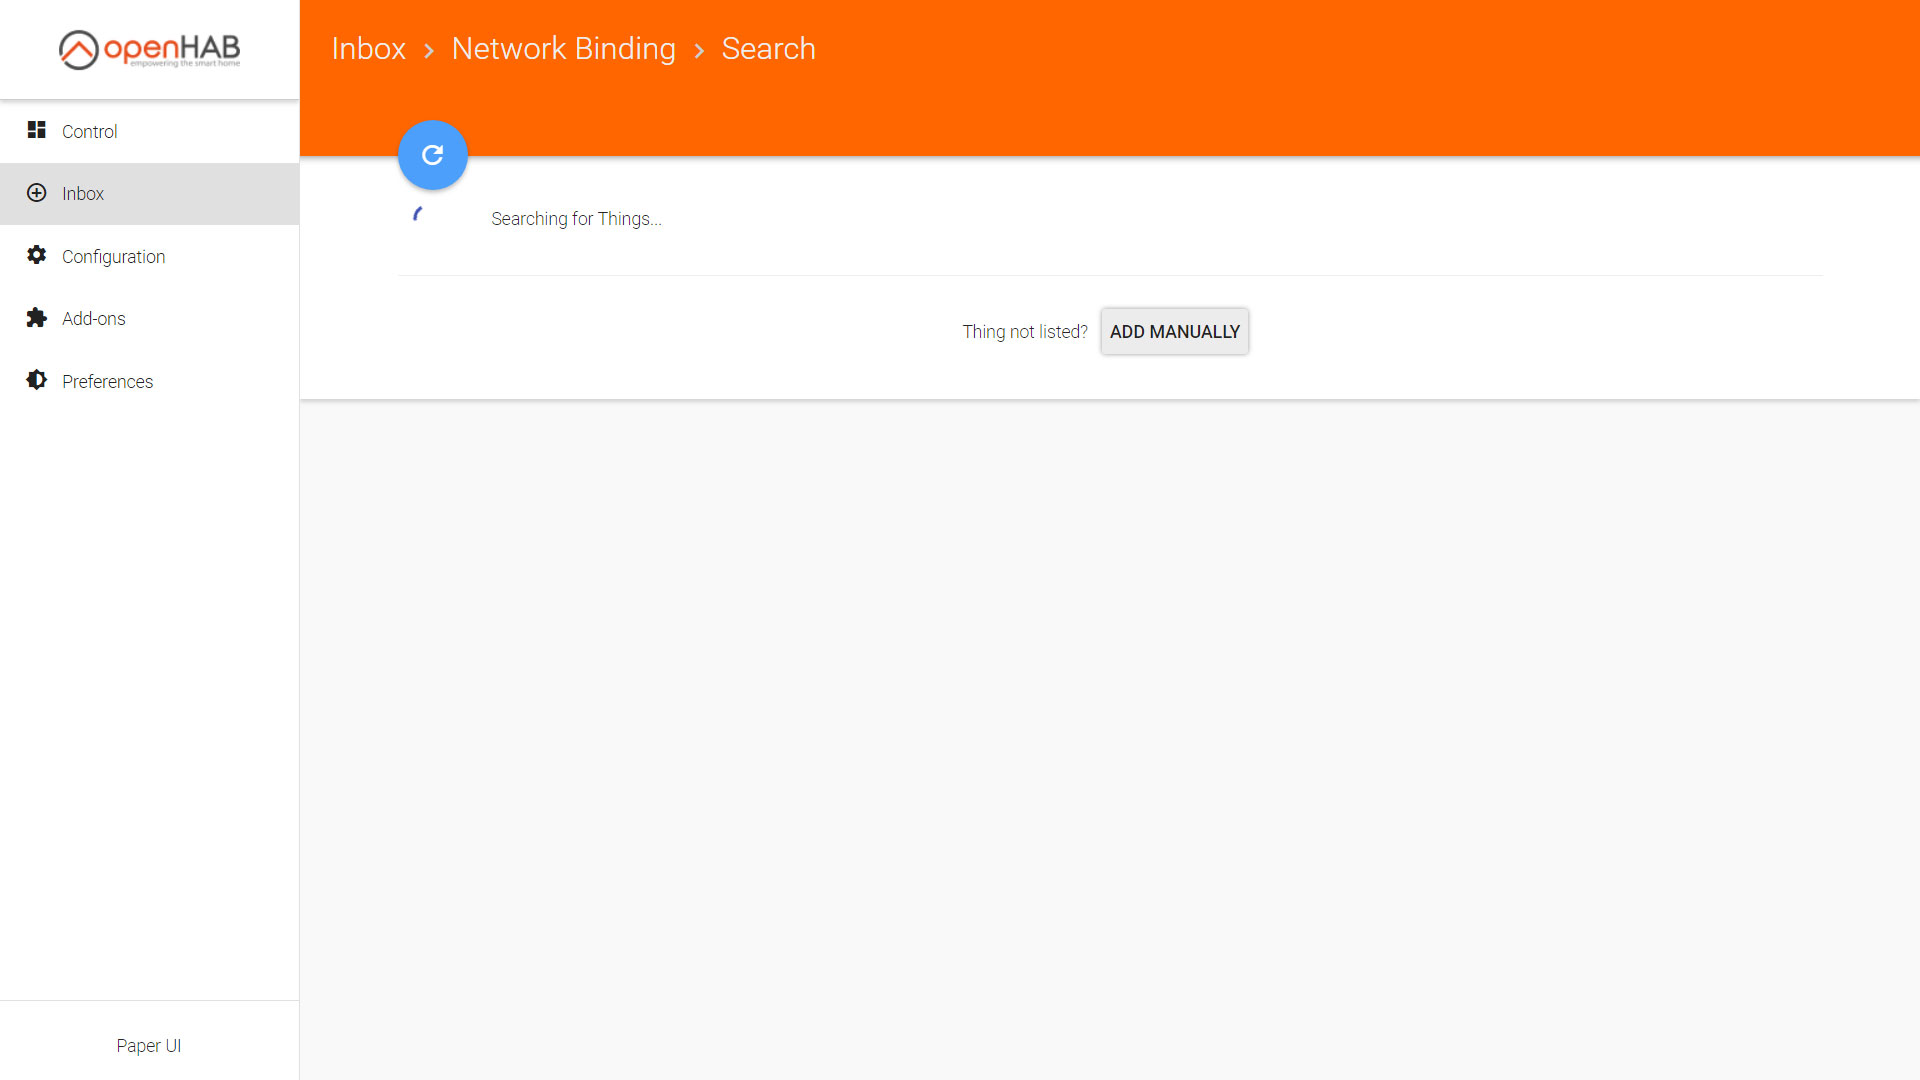
3. OpenHAB Server BasicsOpenHAB is an open-source home automation platform that can be used as the central element in a smart home. To use OpenHAB with Max2Play, you can install the OpenHAB Server Plugin. For more details you can head to our Wiki article on the plugin. After the successful one-click installation, you can enter the OpenHAB web interface by clicking the big blue button. You can select the standard installation to get started. Use the Paper UI to make your configurations. E.g. click on Add-ons, Bindings and install the Network Binding. This will let you add devices to your network. Head to the Inbox, click on the „+“-symbol, select the previously installed Network Binding and search for your network devices, for example your smartphone. If you cannot find it in the list, you can look up the IP address that’s given to your smartphone in your router’s web interface and add this IP address manually to your OpenHAB binding. |
|
|
|
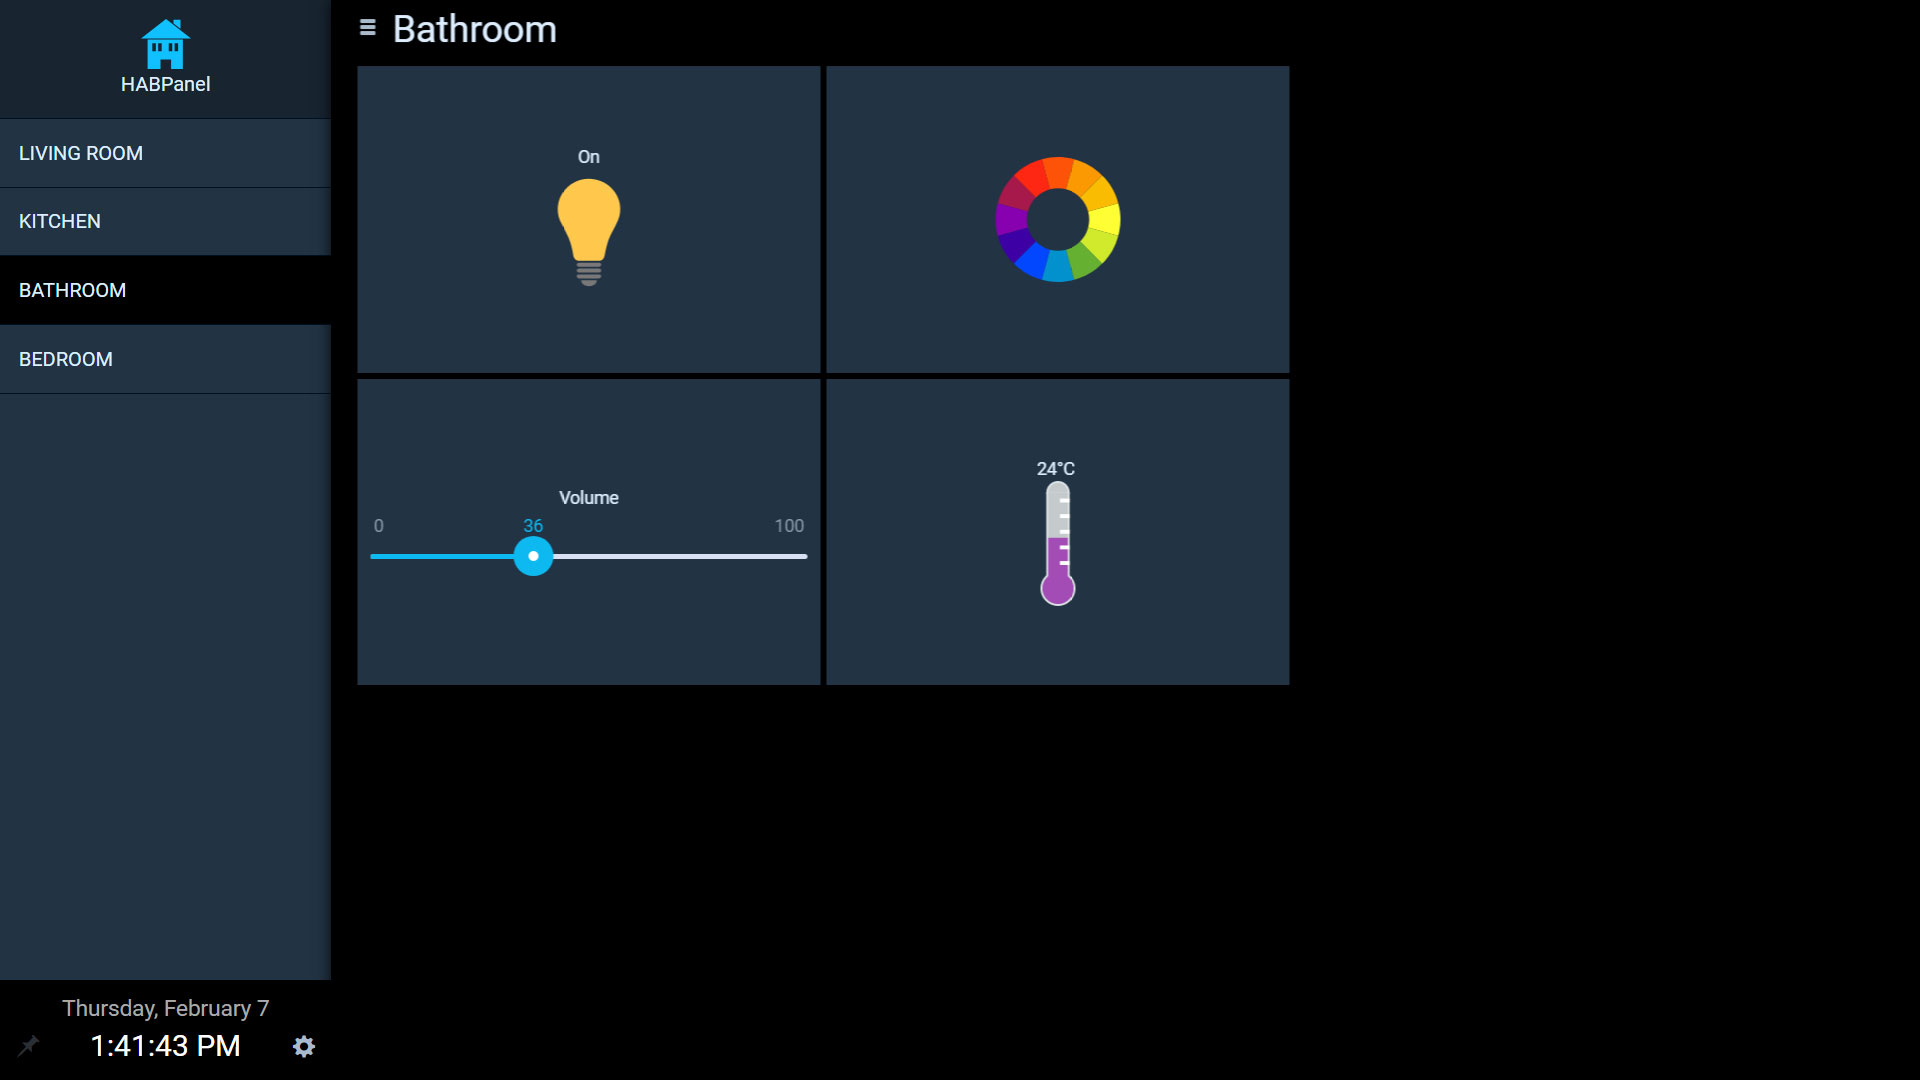
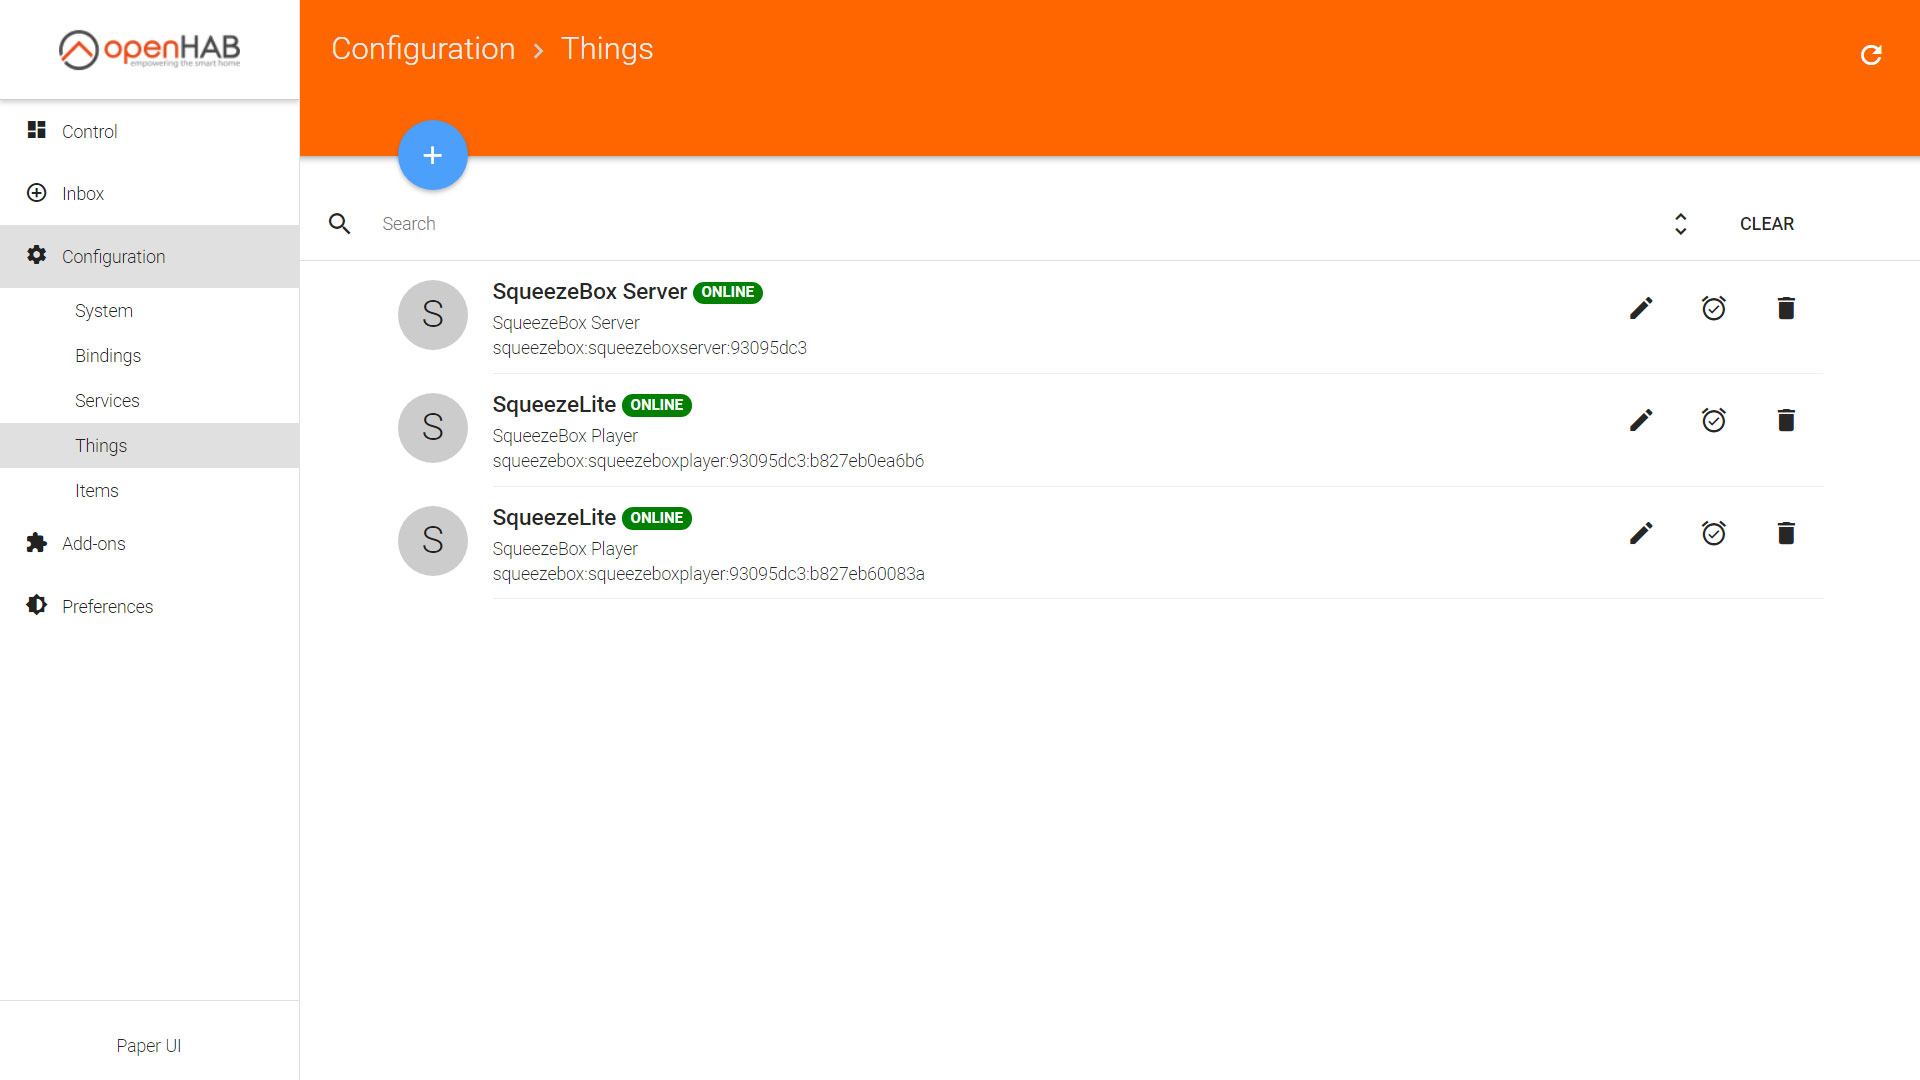
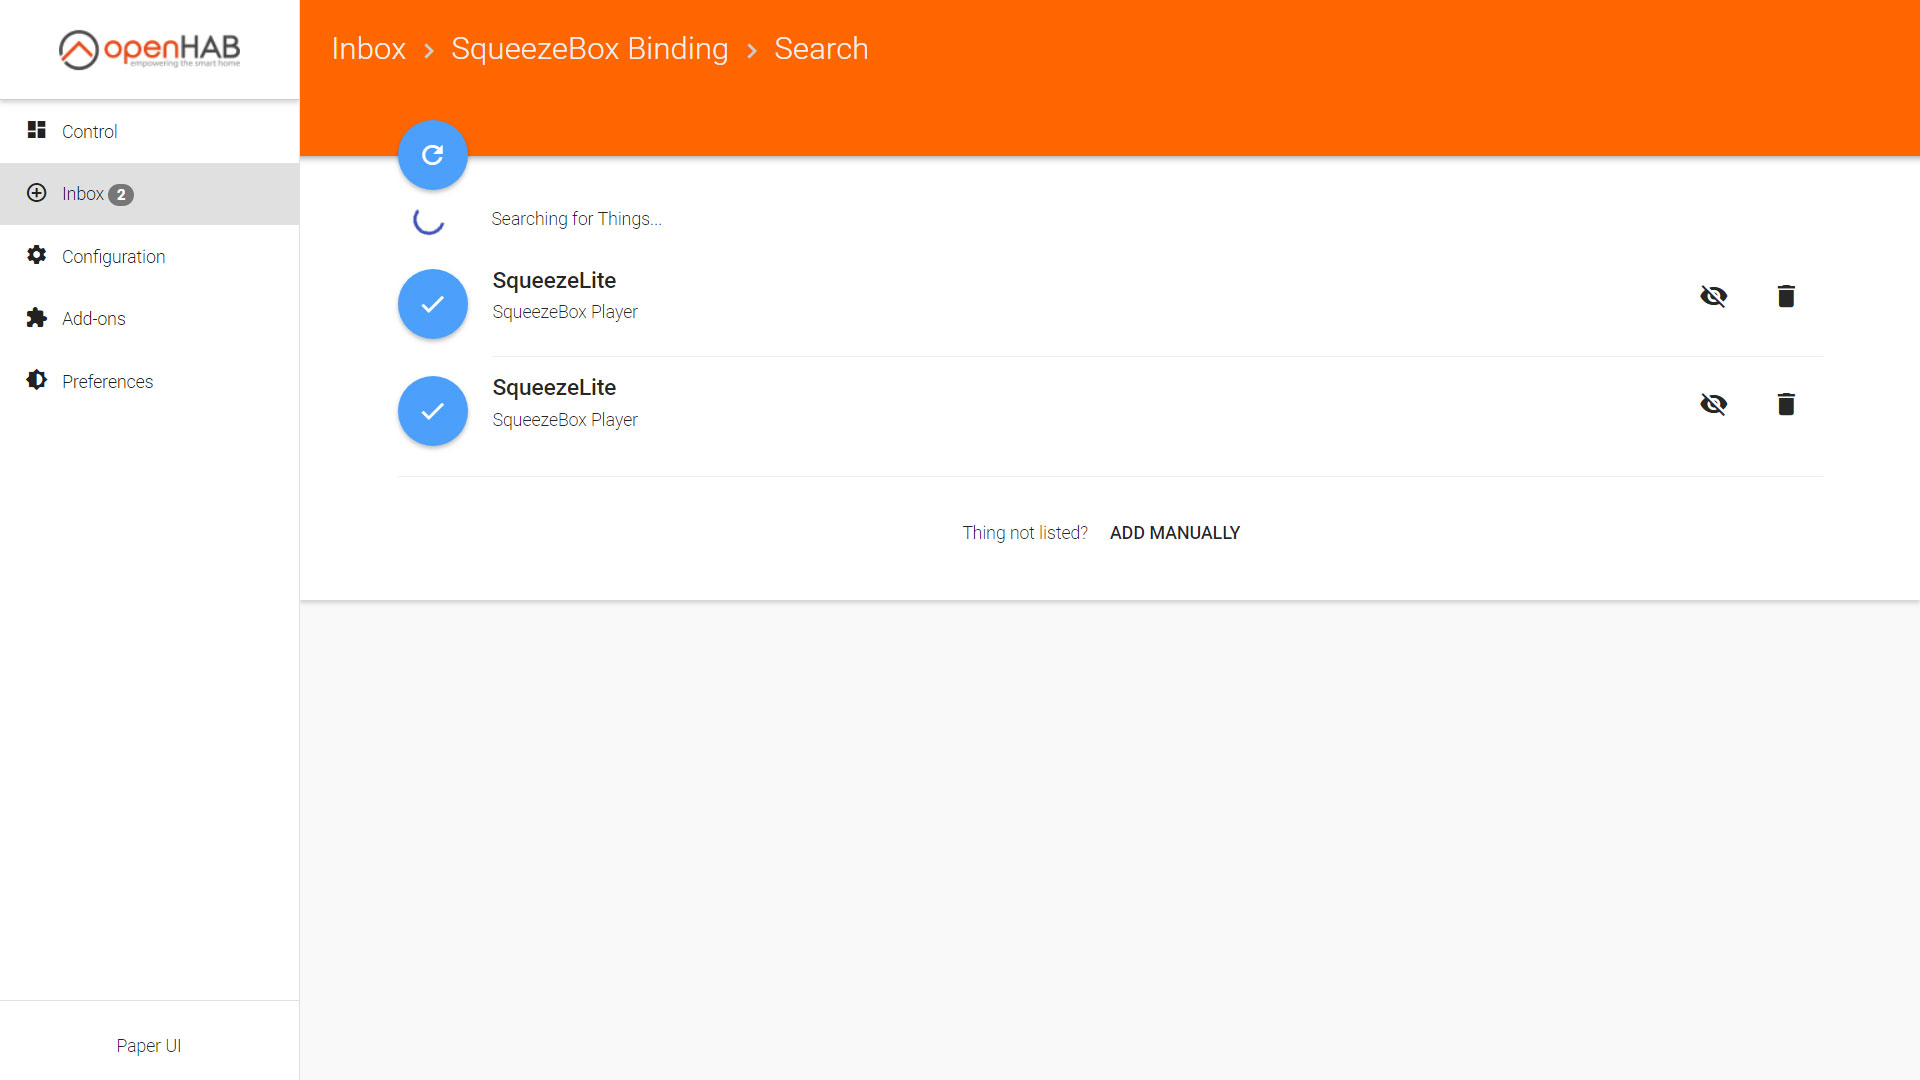
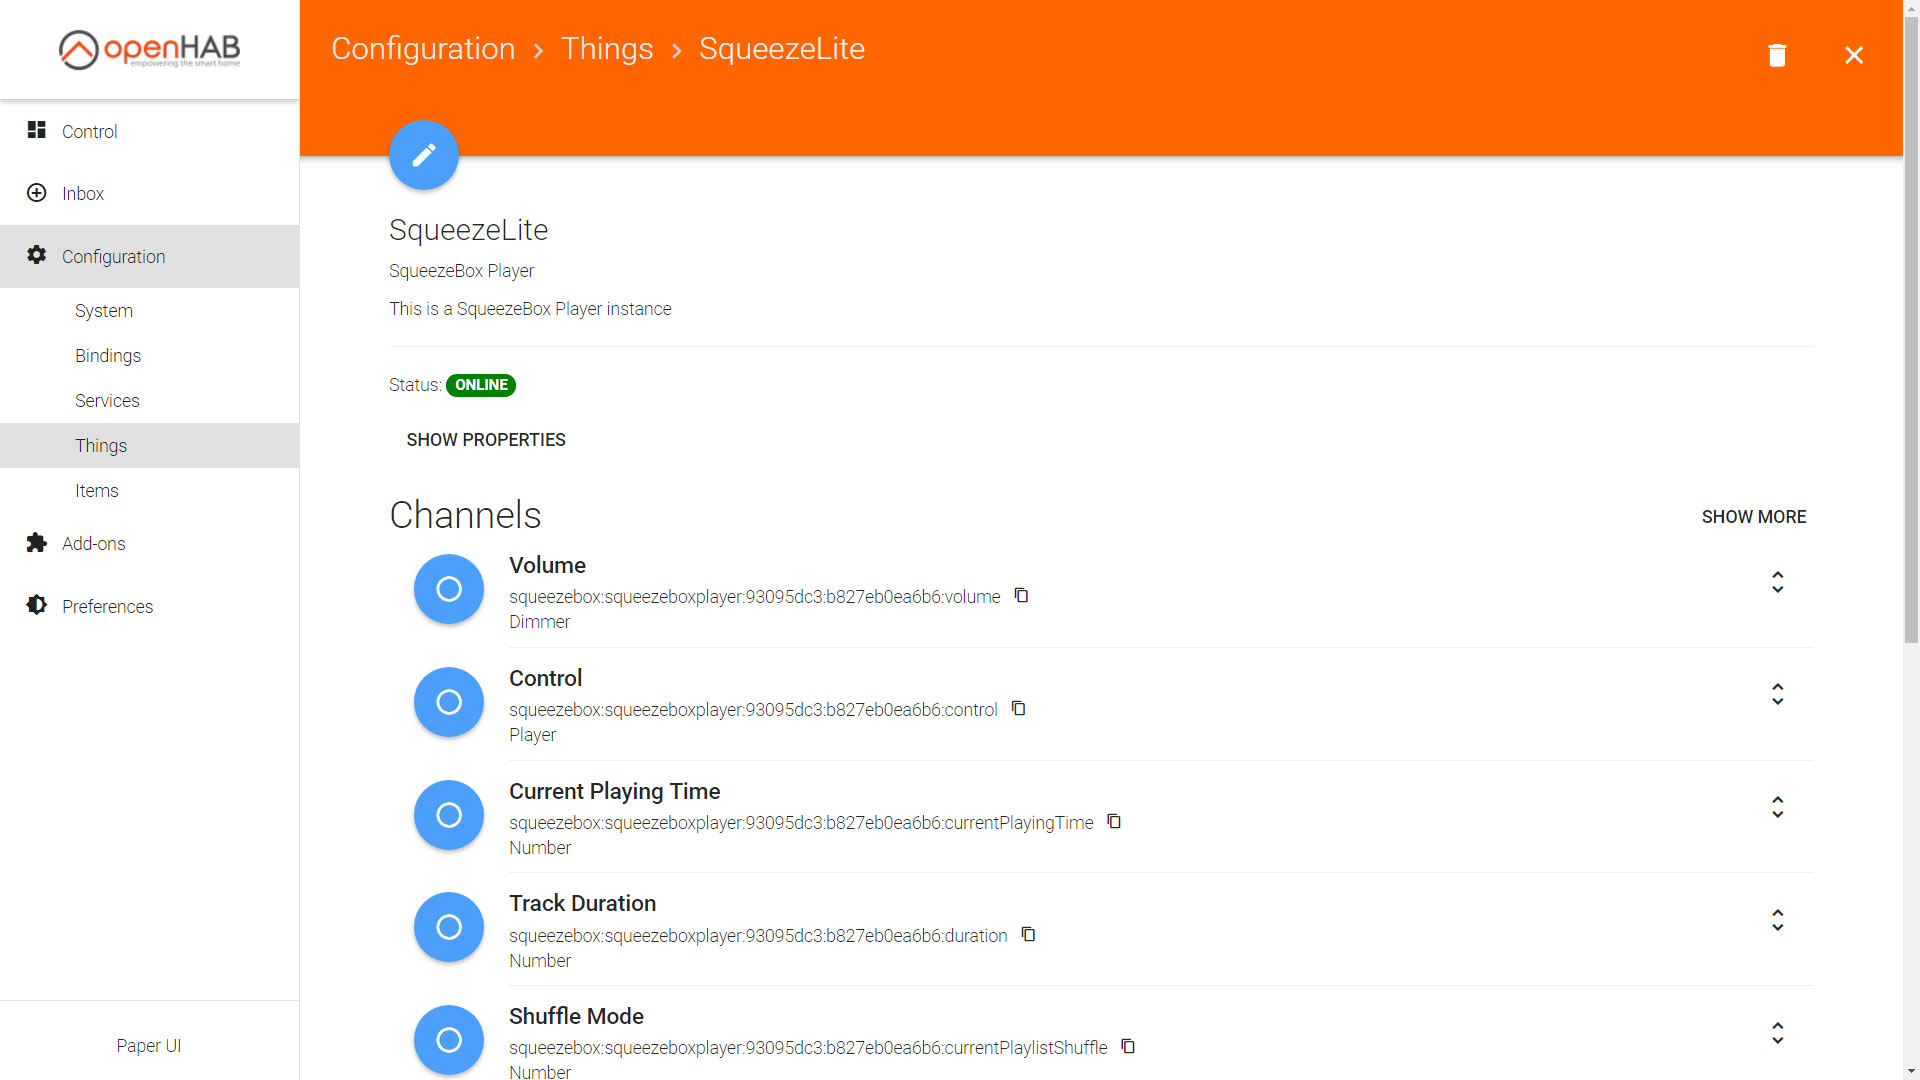
4. OpenHAB and Squeezebox ServerOpenHAB can also communicate with your Squeezebox Server and its respective players. You can simply install the special Squeezebox Binding (same procedure as with the Network Binding) and subsequently search for the server or add it manually. The IP address of the server is the same as the Max2Play device it is installed on. Afterwards, you can do the same with Squeezelite. You might have to also connect Squeezelite manually with a so-called bridge to your server. To do this, head to the settings of Squeezelite in your OpenHAB web interface (Configuration/Things/Squeezelite/) and select the right bridge. At Configuration/Things, you can now activate respective channels for each entity (e.g. Smartphone, Squeezebox Server, Squeezelite). After activating the channels, you can already control the Squeezebox playback in your OpenHAB Control Panel. In this HowTo you can learn more about OpenHAB and follow in detail how to automatically start playback when connecting your smartphone to your home WiFi. |


