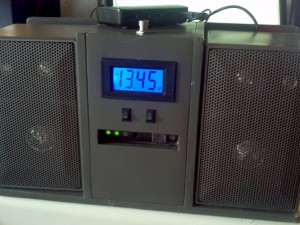
We are starting the Year 2017 with a very special project for you. Our user Whity built a media player with a display in the case of a classic stereo which can be controlled both by a tablet and manually on the streamer itself. To satisfy his high, audiophile demands, he put a lot of thought into it and made some interesting choices in his components.
Happy New Year and have fun reading:
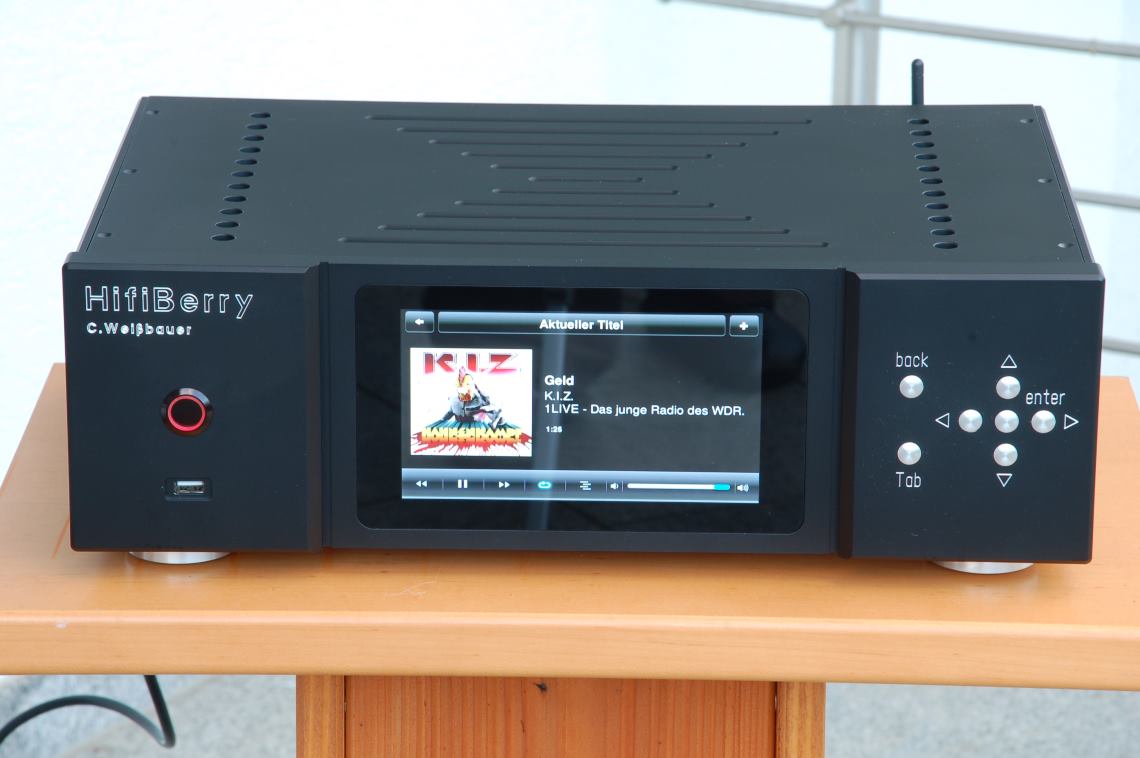
The HiFiBerry by C. Weissbauer
translated from German by Heiner from Max2Play
In the last few months, many Max2Play clients were added in our home, the system is beloved by our whole family (incl. my wife 😉 ) and a complete infrastrcture, based around a Synology NAS is already in place.
Now we wanted to add a player for our music room that should be running in a classic stereo casing but also not create a sound quality bottleneck when combined with high-end HiFi devices. The idea for my „Hifiberry“ was born.
The following points emerged as must-haves for the DIY project:
- Naturally, the highest possible audio quality
- The control should be possible physically on the streamer, even without a tablet
- Clear and legible display with title information and cover art
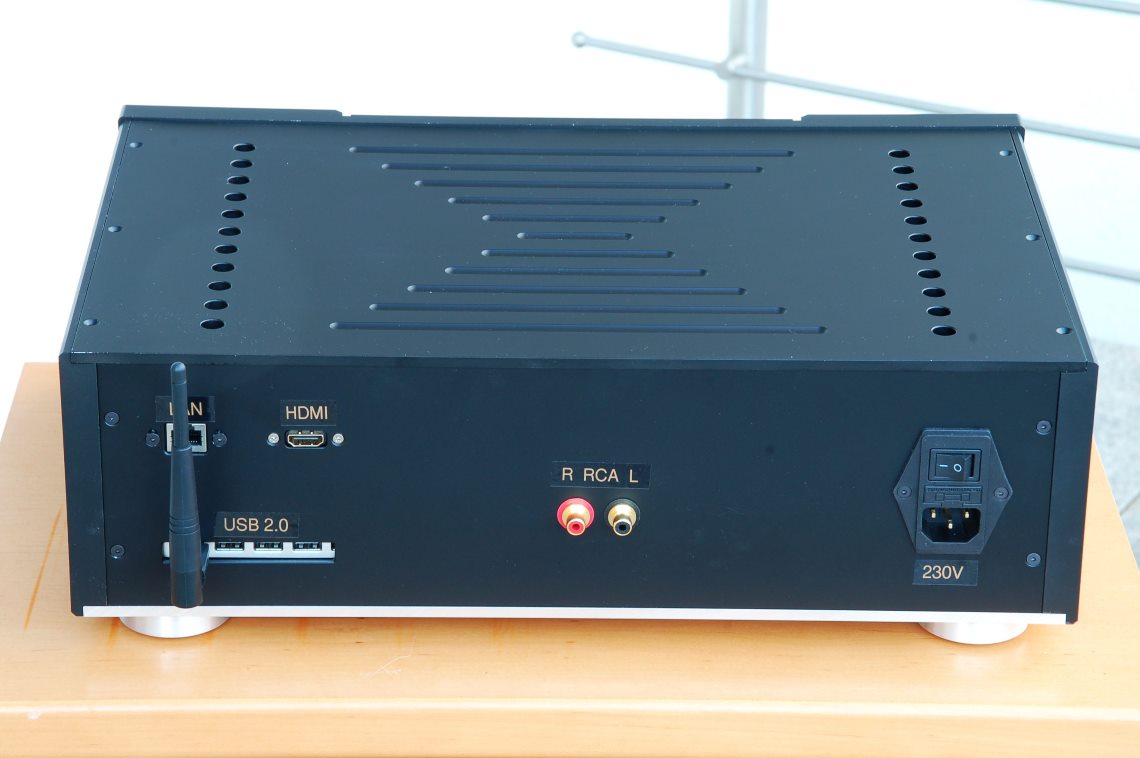
- Standard width for stereos of 43,5 cm
1. Sound Optimization
We made some test setups and finally settled on three modifications on the hardware side that can influence the audio quality especially positively.
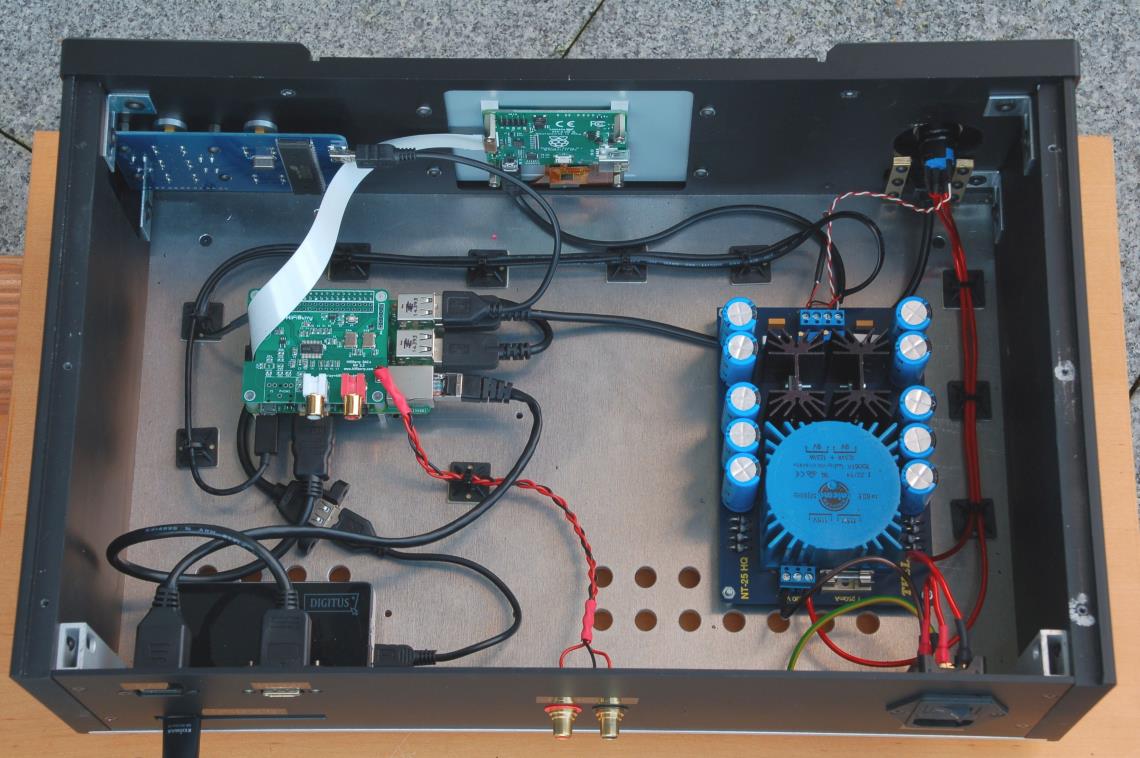
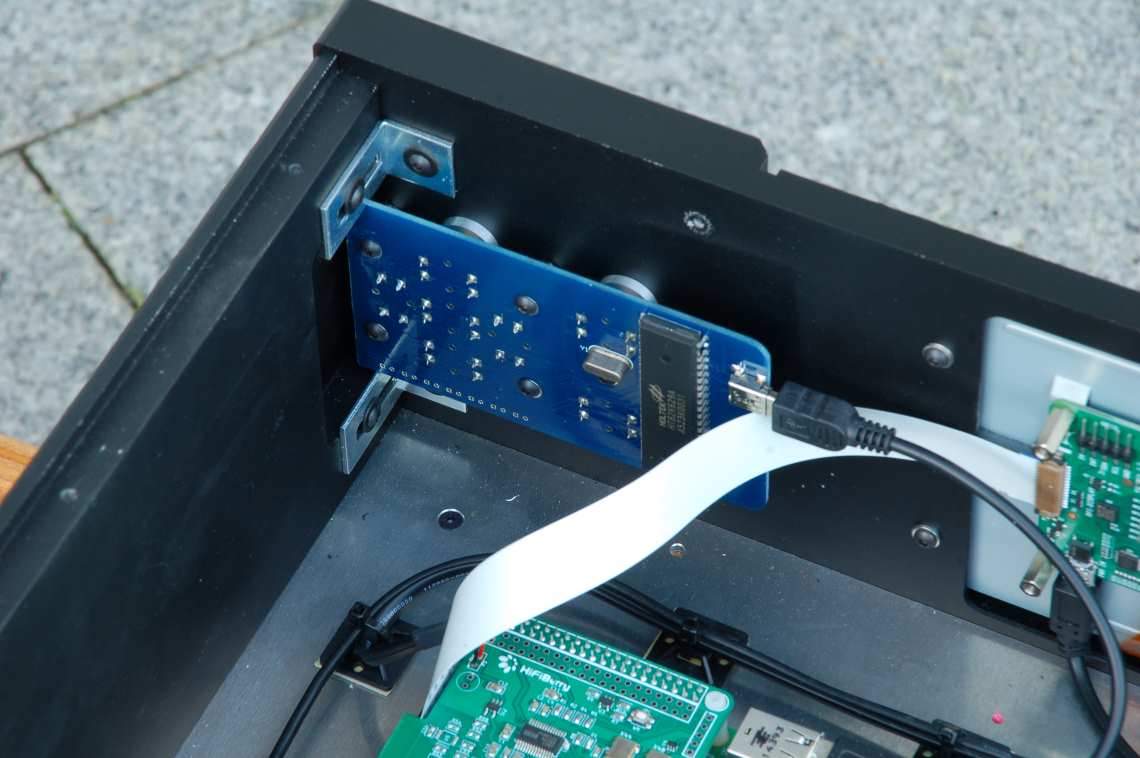
1.1. Splitting of the power supply for the DAC for converter and output section
For this, the HiFiBerry board’s resistor responsible for the output section is removed and instead the power is locally added spearately. Sounds complicated, but it’s not! A detailed tutorial can be found in the HiFiBerry forums.

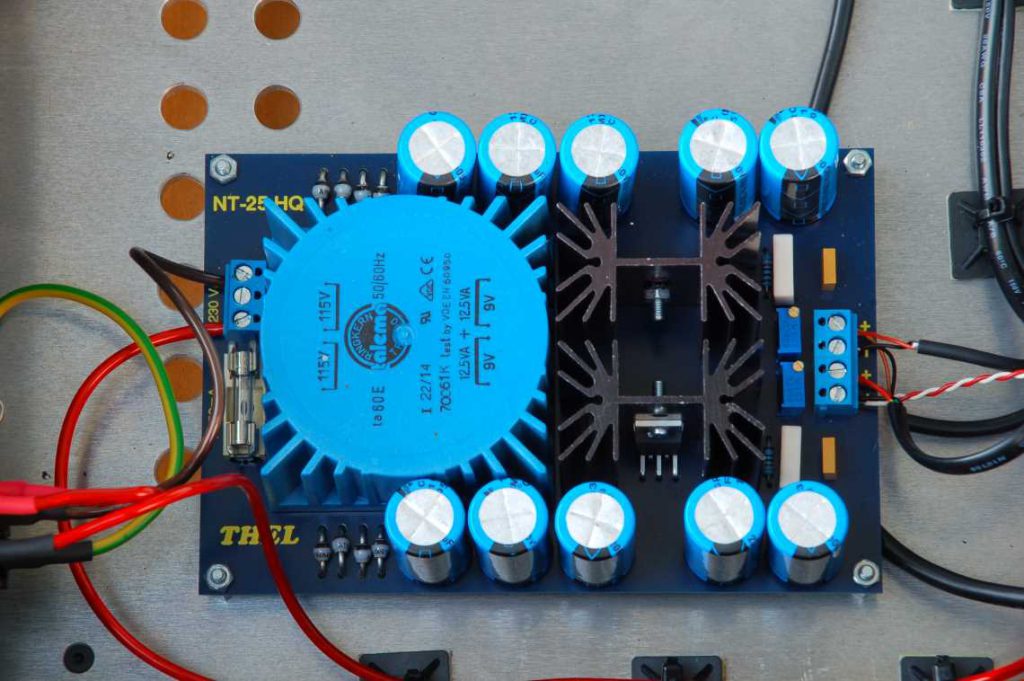
1.2. The most significant factor are the power supplies
While a simple outlet power supply makes the treble sound relatively sharp and its contures uneven, a quality mains supply can immediately offer improvement.
My choice was the double supply by Thel Audioworld, since I have had very positive experiences with Thel products in other projects. One half of the supply powers all digital components while the second is exclusively for the output level of the HiFiBerry DAC.

1.3. The third step shields the DAC from interpersals from the Pi
Either through spatial splitting, by connecting the GPIO’s of the Pi and DAC with cable or with a shielding plate. I currently use a piece of transformer plate that is electrically isolated by Plexiglas on both sides and connected to a mass.
The keyboard module is made by Audiophonics from France and works out of the box without any drivers. I removed the volume control buttons since I want to leave this task to the volume control of my amplifier.
2. Software Configuration
On the software side, I started with the Max2Play image for HiFiBerry sound cards, downloaded it, burn it on the SD card with the Win32DiskImager, connected the network cable, booted, checked the IP in my router and then accessed the web interface from a browser using the IP in the URL bar.
The updates were made and the missing plugins installed.
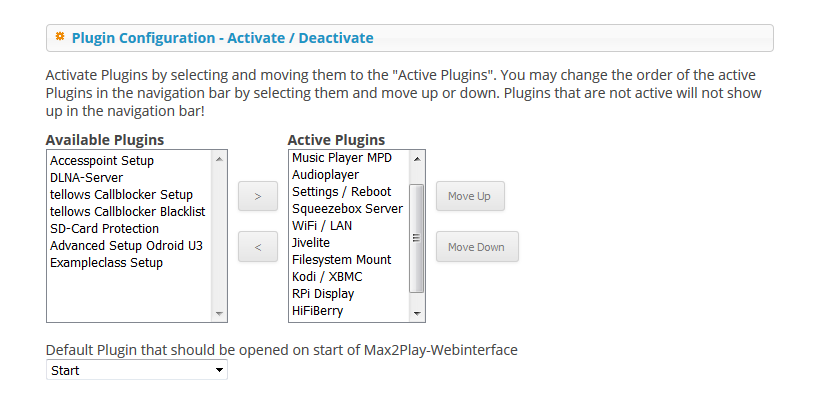
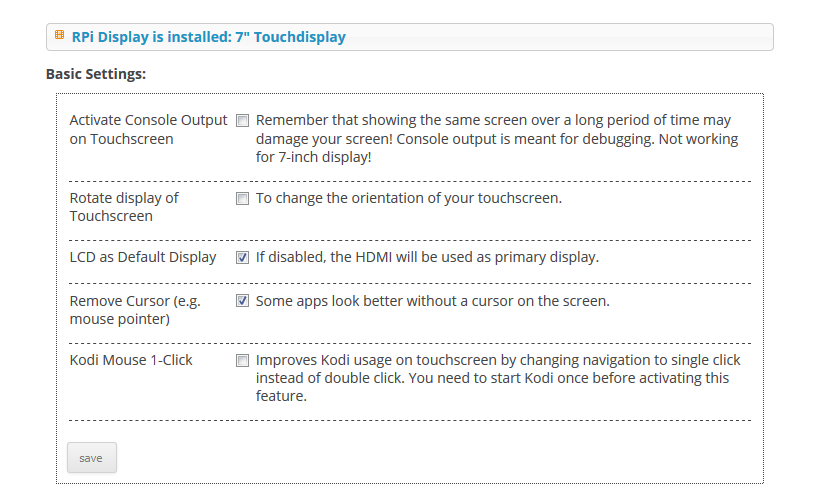
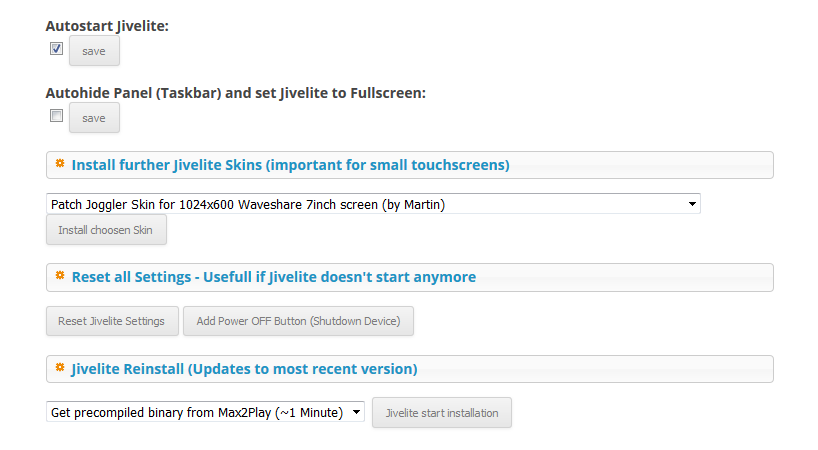
Now the display is configured so that the title is automatically displayed and the player can be controlled from the touchscreen. For this, we need to head over to the menu „Jivelite“, activate the autostart and install the Joggler skin for 7″ displays, save and reboot the Pi.
First I had to look for the setting that automatically selects and displays the right skin. Just go to the display options in the Jivelite interface and set the screensaver to „Now playing views -> artwork and text“.

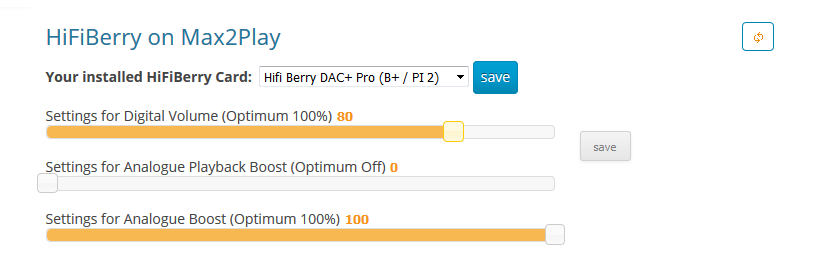
Now we set the Digital Volume to 85%, Analogue Playback Boost to 0% and the Analogue Boost to 100%. With too high values on the Digital Volume, unfortunately, the DAC tends overmodulate. However, it does make sense to play around a little with this controller to find out the value for optimal individual output.
2.2. The volume
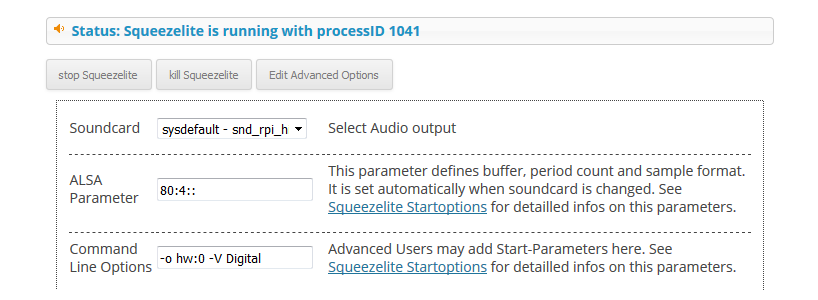
In the final step, we select the menu item “Audioplayer“ and edit the advanced options of the media player Squeezelite. There, you can check whether HiFiBerry is selected as the sound card and add the commandline option “-o hw:0 -V Digital“. This results in the volume only being manipulated by the hardwaremixer and by any software.
I hope this can be helpful, especially for beginners, as a little guideline on how to get started.
If you are interested in further information you can also visit my homepage.
For updates on this project please visit the following page:
audiophile greetings
Whity
If you are interested in this case or a similar solution for your HiFi project, you can contact Whity at
Update:
Whity has sent us a list of the necessary parts, making a rebuild of his project easier to realize.
MAX2PLAY
– 1 Raspberry Pi 2B or 3B
– 1 Original 7 Inch Raspberry Touch Display
– 1 Hifiberry DAC+ Pro
– 1 Stück Premiumlizenz Max2Play
– als Bundle kaufen
Thel Audioworld
– 1 Power Supply Thel NT-25HQ-09
Coming soon, available ca. end of February 2017
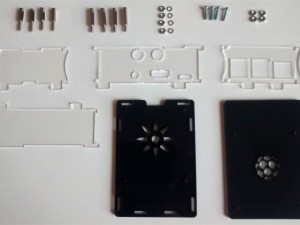
– 1 Custom Case
From the Audiophonics Shop
– 1 Aluminium Button 5469
– 1 Audiophonics Keyboard Controller XBMC 8435
– 2 Micro USB Male Power Cable 9405
– 1 Panel mount USB-A male to USB-A female
– 1 Panel mount HDMI male to female 1.4
– 1 Panel mount Ethernet RJ45 780
– 1 Neutrik NYS367 red 896
– 1 Neutrik NYS367 black 897
– 1 Viablue EPC-1 Silver Unbalanced Interconnector Cable 6798
– 1 Embase IEC Buchse witch switch and safety switch 8965
Miscellaneous:
– 40 Pin FFC cable 150mm to connect the display to the Pi
– M3 thread sleeve for mounting the board
– WiFi-Stick Edimax EW-7612An V2
– USB-Hub
– Screws, cables…
Related Articles

16 Comments
-
Hello,
Great project ! I would love to build something similar. It appears that a quality linear power source as well as component isolation is essential. Regarding power source, I note that the Thel NT25HQ appears to be only available at 230V input. The Thel looks ideal but useless in my 120V environment. Do you have any suggestions regarding a quality linear 120V input, dual output 5VDC power source on a circuit board? Additionally, where did you source the fine looking enclosure? Is it possible to provide parts list? -
Hey neil,
I’m whity the builder of the HifiBerry player.
It’s in Europe somewhat difficult to get hardware with 110V operating voltage.
At the moment I have two options for you.
1. Write an email to Thel Audioworld. Mr. Thel is very competent and realizes almost every customer wish. He does not for the first time sell to the US and knows a solution for vou.
2. The Chinese shop Alibaba offers linear power supplies. I have not tried them myself, but they are highly praised in the german DIY audio forum.
For example: https://www.aliexpress.com/item/Hifi-LT1083-LPS-DC-Linear-Power-Supply-2-way-Output-PSU-50W-sealed-transformer/32628871584.html?spm=2114.40010208.4.92.N6Qt9XFor a piece list was already asked more frequently, so I will create one and publish it on MAX2PLAY in the coming days .
The housings I will manufacture and offer as small series. If you are interested, please write me a short mail to [email protected]. So you will get the latest news.
Best regards
Whity-
Thank you for responding, again, a great piece of work on your part.
-
-
Looks very, very nice! Especially the screen is very nicely implemented!
Is there a reason not just to use a touch screen iso buttons?
I’m planning on a similar project, Odroid C2 based, VU8 touch screen, Soekris DAC and Hypex amplifier all-in-one. -
Hi, thats the greatest project I saw for Raspberry for HD Audio. Case looks awesome. Very professional.
-
Wow, that’s what I was searching for, what a information! present here at
this blog, thanks admin of this web page. -
Hi there
I’m particularly interested in the control keyboard you used, now I don’t seem to find stock of this item, do you know anywhere I can find it?
Thanks
-
Author
Hi Thurstan,
Whity got this panel from Audiophonics. You can head to his site, http://www.weissbauer.com for direct contact and further information on his build.
-
-
Hi, the case is really awesome but….where can we find it ? i’ve searched but didn’t found anything 🙁
Thanks-
Hi Stephane,
Unfortunately, this was a custom creation by Whity the writer of the article. He had to take down his website some time ago.
We will let the community know when we get any news from him on his builds, though. 🙂
-
-
Hi, I’m hoping to do something similar in a full width hifi case (without display) but I’m using the IQaudio DAC. Do you have a wiring diagram from the THEL power supply to how you powered the DAC and Pi?
-
249/5000
This project is the one I would like to realize, unfortunately I can not find any information about the case. It is unfortunate that the Whity site is closed. I hope we will soon have all the information to recreate this project.-
Hi apache,
Could you specify the information you would still require from Whity? I’ll try to contact him and ask if he can find time to reply here.
-
-
It would had been nice if you could have the build-instructions on your homepage. Also with some information if you could make it even more cool by using a raspberry pi 4.
-
Hi Ingemar,
Thank you for your interest in Whity’s project! Unfortunately, he had to shut down his website where these instructions were exclusively hosted. We cannot offer up these instructions since we are not the creator or vendor of this product.
-
-
Imagine, after all this work, for the nicest and purest sound and still play only MP3’s 😉
Isn’t Whity’s website still available on WayBackMachine?

