Introduction
I will show you how to use the plugin „Image Burner“ from Max2Play and what opportunities it can offer you.
With this plugin, you can save pre-configured images on your Max2Play device. It is possible to give a name to the image, assign its own path and a short description about the image before you can save it onto the Max2Play image burner list. With this option, it is also a management system for all saved image-files. Additionally, you can burn more than one sd-card with the same image-file at the same time. During the burning process the sd-card is made into a bootable device.
You can use this plugin with other plugins from Max2Play, but you should use the Image Burner on a separate Max2Play image and on a separate sd-card. It allows you to save backups on this image.
Perfect for people who want to burn several images for friends and operating partners.

What Exactly Is An Image Burner?
What is an image?
Images (or ISO-Images) are archive files of optical discs. ISO image files usually have a file extension of .iso. With this file it is possible to burn the image onto an sd-card and the device can be booted.
With the Max2Play Image Burner, it is possible to write on several sd-cards at the same time with a saved image (backup or pre-configured software setup of Max2Play). Existing files and partitions are deleted during the process. The Image Burner will not only overwrite the old files, it works like the Win32DiskImager. It installs a bootable image, so you can be assured to have a fully functional system.
Please Note: After burning, your SD-card is not readable by Windows. You can fix this with a quick formatting.
What Do We Need?
A Raspberry Pi 3 and a device at which you can connect several SD-cards are required. To save the backup files, you need a Max2Play-Image on an sd-card with enough space. Here, it is important to know how many different versions you want to save. This is my setup:
First Steps
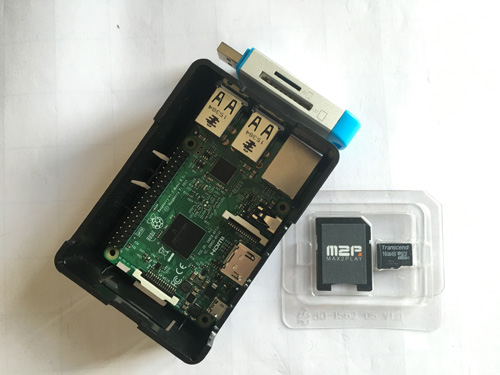
I am using a Raspberry Pi 3 and a case for it. The assembly is pretty straightforward. The first setup of Max2Play is ready after a few steps:
- Unpack the Raspberry Pi 3 and plug in the sd-card with a pre-installed Max2Play Image into the Pi.
- Start the Raspberry Pi
WPS: If you start the Raspberry Pi without a LAN-Cable plugged in and simultaneously activate WPS on your router, the Raspberry Pi with Max2Play OS will automatically connect with the router.
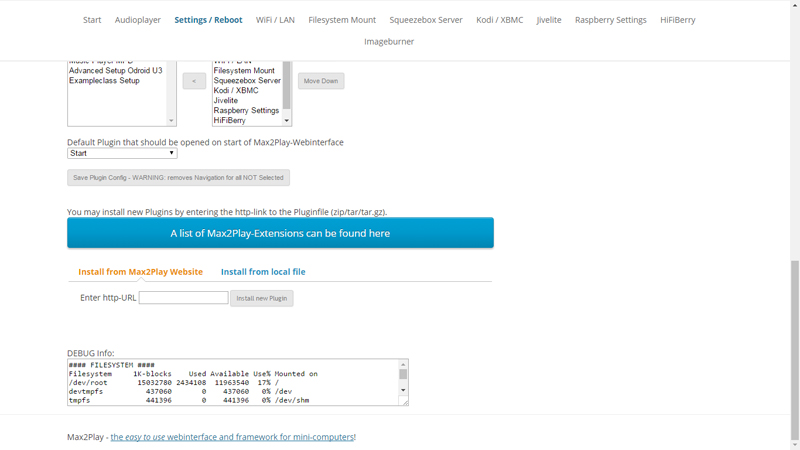
- Go to the Max2Play Webinterface. Under „Settings/Reboot“ it is possible to rename the player. (e.g. „imageburner“). This is helpful when identifying your device.
- The plugin „Image Burner“ is downloadable from Max2Play. You can reach the necessary web page over the menu „Settings/Reboot“ and there you can also insert the URL for the download. (right picture)
Plugin Imagebrenner - (Additionally) You can change the order of the menus of Max2Play, so you can use this image only for the image burner. Plugins like the Audioplayer, Squeezebox Server and Jivelite are not necessary and can be removed. (right picture)
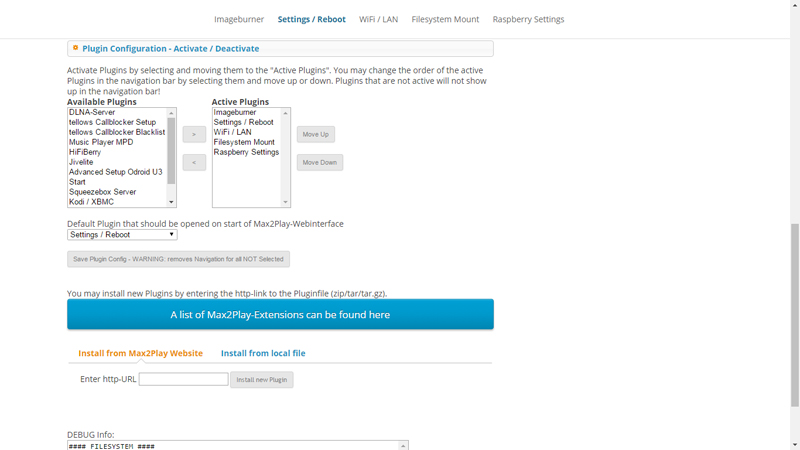
Image Burner Plugin Configuration
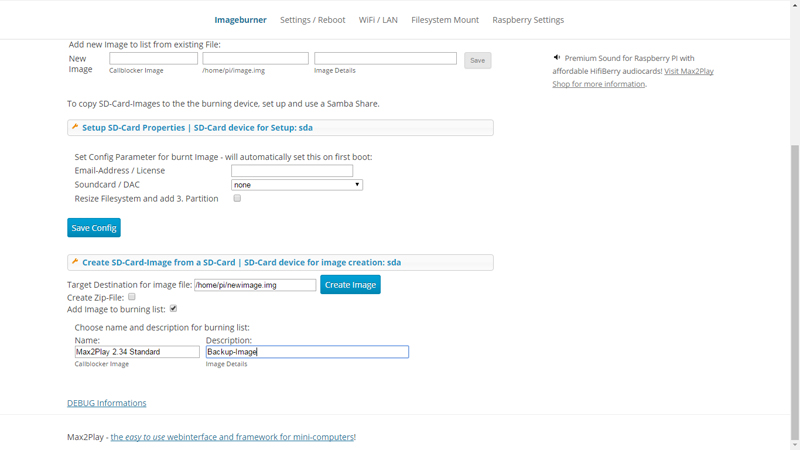
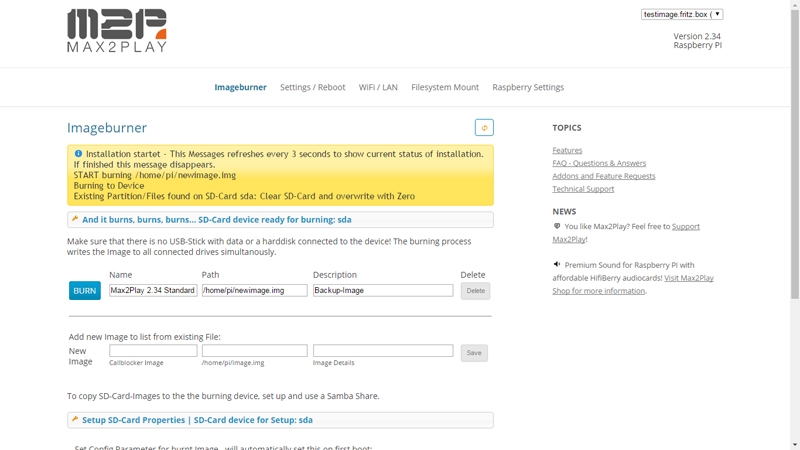
Now you can open the menu of the plugin (right picture). Here you can see at the beginning a default menu and different options.
You have to save the Image on the filesystem of the Max2Play device. For this, you can take an SD-card (which is used until this moment to play music or something else) and plug it into a USB SD-Card-Reader.
To save this image, go to the menu „Create SD-Card-Image from a SD-Card | SD-Card device for Image creation:sda“
Note: Here you can see whether a compatible SD-Card is available or not.
Then, you click on „Add Image to burning list“. In the next step, you can give your image a name, a file path and a short description. If you want, you can add a description to specify the Image.
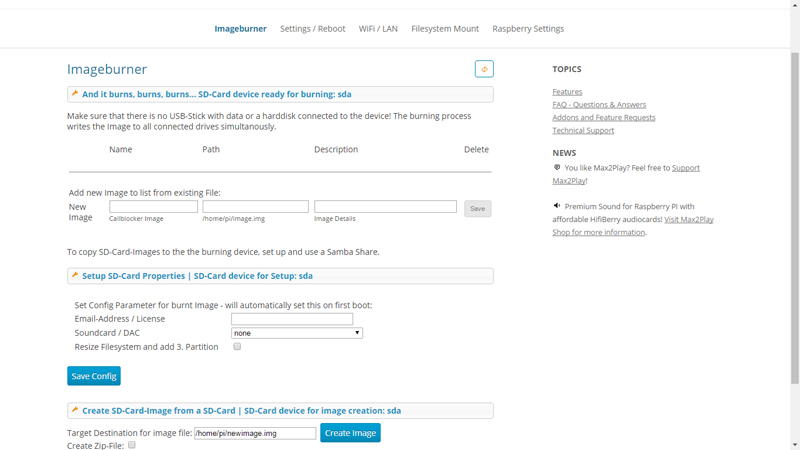
Max2Play is now saving the Image. It is then added to the list. This process may take a while, please be patient. If it is ready, you can see in the info box. There, a text appears, saying „Creating Image was successful“ (right picture)
Example Setup
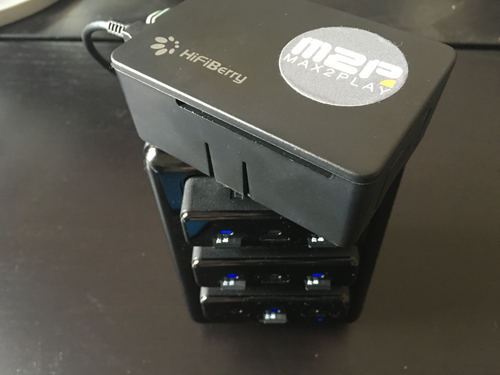
Finally, I want to show you an application example. In the following example, I will show you how you can use the Image Burner to save a lot of time. As I mentioned earlier, I am using a Lexar Professional Workflow Card-Reader. With this device and the Max2Play-Plugin, it is possible to burn 12 SD-cards at the same time.