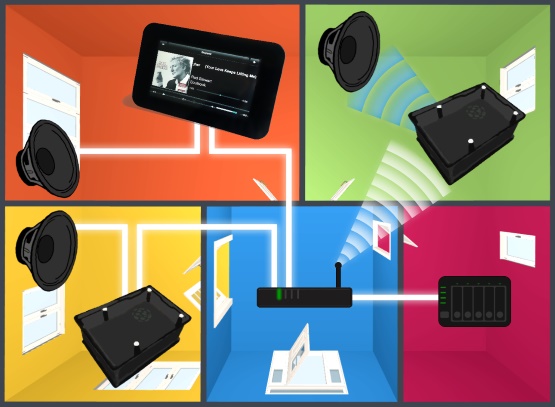
Multiroom Audio – the link between smart home and hi-fi audio – is gradually finding its way into our households: Several players are controlled by a central control unit (usually an app), so that the whole apartment can be filled with your favorite music – optionally even synchronized. Often in this field, several smart (internet-enabled) speakers such as Sonos, Bose SoundTouch or Teufel Raumfeld are connected to each other via manufacturer software. These systems can then be expanded as desired with more of the manufacturer’s speakers. This usually works well, but isn’t really affordable for me. However, such setups cost several hundreds to thousands of Euros. In addition, the supported services and features of these speakers are usually limited and can only be used ideally with the manufacturer’s own products.
But most of us still have one or two „offline“ speakers at home. Wouldn’t it make more sense to make those speakers smart and multiroom-capable instead of buying new expensive speakers?
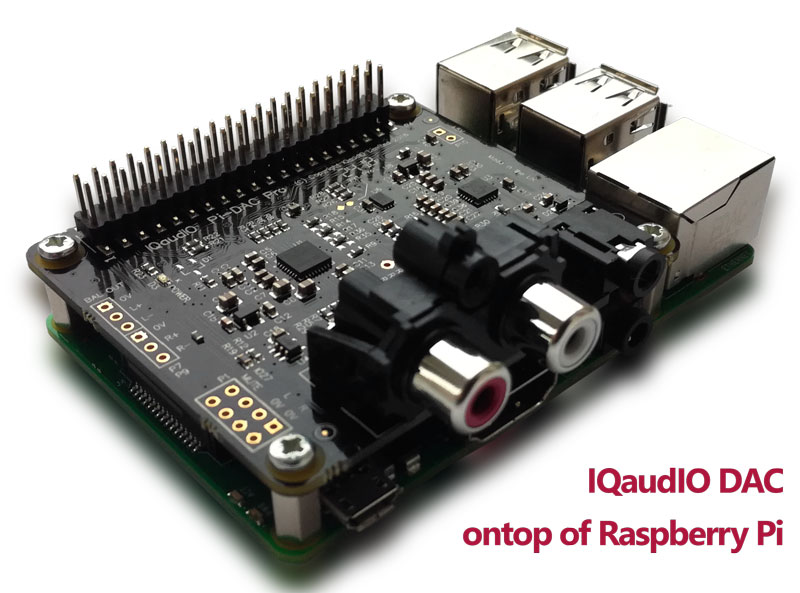
With the help of Raspberry Pis and suitable sound cards, this can actually be done easily and inexpensively. Both components are simply stacked together, connected to the loudspeakers with common audio cables and set up via the Max2Play web interface.
In this series of articles, I’ll show you step by step how to assemble and set up such a system.
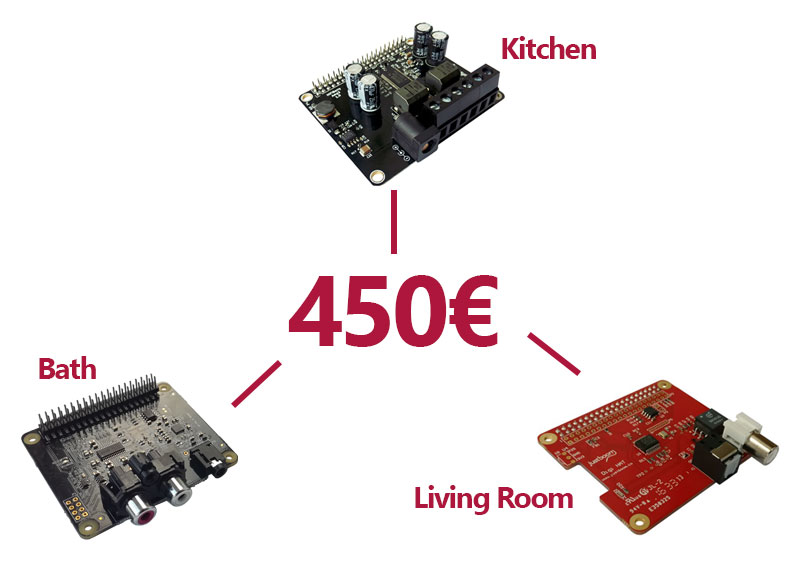
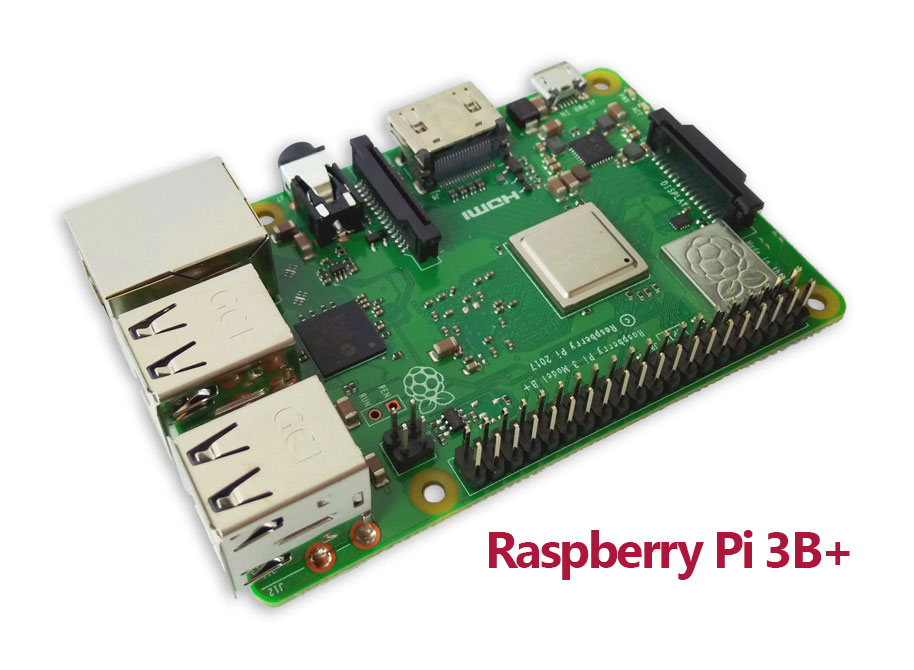
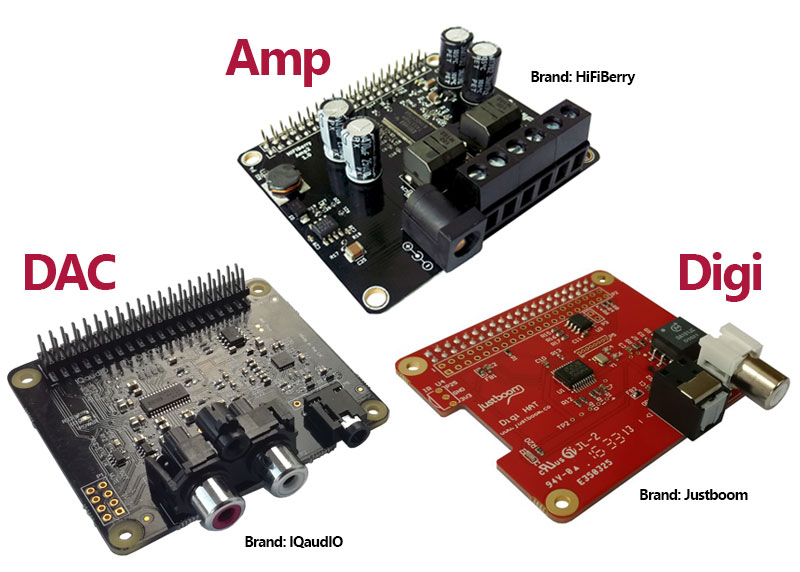
I’m a student from Leipzig and worked at Max2Play in the internship semester of my bachelors degree in media technology. I’m more or less tech-savvy, which in my case means that I know how to search the internet for solutions to technical problems and apply them if necessary. I wouldn’t call myself an expert in audio nor technology. Although I value a good and balanced sound, I can listen to music on the go with old in-ear headphones if necessary. In conclusion, I am a music lover with moderate technical knowledge and a low budget. Luckily, it does not take any special skills to set up a Raspberry Pi with a sound card and Max2Play. On the contrary, anyone can build such a multiroom setup and I’m willing to prove that with the upcoming articles. It is just great to listen to your favorite music in the whole apartment or even the whole house. The best part is when you can synchronize the players (the devices that play the music). You can continue hearing the music that is currently playing in the living room, when entering the kitchen or any other rooms. In the next articles of this series, I’ll show you how to outfit every room in your home with a Max2Play Hardware Bundle and how to install and set up the software. In doing so, I’ll explain every step precisely while avoiding any technical language. In the first article we start with the living room and a Digi-Bundle. (Digi Bundle? Don’t worry, I explain the term below.) For all three bundles (3 rooms) I have determined a total budget of 450 €. In this price range, there are no other Multiroom systems with comparable quality and flexibility. Depending on how many rooms you want to equip and which audio components you want to integrate, you may not need some of the three types of sound cards. However, I don’t just write about the hardware setup, but also explain how to install and set up useful software on your Max2Play devices. It is worthwhile to stay tuned in any case. What is a Raspberry Pi? A Raspberry Pi is a mini computer in credit card format. The board has everything a computer needs: HDMI output for a screen, jack output for headphones, USB ports for using mouse and keyboard, Bluetooth, a WiFi and ethernet. The operating system of the Pis is usually Linux-based and freely configurable. The Pi can thus be reprogrammed and adapted to your own needs. This makes it the perfect solution for any application. What types of sound cards are there and how are they different? There are three main types of Raspberry Pi sound cards: DACs (Digital-Analogue-Converter), Amps (Amplifier) and Digis (Digital-Transporter). Each type has different audio outputs because they are intended for different fields of use. A DAC sound card usually has two RCA (cinch) outputs (L and R). The name comes from the fact that it converts the digital data stream (i.e. the music) for transmission into an analog signal. For connection, active speakers (or other components with analog input), which already have an integrated amplifier, are required. An Amp sound card usually has 2 to 4 screw terminals for connecting passive speakers. In contrast to active speakers these speakers need amplification with the help of a larger power supply. This power supply then provides power to the amp sound card, the Raspberry Pi and the passive speakers concurrently. A Digi sound card is used to forward the digital data stream to a digital input (HDMI/optical/coaxial). The digital-to-analog converter must therefore be present in the target device. A digital transporter sound card has to ensure bit-precise transmission. Why do I Need a Sound Card? To listen to music with Max2Play and the Raspberry Pi, you do not necessarily need a sound card as the Raspberry Pi has both a jack (analog transmission) and an HDMI output (digital transmission). However, the quality and performance of the analog signal of the jack is not optimal. For a better sound experience, it is recommended to use a sound card that handles audio processing and transfer only. In addition, most sound systems require specific connectors such as RCA (cinch) or TOSlink. How do I use Pi and Sound Card? You can simply stack the sound card ontop of the Raspberry Pi. Then just connect them to the power supply and speakers and your setup is fit for use. Besides the Squeezebox Multiroom software, Max2Play also offers many plugins that you can use to expand your system, e.g. Spotify Connect, Bluetooth integration and home automation plugins. The extensions can be installed and set up with just a few clicks and then provide you with new useful functions. An overview of all Max2Play plugins is available here.A little bit about myself:
Why Multiroom Audio?
An important point is also the central control of these players through a media server. Max2Play uses a so-called Squeezebox Server here. It is installed on one of the devices and distributes the music to all other connected audio components in the house. You can easily operate this server with an app, the web interface or another control device.Three Easy Steps to Multiroom
Basic Information to Get Started:
Max2Play's Advantages:
Advantages of Max2Play
Features


