In this How To we show you how to set up and use the Roomskills plugin for the Squeezebox Server to control your music playback via Alexa voice control. You can also find these instructions on the Roomskills website:
![]()
Costs
To use Roomskills with the Logitech Media Server, you need the Advanced package, which is available for €10/year or €3/quarter. In addition to voice control for the LMS, you also get the functions from the other two packages Free and Basic. When you register for the first time, the „Basic“ package is automatically activated for 4 weeks free of charge. With this you can already test the plugin for the LMS.
Step 1 - Roomskills Registration
With the installation and connection of any of our Alexa skills a user is automatically registered in Roomskills. If you have not activated a Roomskills skill there are 2 ways to register with the Roomskills service. If you register directly and not through an Alexa skill it is important, that the email address used in the registration in Roomskills is the same email address, that will be used in Alexa later, because the identification in Roomskills is done via the email adress.
- The easiest way to register and log into Roomskills is by using the ‚Amazon Login‘ button on the login page.
- An alternative way to register and log into Roomsskills is by registering your email address and define a password to login. First you use the registration page. After the registration you have to confirm your given email address by clicking on a link send to you from us by email. After the link has been clicked you can log into Roomskills using the email address and password defined in the registration process.
Step 2 - Setup of the Logitech Media Server in Roomskills
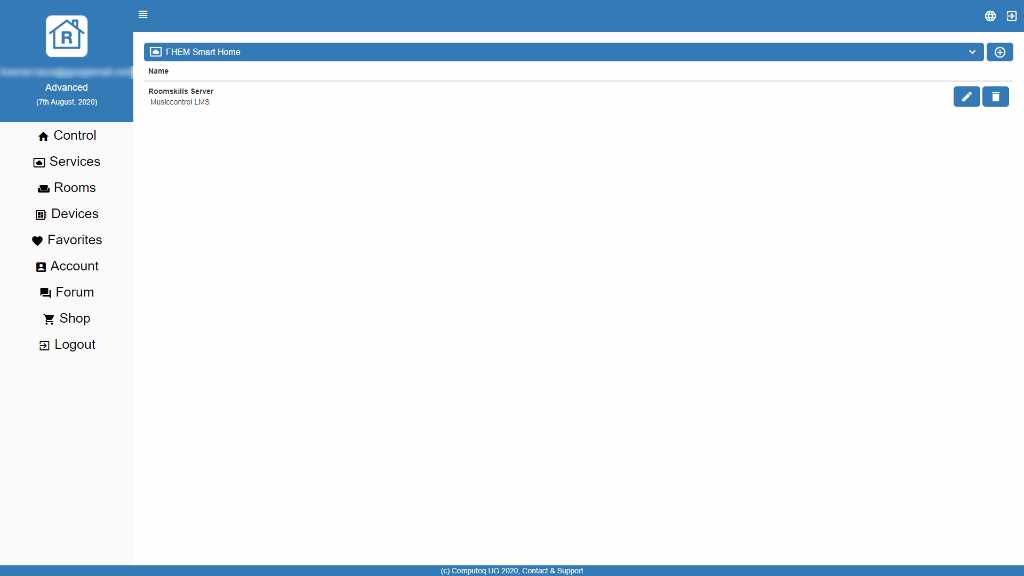
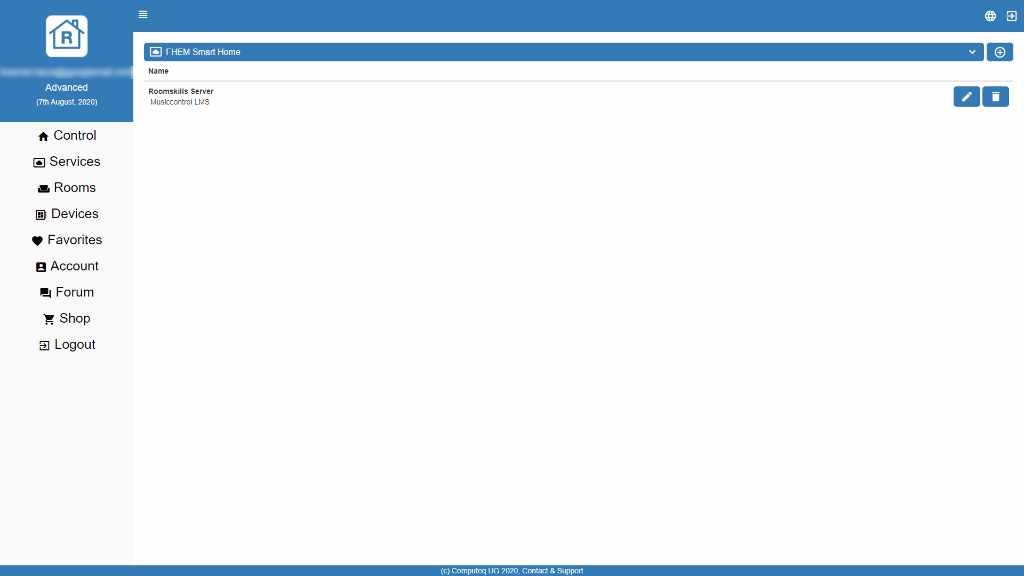
You activate the service in Roomskills by clicking on the ‚Services‘ area in Roomskills in the menu on the left. Then you select the service type ‚Musiccontrol LMS‘ in the drop down menu and click on the ‚+‘ button.
In the upcoming dialogue you give the service a name and click on ‚ok‘ to save the service.
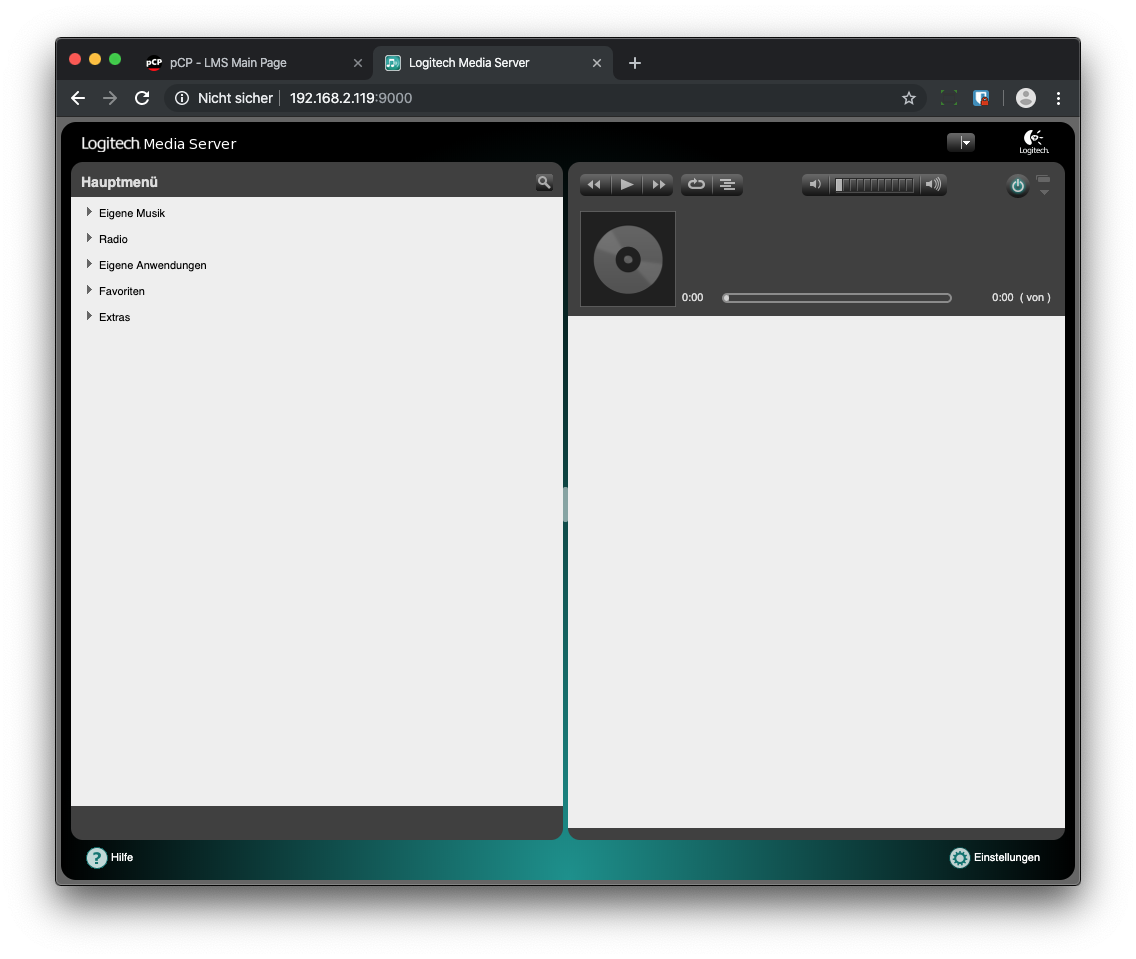
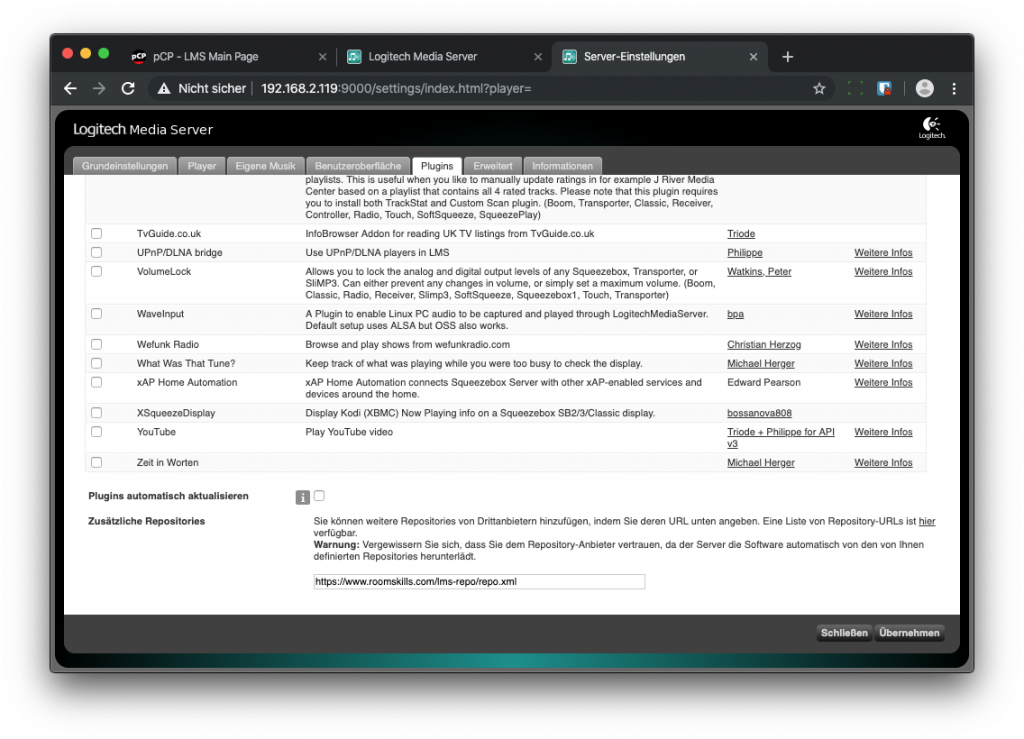
Step 3 - Setup of the Roomskills Plugin
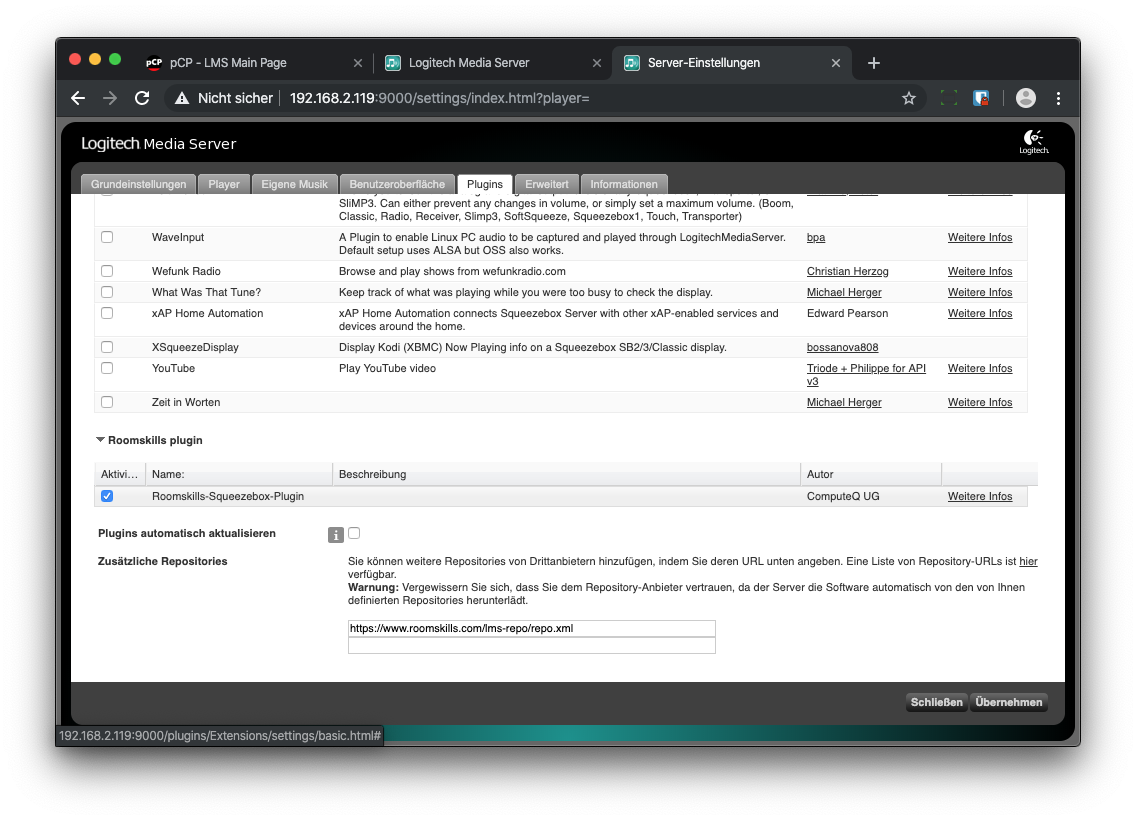
To setup the plugin you have to click on Settings on the lower right corner and got to the ‚Plugin‘ tab. To get to the Roomskills plugin you have to add the Roomskills repository as an additional repository by adding the following address to the field ‚Additional Repositories‘: https://www.roomskills.com/lms-repo/repo.xml and click on ‚Apply‘.
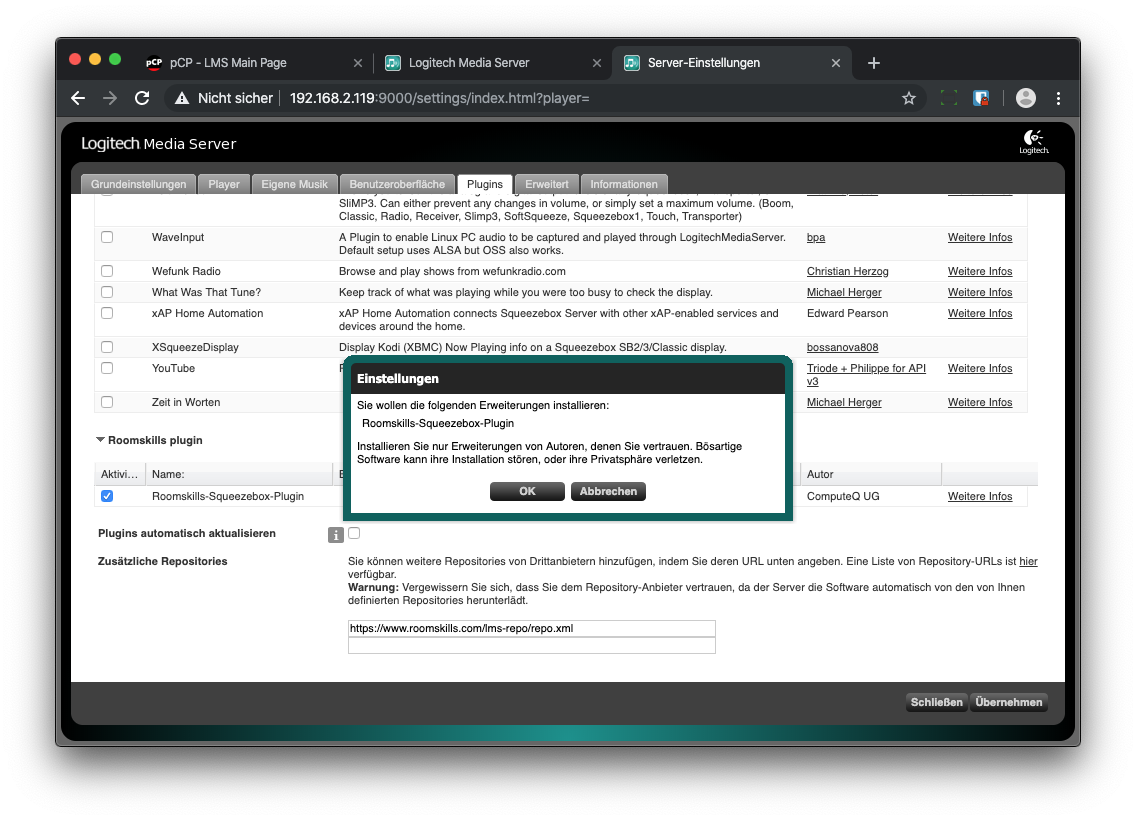
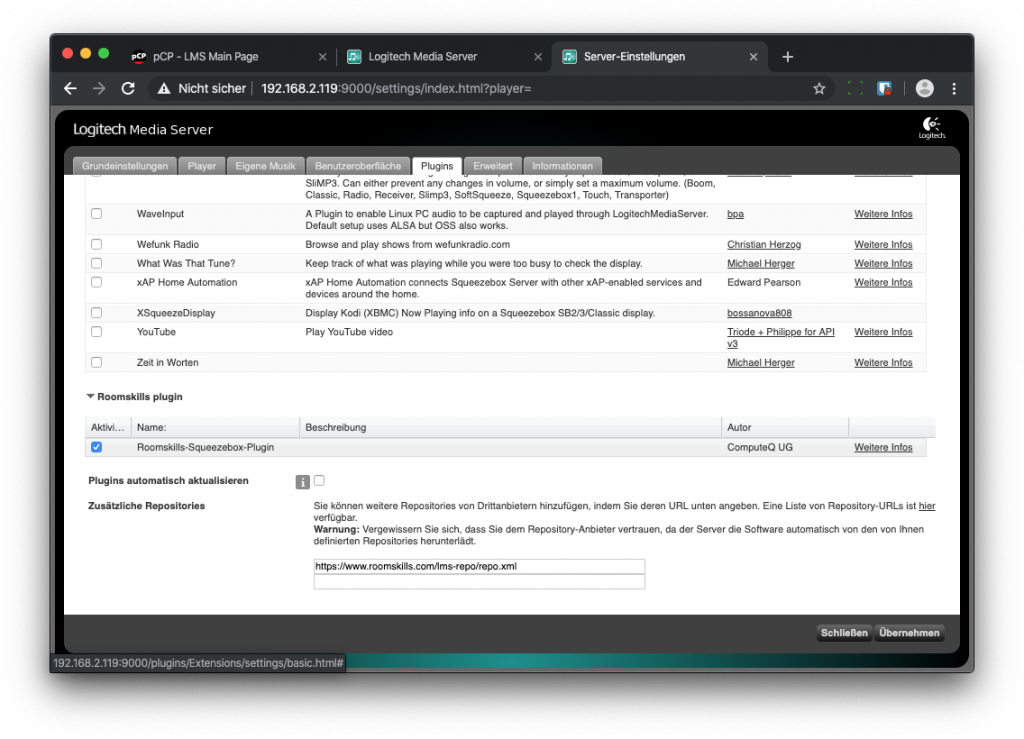
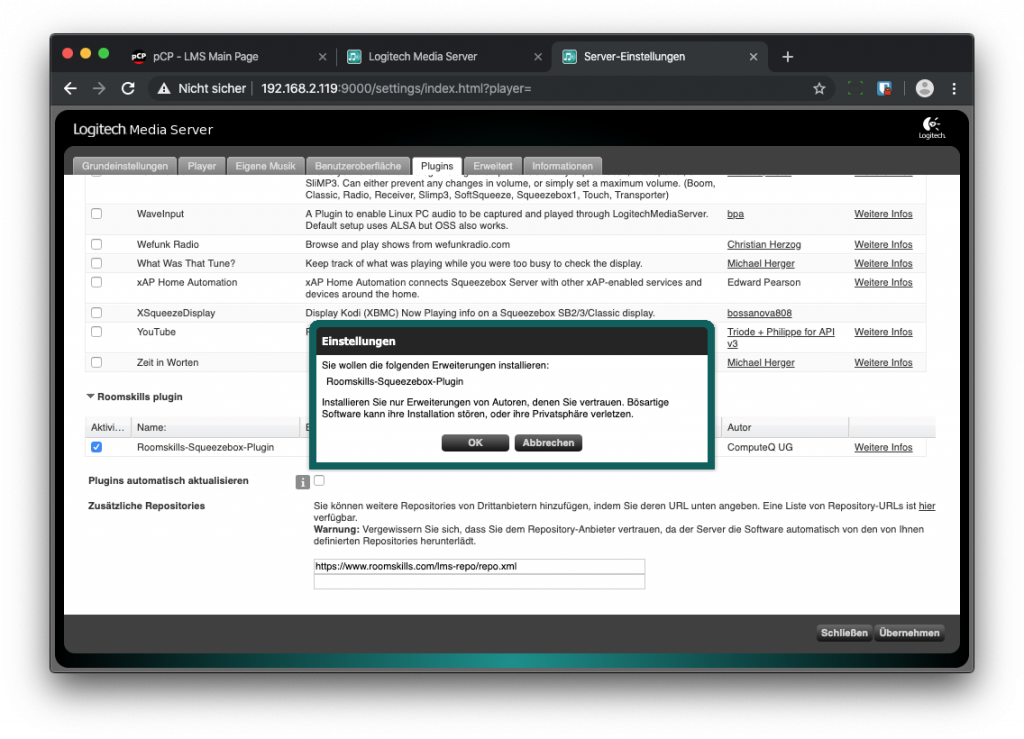
Then you have to activate the newly available plugin ‚Roomskills-Squeezebox-Plugin‘ by activating the button next to the plugin and clicking on ‚Apply‘. Next you have to confirm the installtion twice – once to confirm, that the plugin should be activated and once to allow the server to restart to activate the plugin.
Next you have to configure the plugin in order to connect the server to your Roomskills service. There are 3 steps in the plugin configuration page to follow. At least the Roomskills login data have to be entered. If you are using the Amazon Login service to login into Roomskills you don’t have a password. For this situation there is an alternative password given on the configuration page of the Musiccontrol LMS service in Roomskills (click on ‚Services‘ and then on the ‚pencil‘ button next to your Musiccontrol LMS service created by you). After the user data has been entered the server has to be restarted by the button provided on the bottom of the page.
After the restart you can check if the connection has been established successfully. If there are any other parameters, that need to be adjusted the page will give you hints on what to look for (e.g. The CLI port, the HTML port or a user /password protection on the server).

Step 4 - Setup of the music players
Now you can setup the different players in the according rooms in Roomskills. For this you first have to activate the rooms you want to use by clicking on ‚Rooms‘ on the menu on the left and then selecting the room in the drop down menu and activating them by clicking on the ‚+‘ button. Then you have to create the players as devices in the devices section of Roomskills. First click on ‚Devices‘ on the menu on the left to get to the devices area. Then select the room, in which you want to create the player in the drop down menu on the top.
Start the creation of the device by clicking on the ‚+‘ button on the top right. In the upcoming dialogue you have to give the device a name and select ‚Entertainment Device‘ as type. Now select the created ‚Musiccontrol LMS‘ service. After you have selected the service, you can choose the player for your room and the players of the other rooms using the drop down lists provided by the system. Repeat this for all players in each room.
That’s it. You are done setting up the system and can test it using the ‚Control‘ area by clicking on ‚Control‘ in the menu on the left.

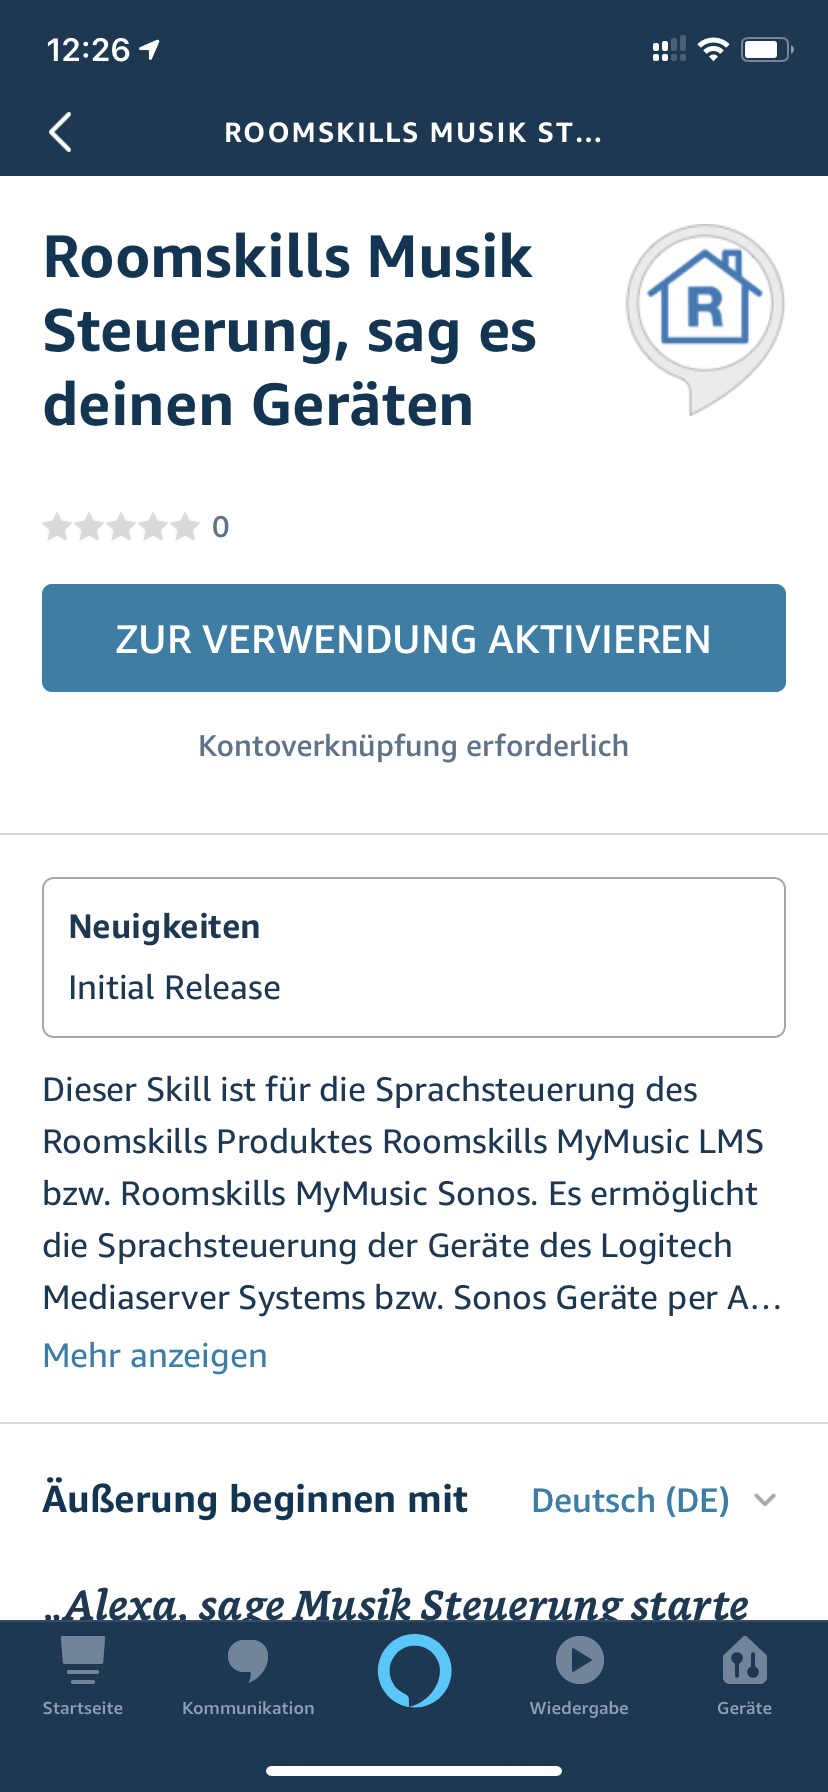
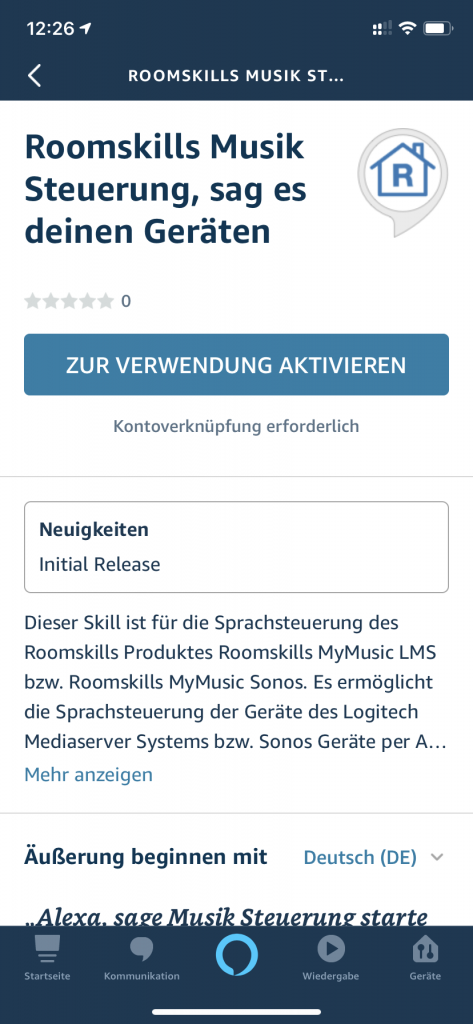
Step 5 - Activating the Alexa skill
As a last step, you have to activate the Alexa skill ‚Roomskills Musiccontrol‘ in the Alexa App (or via the Alexa web interface). First you have to find the skill in the Alexa App by using the search function under ‚Skills and Games‘. Activate the skill by clicking on ‚Activate to use‘.
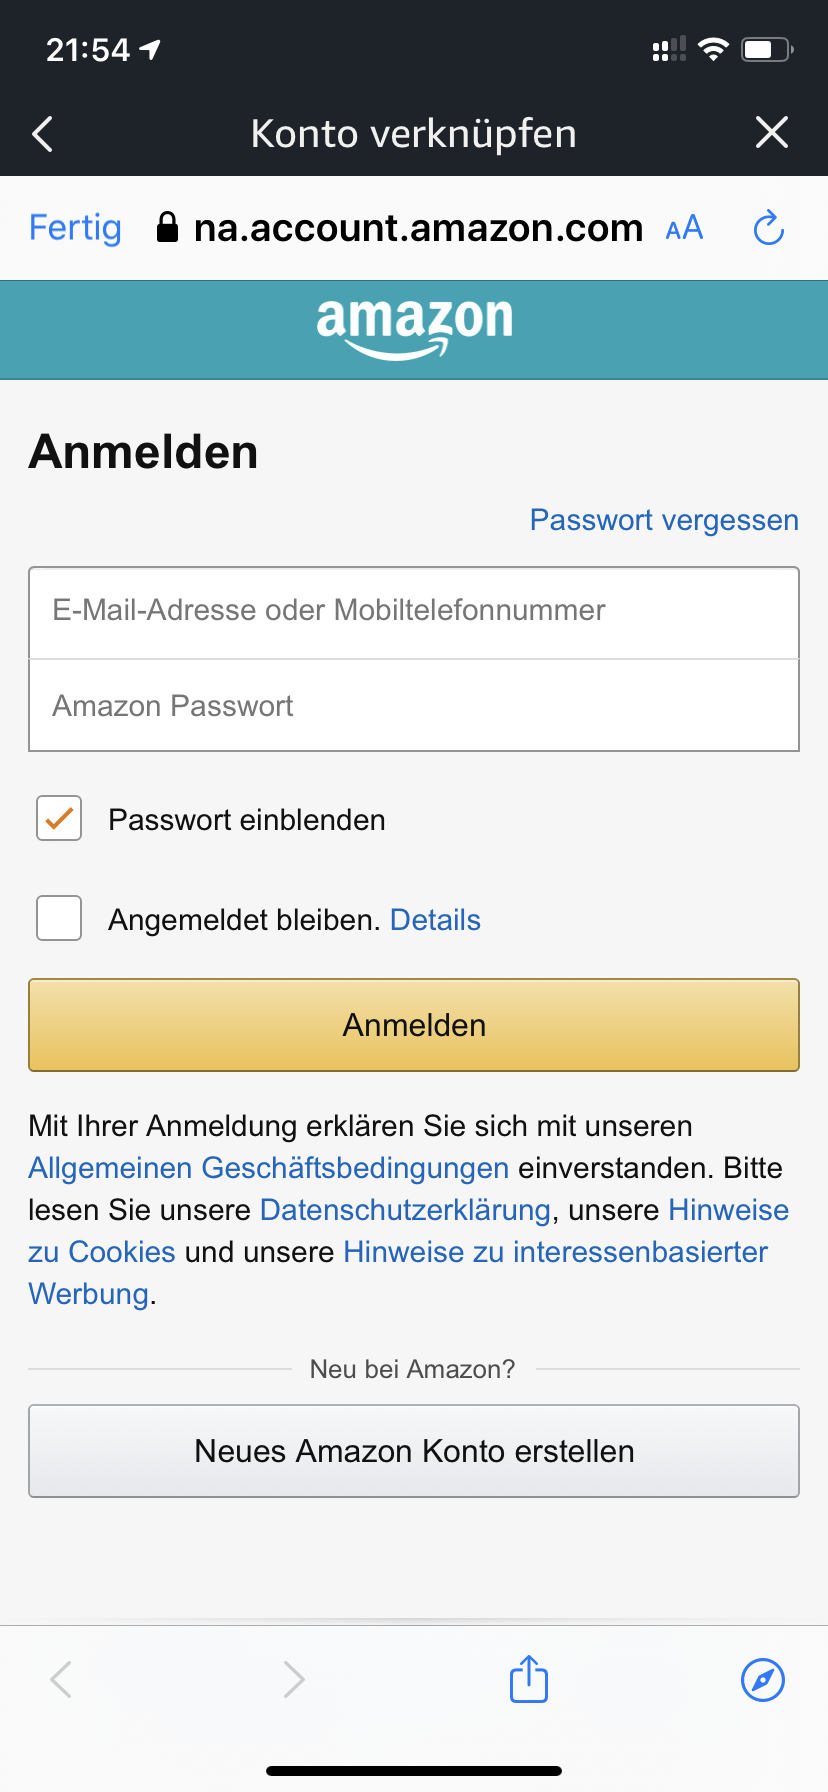
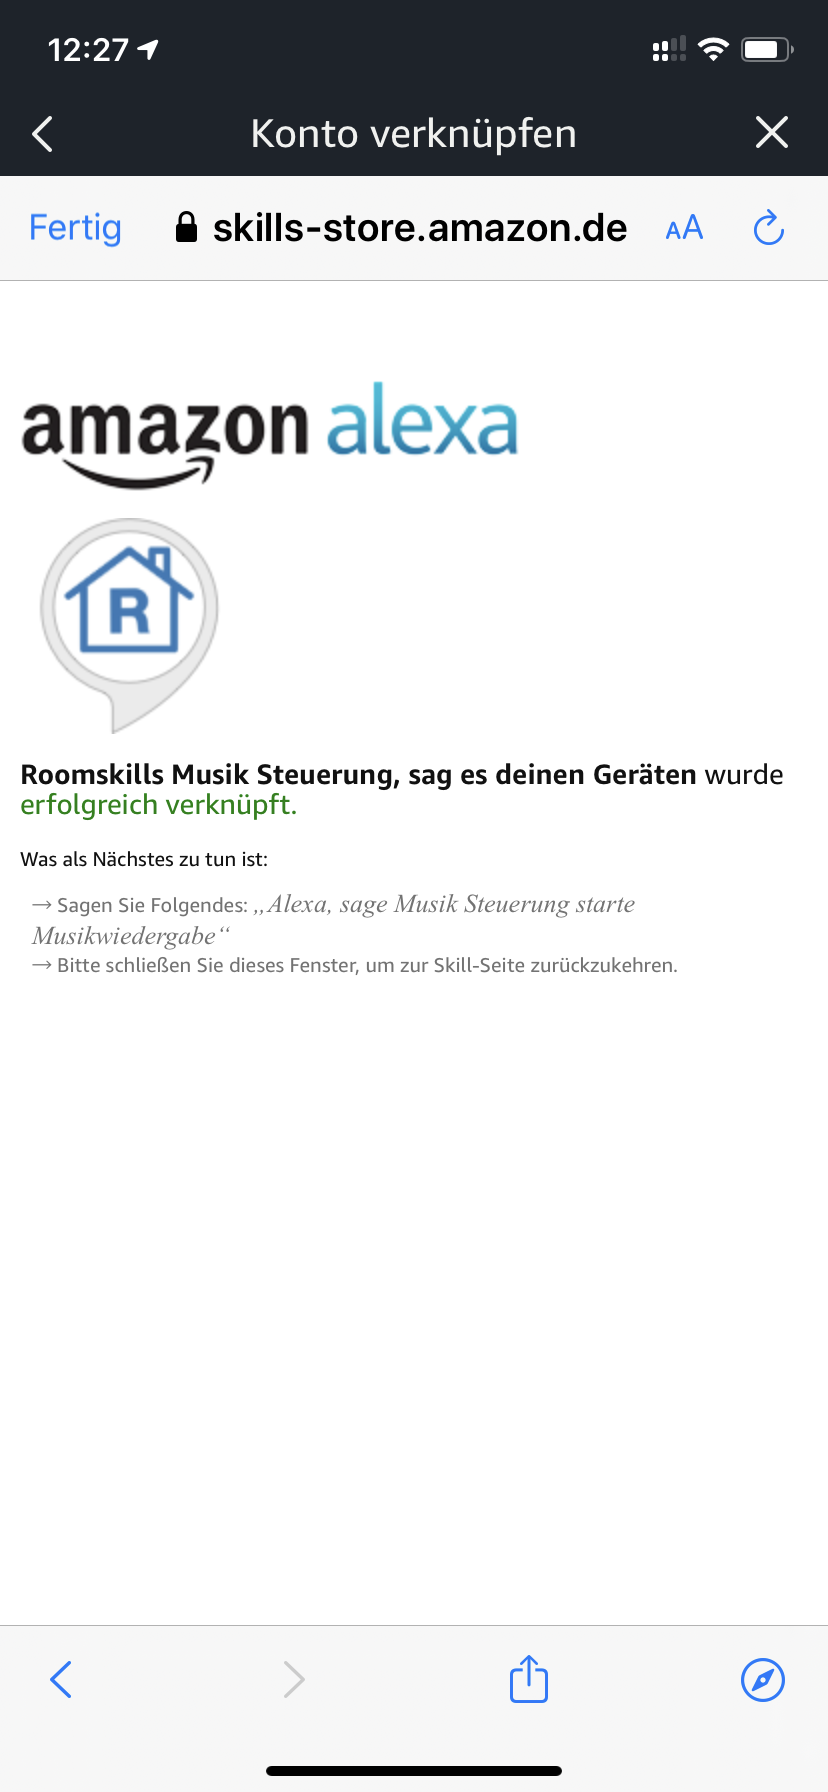
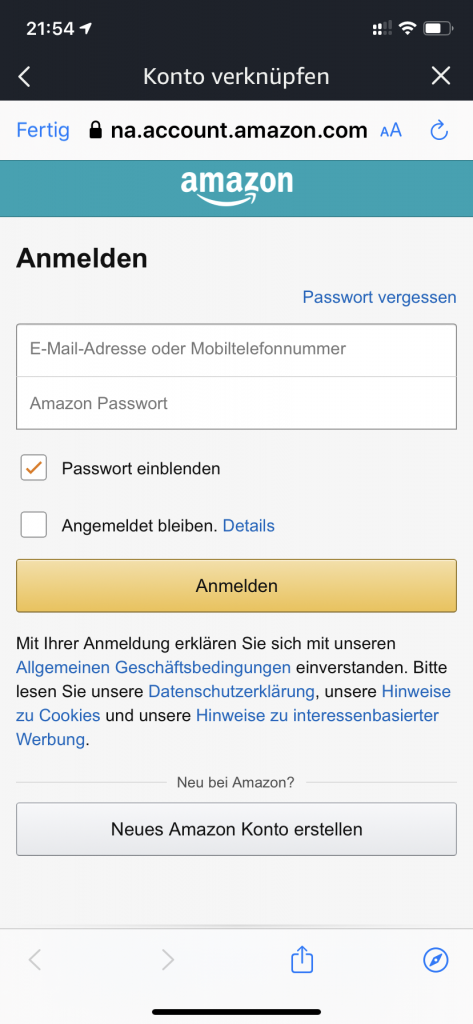
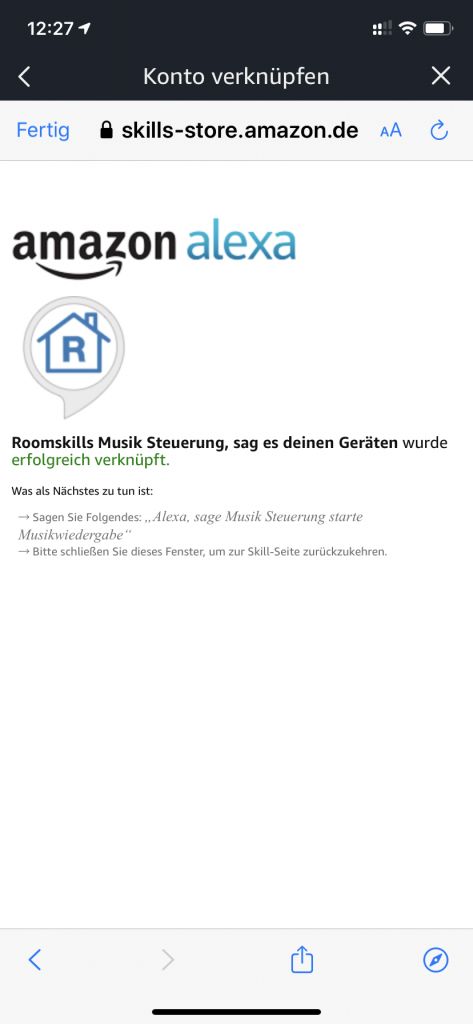
Next you have to link the skill to your Roomskills service. This is done by entering the Amazon account data. It is important to use the Amazon Account with the same email address as used in Roomskills. After the account linking process is done, you can start using the voice commands described on the Roomskills website to control your players.

