Creating an Image Backup
- /
- /
- /
Creating an Image Backup
Please note: You need an SD card reader and a second micro SD card (Class 10 or higher) for this solution.
Step 1:
Burn a fresh Max2Play image onto the second micro SD card. Please see this article if you need further help on how to burn an image.
Important: Make sure your usual image, that is supposed to be backed up, is smaller than the free space of your second SD card. By not expanding the filesystem of the usual image, its size remains much smaller. (automatic expansion of filesystem added in Version 2.40)
Step 2:
Remove your usually used image from your device and insert the second micro SD card with the fresh image instead.
Step 3:
After starting your device with the fresh image please navigate to the „Settings/Reboot“ menu and activate your premium license. Please see this article if you need further assistance with the activation process.
Step 4:
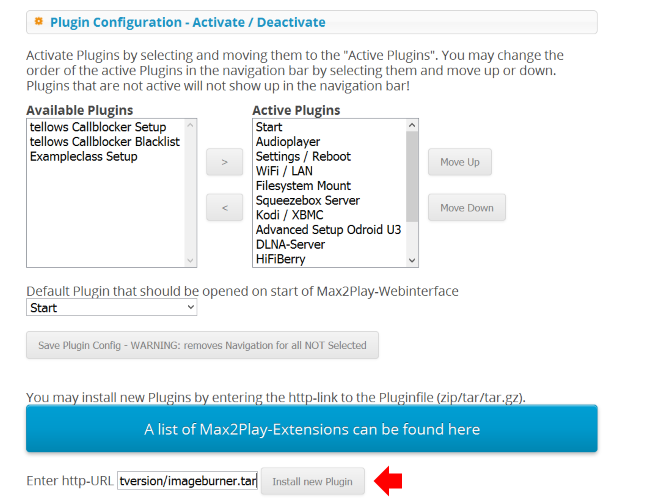
Install the Image Burner plugin from Max2Play on this fresh image. You can find the installation URL on our website on the extensions page.
Step 5:
Connect the SD card reader to your device with your usual image’s micro SD card, that you want to back up.
Step 6:
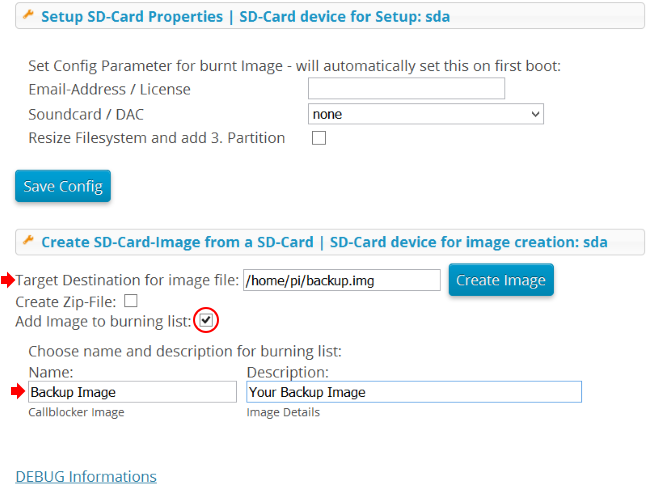
Go to the Image Burner menu under „Create SD card image from SD card“. Select a path to save the image under and a name for the image backup. Make a tick at „Add image to burning list“.
Step 7:
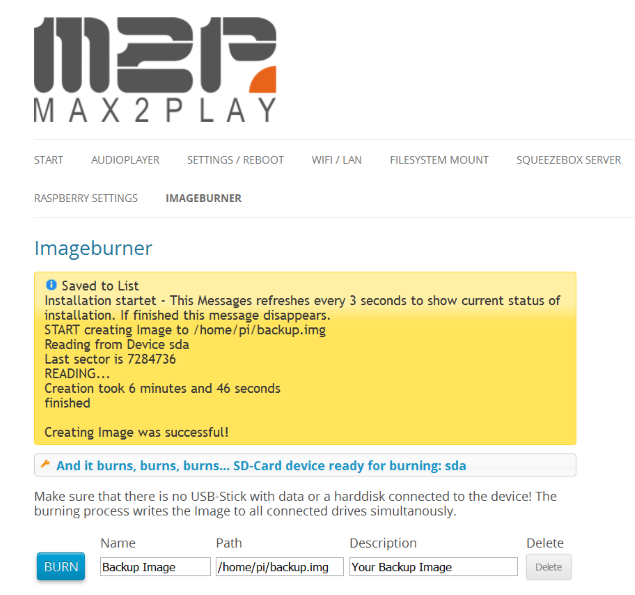
After clicking on „Create Image“ your image appears after a few moments on the burning list.
Step 8:
You now have an SD card with your image backed up on it. To burn the backed up state of your image, just insert the back-up card again and select your back-up image for burning. You can now burn your backup onto any SD cards connected to your device with just one click while the back-up image is running.