Printserver
- /
- /
- /
Printserver
The plugin Printserver provides a printer for the network connected to the Max2Play device. You can learn more about its requirements and features in the plugin gallery.
Step 1
Download and install the plugin from the plugin gallery. Afterwards, a new entry appears in the menu of the Max2Play user interface.
Step 2
Click Printserver to enter the plugin’s menu. Click „Install printserver“ and wait until the installation of CUPS (Common UNIX Printing System) has finished. Reload the page.
Step 3
If everything works fine, Max2Play confirms the installation and offers the URL to the printserver’s user interface, basically the IP address of your Max2Play device and port 631. Click this URL to enter the interface.
Step 4
In the CUPS interface, click „Administration“ and look for the section „Server“. Since you want to share a printer connected to the Max2Play device with USB, tick „Share printers connected to this system“ and click „Change Settings“ to save the configuration. Now, your browser might warn you because of a untrustworthy certificate because CUPS switches to the https protocol. Please ignore this warning respectively set an exception to proceed. If CUPS asks for a username and password, use the login data of the root account. Wait some seconds while CUPS reboots.
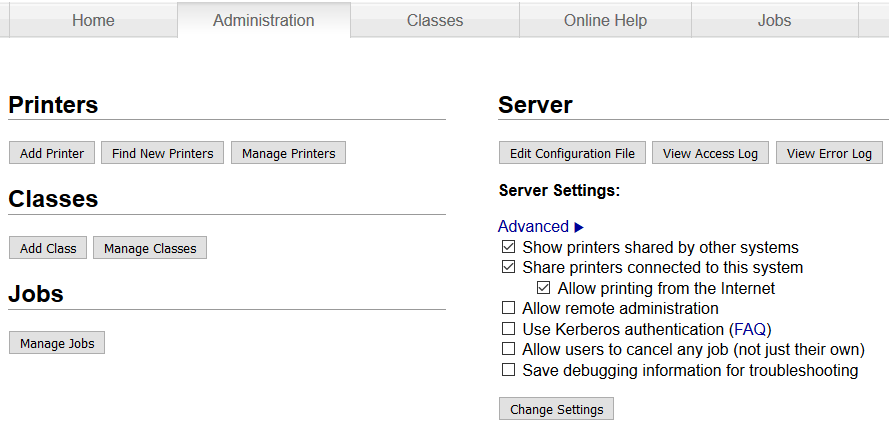
All menues and entries of CUPS‘ main page.
Step 5
Connect the printer with the Max2Play device via USB and make sure the printer is enabled. Again in the „Administration“ menu of CUPS, hit „Find New Printers“ in the section „Printers“ to get a list of discovered printers. If your connected printer is not in the list, head back to the administration menu and click „Add Printer“ instead and choose from the list of „local printers“.
Step 6
After you have chosen your printer successfully, click „continue“ and edit name, description and location of the printer. Also tick „Share the printer“ and click „Continue“. If necessary, choose the manufacturer of your printer from the list and afterwards the model of your printer or at least a similar model. Click „Add Printer“. The following page allows you to set default print options like media size or print quality. resolution. Click „Set Default Options“ to save the configuration.
Step 7
You should see an overview of the recently added printer. To check everything is working as expected, click on „Maintenance“ in the left drop-down menu and select „Print Test Page“. If your printer is in sleep mode, it should also wake up soon after creating the print job and print the test page.
Step 8
Add the printer as network printer to your other devices like PC, notebook, etc. Since this step is more or less different in every single operating system, please refer to the manual of the manufacturer or look for tutorials on the internet.